Impor/Ekspor Data Microsoft Access
Pendahuluan
Microsoft Access mendukung berbagai skenario mengimpor dan mengekspor data, ke dan dari database MS Access, ke dan dari file teks, ke dan dari spreadsheet, dll. Sebelum mengimpor, Anda harus membuat database yang akan menerima catatan.
Cara utama untuk mengimpor atau mengekspor adalah melalui halaman properti Data Eksternal dari Ribbon. Anda juga dapat mengeklik kanan objek apa pun di Panel Navigasi, menempatkan mouse pada Impor atau Ekspor, dan klik opsi yang diinginkan.
 Pembelajaran Praktis:Memperkenalkan Impor/Ekspor Data
- Mulai Microsoft Access
- Klik Basis Data Desktop Kosong
- Tetapkan nama file sebagai FunDS2
- Klik Buat
- Pada Pita, klik File dan klik Opsi
- Di daftar kiri, klik Basis Data Saat Ini
- Di daftar kanan, klik Tumpang Tindih Windows
- Klik Oke
- Baca kotak pesan dan klik OK
- Pada tabel default, klik dua kali ID untuk masuk ke mode edit, tekan F2 dan tekan Home, ketik SoldItem (untuk mendapatkan SoldItemID) dan tekan Enter
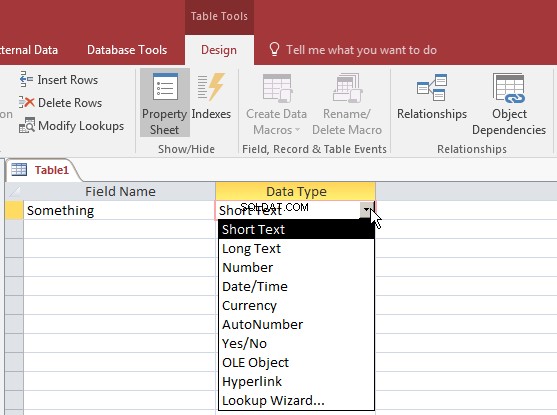
- Di bagian Tampilan pada Pita, klik Tampilan (atau Tampilan Desain)
- Tetapkan namanya sebagai Item Terjual dan klik Oke
- Lengkapi tabel dengan bidang berikut (ubah hanya bagian yang ditunjukkan):
Nama Bidang Jenis Data Ukuran Bidang Format Keterangan SoldItemID Sold Item ID ReceiptNumber Number Receipt # ItemNumber Number Item # Produsen 40 Kategori 25 SubCategory 25 Sub-Category ItemName 100 Nama Item ItemSize 20 Size Jumlah Harga Pembelian Ganda Harga Pembelian Tetap - Tutup tabel
- Saat ditanya apakah Anda ingin menyimpan, klik Ya
- Untuk membuat tabel baru, pada Pita, klik Buat dan, di bagian Tabel, klik Desain Tabel
- Ketik ReceiptNumber dan tekan Tab
- Klik kanan ReceiptNumber dan klik Kunci Utama
- Buat bidang sebagai berikut:
Nama Bidang Jenis Data Ukuran Bidang Format Keterangan ReceiptNumber Number Long Integer Receipt # EmployeeNumber Number Long Integer Employee # ShoppingTanggal Tanggal/Waktu Long Date Shopping Date ShoppingTime Date/Waktu Lama Waktu Belanja PenjualanJumlah Total Penjualan Tetap Ganda Jumlah Total Jumlah Yang Ditenderkan Dua Kali Jumlah Tetap Ditender - Tutup tabel
- Saat ditanya apakah Anda ingin menyimpan, klik Ya
- Tetapkan nama tabel sebagai ShoppingSessions dan klik Oke
- Pada Pita, klik File dan klik Baru
- Klik Basis Data Desktop Kosong
- Tetapkan nama file sebagai Pusat Pelatihan Komputer
- Klik Buat
- Pada Pita, klik File dan klik Opsi
- Di daftar kiri, klik Basis Data Saat Ini
- Di daftar kanan, klik Tumpang Tindih Windows
- Klik Oke
- Baca kotak pesan dan klik OK
Mengimpor Basis Data Microsoft Access
Jenis data yang paling sederhana untuk diimpor ke database Microsoft Access adalah database MS Access lainnya. Untuk mengimpor database Microsoft Access:
- Jika Panel Navigasi berisi setidaknya satu tabel, klik kanan tabel. Posisikan mouse pada Import, dan klik Access Database
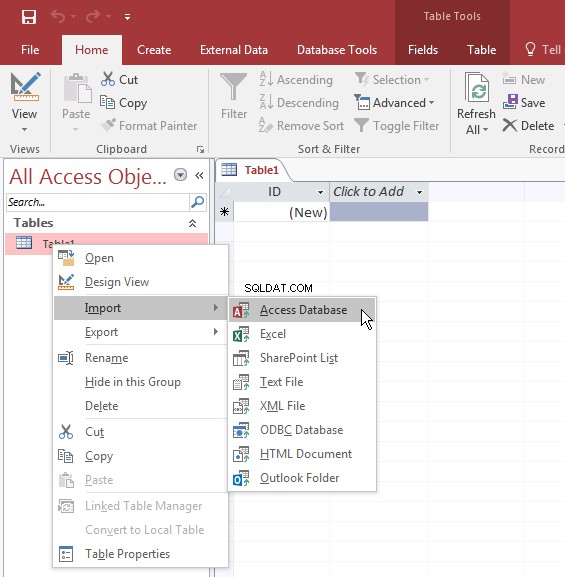
- Di bagian Impor &Tautan Pita, klik tombol Akses

Di kotak dialog, jika Anda mengetahui jalur ke database termasuk namanya, ketikkan. Jika tidak, klik tombol Browse untuk memilih database sumber. Setelah Anda menentukan database, klik OK. Kotak dialog Impor Objek akan ditampilkan. Objek-objek tersebut diatur berdasarkan kategori. Pilih objek yang diinginkan. Selain objek, Anda bisa mengimpor atau mengabaikan aspek seperti hubungan dan opsi Panel Navigasi lainnya. Untuk memutuskan, klik tombol Opsi dan pilih opsi yang diinginkan:

Setelah Anda siap, klik OK. Jika objek dalam database valid (dan memang seharusnya demikian), Anda seharusnya tidak memiliki masalah.
Pembelajaran Praktis:Mengimpor Database Microsoft Access
- Pada Pita, klik Data Eksternal
- Di bagian Impor &Tautan Pita, klik tombol Akses
- Dalam kotak dialog, klik tombol Jelajah
- Dari sumber yang menyertai pelajaran ini, pilih CTC dan klik Buka
- Pada kotak dialog, klik OK
- Di halaman properti Tabel, klik Pilih Semua
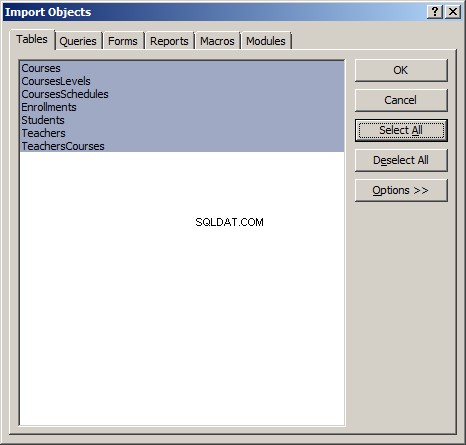
- Klik tab Formulir dan klik Pilih Semua
- Klik Oke
- Bila objek telah diimpor, pada kotak dialog, klik Tutup
Mengekspor Basis Data Microsoft Access
Ada berbagai cara Anda dapat mengekspor catatan database Microsoft Access. Salah satu caranya adalah dengan mengekspor tabel secara formal.
Untuk mengekspor objek:
- Di Panel Navigasi, klik kanan tabel yang berisi rekaman, posisikan mouse saat mengekspor, dan klik Akses
- Di Panel Navigasi, klik tabel yang berisi rekaman untuk memilihnya. Di bagian Ekspor Pita, klik tombol Akses
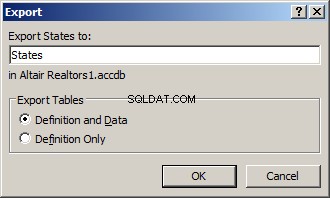
Di halaman pertama wizard, jika Anda mengetahui path ke database termasuk namanya, ketikkan atau klik tombol Browse untuk memilih database target. Setelah Anda menentukan database, klik OK. Ini akan menampilkan kotak dialog Ekspor. Ini memungkinkan Anda untuk menentukan nama objek yang akan menerima catatan atau objek yang akan dibuat. Anda juga dapat menentukan apa yang akan diekspor:hanya struktur tabel atau struktur dan catatan:
Teknik di atas memungkinkan Anda untuk mengekspor satu objek, atau satu objek pada satu waktu. Jika Anda ingin mengekspor seluruh database, pada Ribbon, klik File dan klik Save As:
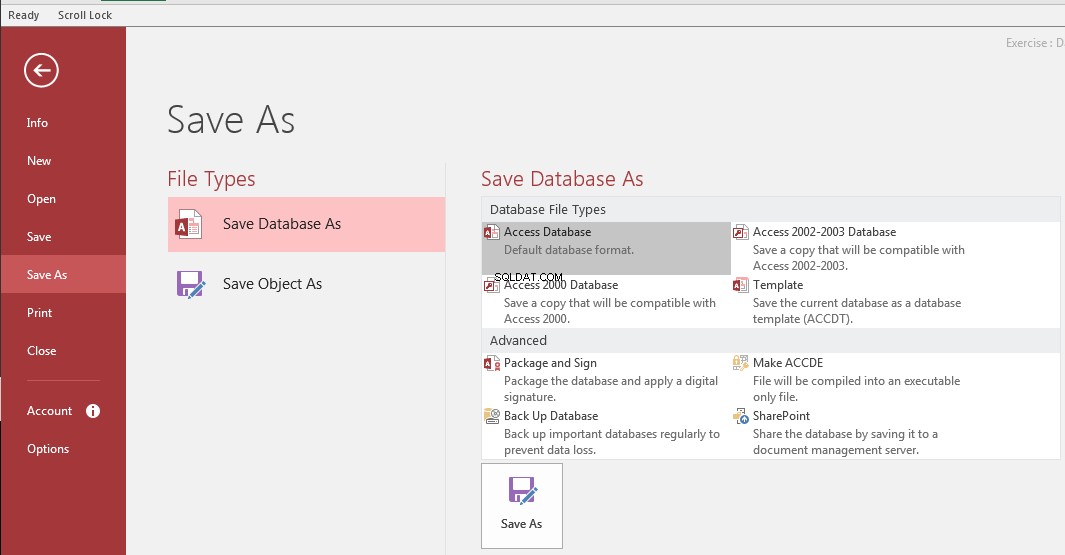
Jendela ini memungkinkan Anda untuk memilih jenis format yang harus dimiliki database baru. Jendela menyediakan delapan opsi yang dapat Anda gunakan. Untuk menggunakan opsi, klik dan klik Simpan Sebagai atau klik dua kali.
Jika Anda ingin menyimpan database dalam format Access 2007-2016 saat ini, pilih Access Database. Ini akan membuka kotak dialog Save As. Tentukan nama dan lokasi database baru, lalu klik Simpan.
Jika Anda ingin membuat database Microsoft Access 97-2000, klik Access 2000 Database. Ini akan membuat file dengan .mdb perpanjangan. Ini adalah database yang kompatibel dengan Microsoft Access 97 dan Microsoft Office Access 2000. Tidak ada yang buruk atau salah dengan versi database tersebut dan mereka masih berharga sampai sekarang. Mereka hanya tidak mendukung beberapa fitur seperti ekspresi, lampiran, dll di atas meja:
Dalam versi database MDB, ekspresi tidak dapat dibuat pada tabel tetapi dapat dibuat pada jenis objek lain.
Microsoft Access dan Spreadsheet
Mengimpor Lembar Kerja
Ada berbagai cara Anda dapat mengimpor spreadsheet ke database Microsoft Access. Spreadsheet dapat berasal dari aplikasi apa pun, termasuk Microsoft Excel, Google Spreadsheet, CSV, dll.
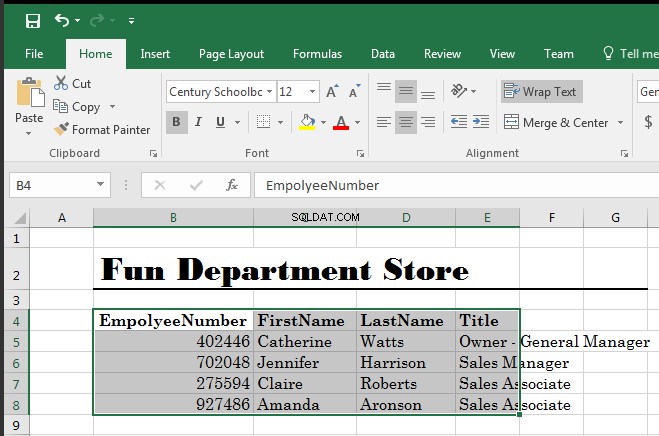
Jika Anda berencana untuk mengimpor lembar kerja Microsoft Excel atau Google Sheet, Anda harus mempersiapkannya terlebih dahulu. Salah satu caranya adalah dengan memastikan bahwa seluruh spreadsheet diatur sebagai satu tabel. Dalam hal ini, sisi atas spreadsheet harus berisi kategori yang dapat digunakan/dianggap sebagai header kolom. Tidak boleh ada teks yang tidak terorganisir (teks yang tidak dianggap milik tabel) yang ditampilkan di atas header. Nilai kemudian dapat ditampilkan di bawah setiap header. Ini contohnya:
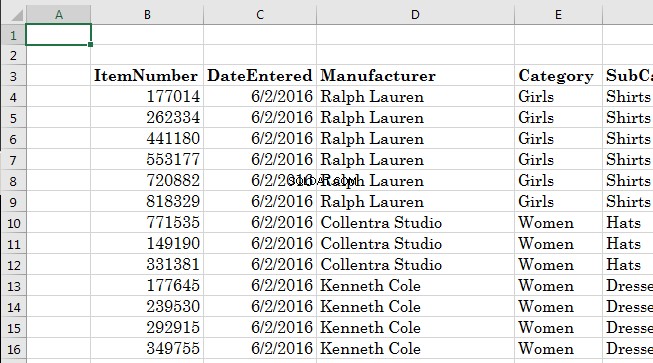
Tidak boleh ada teks yang tidak terorganisir (teks yang tidak dianggap milik tabel) yang ditampilkan di bawah catatan).
Setelah dokumen siap, untuk mengimpornya:
- Jika Panel Navigasi berisi setidaknya satu tabel, klik kanan tabel di Panel Navigasi, posisikan mouse pada Impor, dan klik Excel
- Di bagian Impor &Tautan Pita, klik tombol Excel

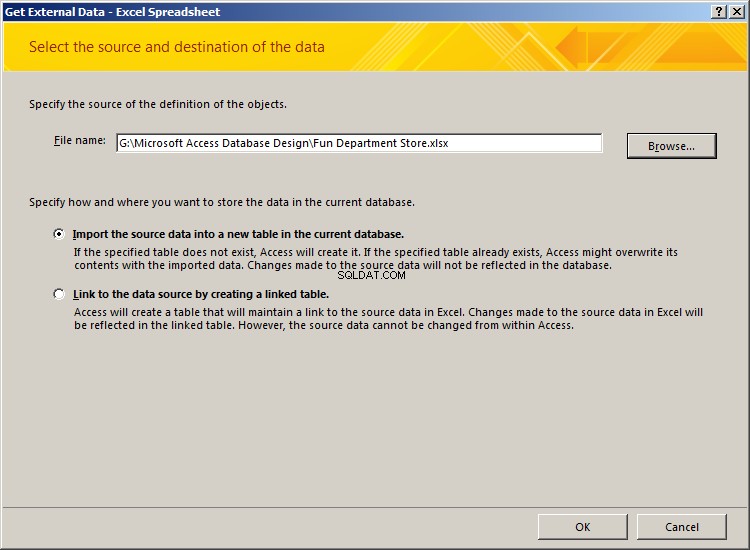
Di kotak dialog, tentukan jalur dan nama spreadsheet dan klik OK. Ini akan memulai penyihir. Di halaman pertama, pilih nama spreadsheet yang berisi data.
Pembelajaran Praktis:Mengimpor Spreadsheet Microsoft Excel
- Pada Pita, klik File dan klik Buka
- Dalam daftar file, klik FundDS2
- Pada Pita, klik Data Eksternal
- Di bagian Impor &Tautan, klik tombol Excel
- Klik tombol Jelajah
- Dari sumber yang menyertai pelajaran ini, pilih Fun Department Store dan klik Buka
- Klik Oke
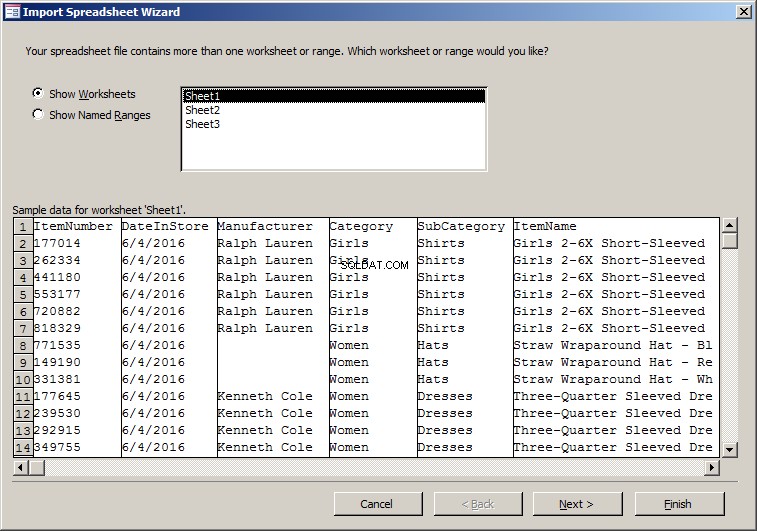
- Di halaman pertama wizard, pastikan Sheet1 dipilih dan klik Next. Kotak pesan mungkin ditampilkan. Baca dan klik OK

- Di halaman kedua wizard, pastikan Baris Pertama Berisi Judul Kolom dicentang dan klik Berikutnya
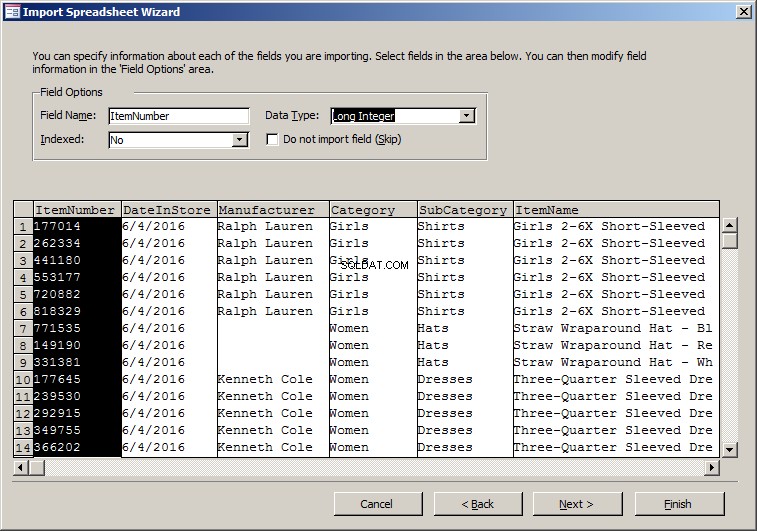
- Di halaman ketiga panduan, saat kolom ItemNumber dipilih, klik panah kotak kombo Tipe Data dan pilih Bulat Panjang
- Klik DateInStore atau sel mana pun di bawahnya dan pastikan Tipe Datanya adalah Tanggal Dengan Waktu
- Klik UnitPrice dan pastikan Data Type-nya disetel ke Double
- Klik Berikutnya
- Klik panah kotak kombo dan pilih ItemNumber
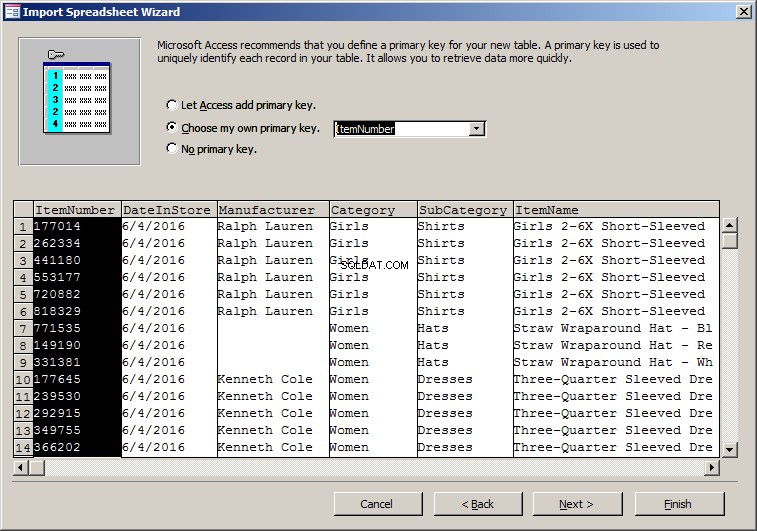
- Klik Berikutnya
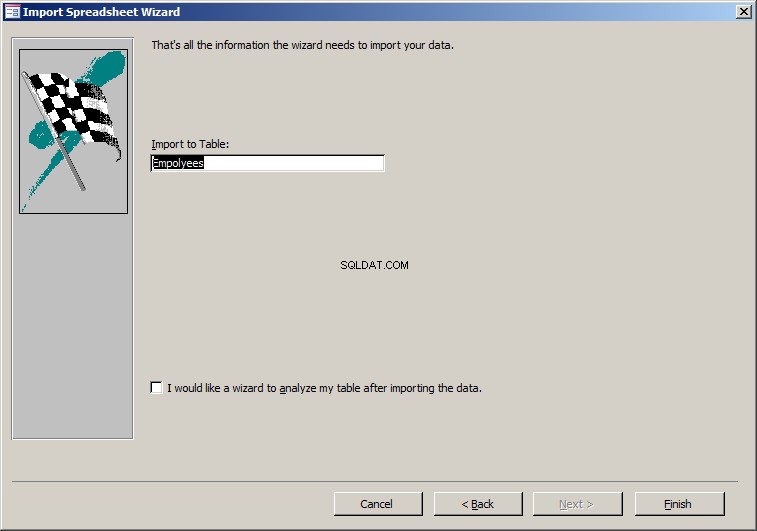
- Ganti nama Impor ke Tabel menjadi StoreItems
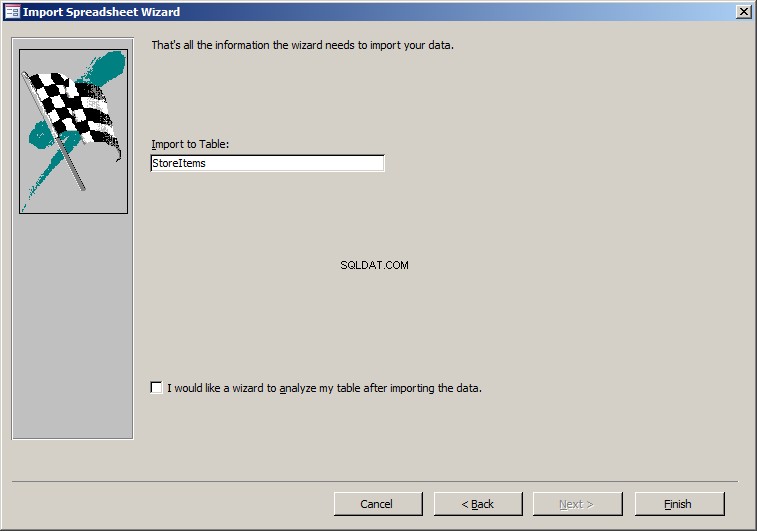
- Klik Selesai
- Pada kotak dialog, klik Tutup
- Di Panel Navigasi, klik kanan tabel StoreItems dan klik Tampilan Desain
- Ubah karakteristik bidang berikut:
Nama Bidang Ukuran Bidang Format Keterangan ItemNumber Item # DateInStore Tanggal di Toko Produsen 40 Kategori 25 SubKategori 25 Sub-Kategori Nama Barang 100 Nama Barang Ukuran Barang 20 Ukuran Harga Satuan Ganda Tetap Harga Satuan - Tutup tabel
- Saat ditanya apakah Anda ingin menyimpan, klik Ya
- Anda juga akan menerima kotak pesan yang menunjukkan bahwa beberapa data mungkin hilang. Baca dan klik Ya
Mengimpor Spreadsheet Bernama
Jika spreadsheet berisi campuran bagian atau grup terorganisir dan tidak terorganisir, Anda harus membuat nama untuk grup rekaman yang diperlukan.
Pembelajaran Praktis:Mengimpor Spreadsheet Microsoft Excel
- Mulai Microsoft Excel
- Dari sumber yang menyertai pelajaran ini, buka buku kerja Fun Department Store
- Di sisi bawah, klik Sheet2
- Klik Karyawan # dan ketik EmpolyeeNumber
- Ganti Nama Depan dengan Nama Depan
- Ganti Nama Depan dengan Nama Belakang
- Pilih sel dari EmployeeNumber hingga Rekan Penjualan terakhir
- Pada Pita, klik Rumus
- Di bagian Nama yang Ditentukan, klik Tentukan Nama
- Ganti Nama yang disarankan dengan Karyawan
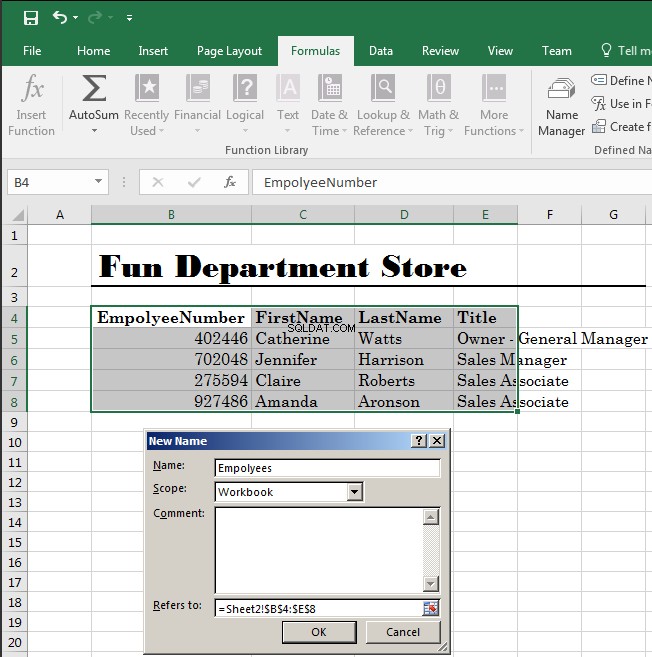
- Klik Oke
- Tutup Microsoft Excel
- Saat ditanya apakah Anda ingin menyimpan, klik Simpan dan kembali ke Microsoft Access
- Pada Pita, klik Data Eksternal jika perlu.
Di bagian Impor &Tautan, klik tombol Excel - Klik tombol Jelajah
- Pilih spreadsheet Fun Department Store yang Anda ubah di atas dan klik Buka
- Pada kotak dialog Dapatkan Data Eksternal, klik OK
- Di halaman pertama wizard, klik tombol radio Show Named Ranges
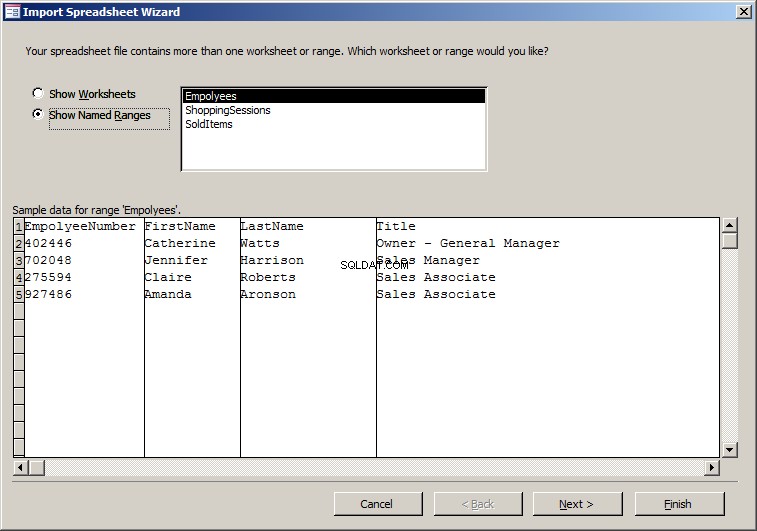
- Pastikan Karyawan dipilih dan klik Berikutnya
- Pada halaman kedua wizard, klik Baris Pertama Berisi Judul Kolom dan klik Berikutnya
- Di halaman ketiga panduan, saat kolom EmployeeNumber dipilih, klik panah kotak kombo Tipe Data dan pilih Integer Panjang
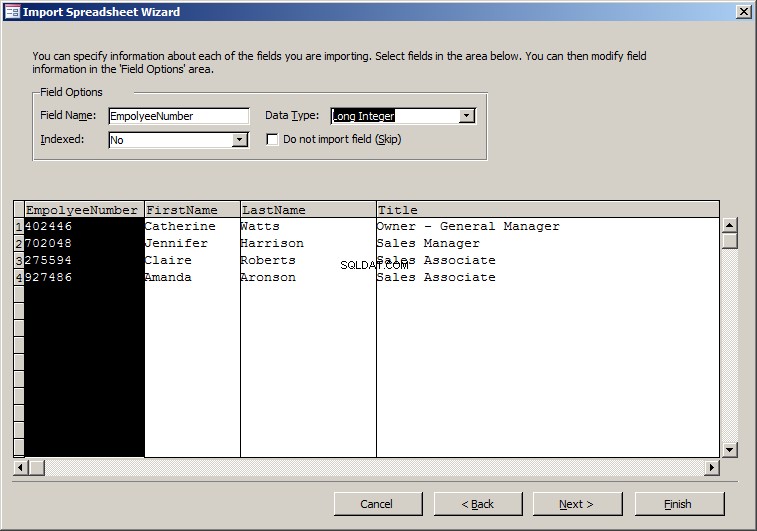
- Klik Berikutnya
- Klik panah kotak kombo dan pilih EmployeeNumber

- Klik Berikutnya
- Terima nama tabel sebagai Karyawan dan klik Selesai
- Pada kotak dialog, klik Tutup
- Di Panel Navigasi, klik kanan tabel Karyawan dan klik Tampilan Desain
- Ubah karakteristik bidang berikut:
Nama Bidang Jenis Data Ukuran Bidang Ekspresi Keterangan EmployeeNumber Nomor Karyawan # Nama Depan 20 Nama Depan Nama Belakang 20 Nama Belakang EmployeeName [FirstName] &" " &[LastName] Nama Karyawan Judul 100 - Tutup tabel
- Saat ditanya apakah Anda ingin menyimpan, klik Ya
- Anda juga akan menerima kotak pesan bahwa beberapa data mungkin hilang. Baca dan klik Ya
Menyalin Dari Spreadsheet
Daripada mengimpor spreadsheet secara manual, Anda dapat memilih nilai dalam spreadsheet, menyalinnya, dan menempelkannya dalam tabel di Microsoft Access.
Pembelajaran Praktis:Menyalin Dari Spreadsheet
- Mulai Microsoft Excel dan, dalam daftar file, klik Fun Department Store
- Klik Sheet3
- Klik sel B5
- Tekan dan tahan Shift
- Klik Sel G64
- Pergeseran Rilis
- Pada Pita Microsoft Excel, klik Beranda
- Di bagian Papan Klip, klik Salin
- Di Microsoft Access, di Panel Navigasi, klik dua kali tabel ShoppingSessions
- Klik kanan tombol di persimpangan header kolom dan header baris
- Klik Tempel
- Baca kotak pesan Microsoft Access dan klik Ya
- Kembali ke Microsoft Excel di Sheet3
- Klik sel I5
- Tekan dan tahan Shift
- Klik sel P165
- Pergeseran Rilis
- Pada Pita, klik Beranda dan klik Salin
- Kembali ke Microsoft Access dan klik dua kali tabel SoldItems di Panel Navigasi
- Pada tabel, klik Tanda Terima #
- Tekan dan tahan Shift
- Harga Satuan Klik
- Pergeseran Rilis
- Tekan Ctrl + V untuk menempel
- Baca kotak pesan dan klik Ya
- Tutup kedua tabel
- Di Panel Navigasi, klik kanan salah satu tabel, posisikan mouse pada Impor, dan klik Access Database
- Klik Jelajahi
- Cari dan pilih database FundDS1 dari pelajaran sebelumnya (jika tidak, dari sumber yang menyertai pelajaran ini, pilih FundDS2) dan klik Buka
- Pada kotak dialog, klik OK
- Pada kotak dialog Impor Objek, klik Formulir
- Klik Pilih Semua
- Klik Oke
- Bila formulir telah diimpor, pada kotak dialog, klik Tutup
Mengekspor ke Microsoft Excel Spreadsheet
untuk mentransfer data dari Microsoft Access ke spreadsheet melibatkan penyalinan dan penempelan. Untuk memulai, di Microsoft Access, Anda dapat membuka tabel dalam Tampilan Lembar Data, lalu memilih satu, beberapa, atau semua rekaman. Setelah memilih catatan, Anda dapat menyalinnya, membuka Microsoft Excel, klik sel yang akan menampung nilai kiri atas, dan tempel.
Teknik lain terdiri dari mengekspor, dan Anda dapat melakukannya tanpa terlebih dahulu membuka tabel:
- Sebelum mengekspor tabel, di Panel Navigasi, klik tabel. Kemudian, pada Pita, klik Data Eksternal. Di bagian Ekspor, klik tombol Excel
- Di Panel Navigasi, klik kanan tabel yang diinginkan, posisikan mouse pada Ekspor, dan klik Excel
Ini akan membuka kotak dialog Ekspor - Excel Spreadsheet dengan jalur tempat file akan disimpan. Folder default adalah My Documents:

Pembelajaran Praktis:Mengekspor Data sebagai Spreadsheet
- Pada Pita, klik File dan klik Buka
- Dalam daftar file, klik Pusat Pelatihan Komputer
- Di Panel Navigasi, klik kanan tabel Jadwal Kursus, posisikan mouse pada Ekspor, dan klik Excel
- Klik tombol Jelajah dan pilih folder Dokumen (Saya)
- Klik Oke
- Pada kotak dialog, klik Tutup
Microsoft Access dan File Teks
Mengimpor File Teks
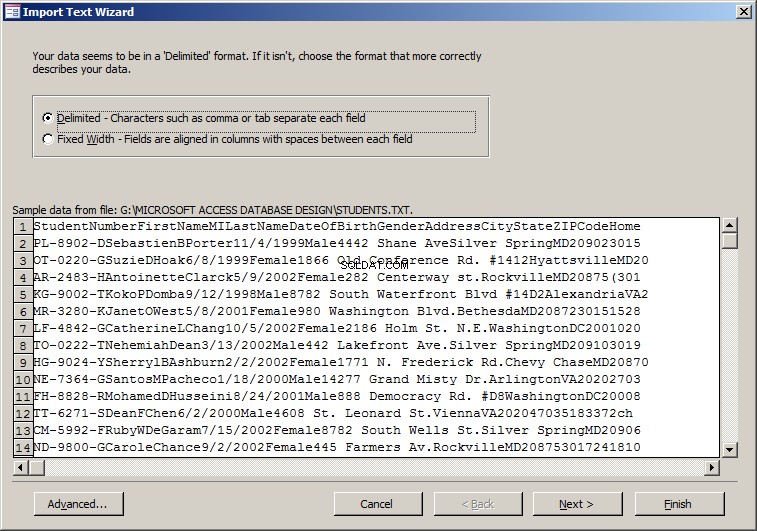
Anda dapat membuat tabel menggunakan data dari file teks. Jika Anda membuat file (teks) di Notepad, delimitasi bidang biasanya dilakukan dengan menekan Tab setelah membuat konten bidang. Untuk mengimpor file teks di Microsoft Access:
- Di bagian Impor Pita, klik tombol File Teks
- Jika sebelumnya Anda telah membuat tabel yang akan menerima nilai, di Panel Navigasi, klik kanan tabel itu, posisikan mouse pada Impor, dan klik File Teks Pendek
Pembelajaran Praktis:Mengimpor Dokumen Teks
- Untuk memulai database baru, pada Ribbon, klik File dan klik New
- Klik Basis Data Desktop Kosong
- Tetapkan namanya menjadi Monson University1
- Klik Buat
- Pada Pita, klik File dan klik Opsi
- Di daftar kiri, klik Basis Data Saat Ini
- Di daftar kanan, klik Tumpang Tindih Windows
- Klik Oke
- Pada Pita, klik Data Eksternal dan, di bagian Impor &Tautan, klik File Teks

- Dalam kotak dialog Dapatkan Data Eksternal - File Teks, klik tombol Telusuri
- Temukan sumber daya yang menyertai pelajaran ini dan pilih file Departments.txt
- Klik Buka
- Pada kotak dialog, klik OK
- Pada halaman pertama Wizard Impor Teks, terima bahwa teks akan Dibatasi dan klik Berikutnya
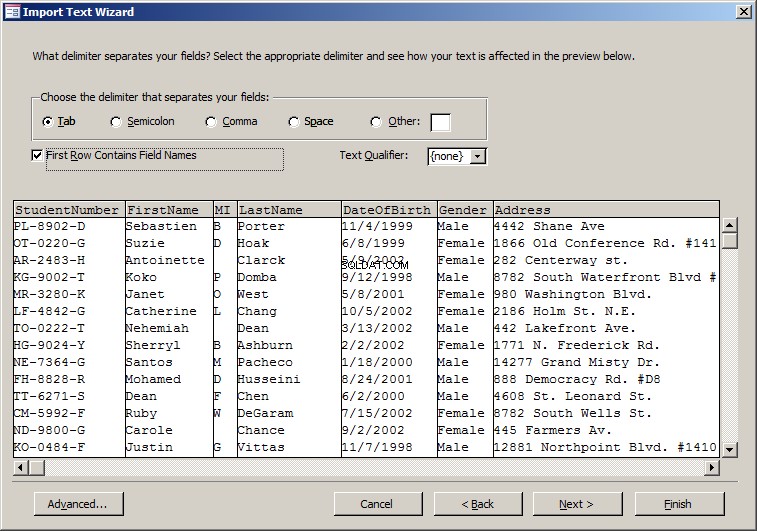
- Di halaman kedua, terima bahwa pembatas disetel ke Tab.
Klik kotak centang Baris Pertama Berisi Nama Bidang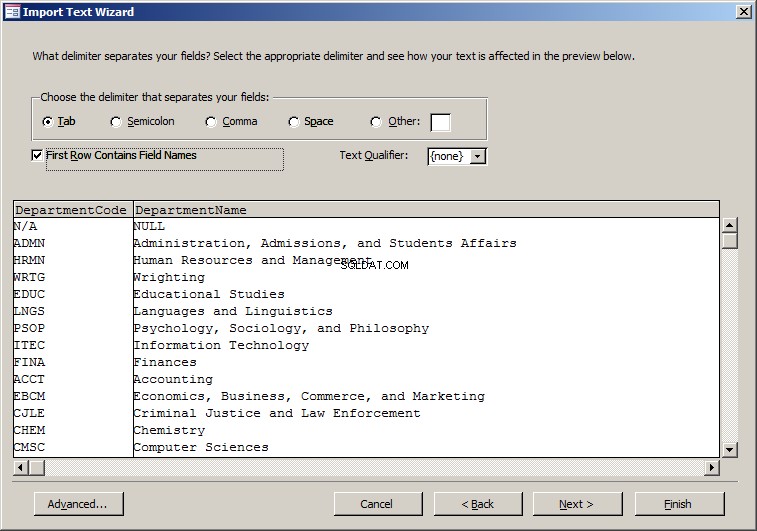
- Klik Berikutnya
- Di halaman ketiga wizard, klik Berikutnya
- Klik panah kotak kombo dan pilih DepartmentCode
- Klik Berikutnya
- Terima nama tabel sebagai Departemen dan klik Selesai
- Bila catatan telah diimpor, klik Tutup
- Di Panel Navigasi, klik kanan tabel Departemen dan klik Tampilan Desain
- Ubah karakteristik bidang berikut:
Nama Bidang Ukuran Bidang Kode Departemen 5 Nama Departemen 100 - Tutup tabel
- Saat ditanya apakah Anda ingin menyimpan, klik Ya
- Anda juga akan menerima kotak pesan bahwa beberapa data mungkin hilang. Baca dan klik Ya
- Pada Pita, klik Data Eksternal dan, di bagian Impor &Tautan, klik File Teks
- Dalam kotak dialog Dapatkan Data Eksternal - File Teks, klik tombol Telusuri
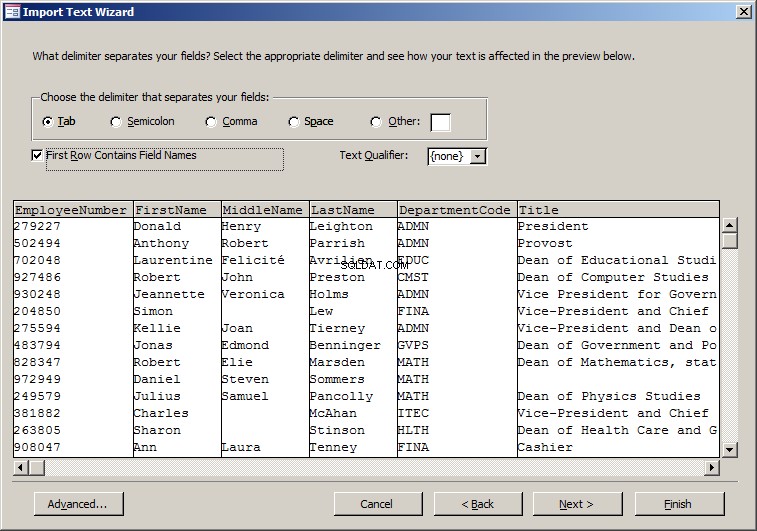
- Dari sumber yang menyertai pelajaran ini, pilih file Employee.txt, dan klik Buka
- Pada kotak dialog, klik OK
- Pada halaman pertama Wizard Impor Teks, terima bahwa teks akan Dibatasi dan klik Berikutnya
- Di halaman kedua, terima bahwa pembatas disetel ke Tab dan klik Baris Pertama Berisi Nama Bidang
- Klik Berikutnya
- Di halaman ketiga wizard, saat EmployeeNumber dipilih, klik panah kotak kombo Tipe Data dan pilih Teks Pendek
- Klik Berikutnya
- Klik panah kotak kombo dan pilih EmployeeNumber
- Klik Berikutnya
- Terima nama tabel sebagai Karyawan dan klik Selesai
- Bila catatan telah diimpor, klik Tutup
- Di Panel Navigasi, klik kanan tabel Karyawan dan klik Tampilan Desain
- Ubah karakteristik bidang berikut:
Nama Bidang Ukuran Bidang Keterangan EmployeeNumber 10 Nama Depan 25 Nama Depan Nama Tengah 25 Nama Belakang 25 Nama Belakang Kode Departemen 5 Judul 100 - Tutup tabel
- Saat ditanya apakah Anda ingin menyimpan, klik Ya
- Anda juga akan menerima kotak pesan bahwa beberapa data mungkin hilang. Baca dan klik Ya
- Pada Pita, klik Data Eksternal dan, di bagian Impor &Tautan, klik File Teks
- Dalam kotak dialog Dapatkan Data Eksternal - File Teks, klik tombol Telusuri
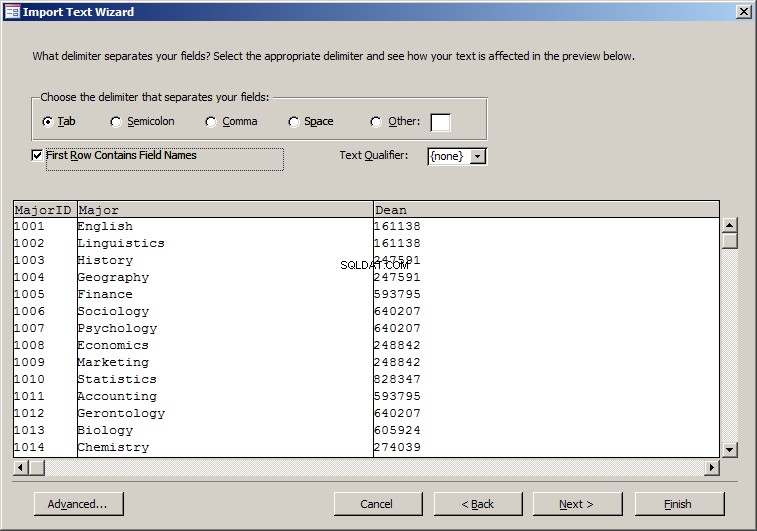
- Dari sumber yang menyertai pelajaran ini, pilih file Majors.txt, dan klik Buka
- Pada kotak dialog, klik OK
- Pada halaman pertama Wizard Impor Teks, terima bahwa teks akan Dibatasi dan klik Berikutnya
- Di halaman kedua, terima bahwa pembatas disetel ke Tab dan klik Baris Pertama Berisi Nama Bidang
- Klik Berikutnya
- Di halaman ketiga wizard, klik Dean
- Klik panah kotak kombo Tipe Data dan pilih Teks Pendek
- Klik Berikutnya
- Klik panah kotak kombo dan pilih MajorID
- Klik Berikutnya
- Terima nama tabel sebagai Jurusan dan klik Selesai
- Bila catatan telah diimpor, klik Tutup
- Di Panel Navigasi, klik kanan tabel Karyawan dan klik Tampilan Desain
- Ubah karakteristik bidang berikut:
Nama Bidang Ukuran Bidang MajorID Mayor 100 Dekan 10 - Tutup tabel
- Saat ditanya apakah Anda ingin menyimpan, klik Ya
- Anda juga akan menerima kotak pesan bahwa beberapa data mungkin hilang. Baca dan klik Ya
- Pada Pita, klik Data Eksternal dan, di bagian Impor &Tautan, klik File Teks
- Dalam kotak dialog Dapatkan Data Eksternal - File Teks, klik tombol Telusuri
- Dari sumber yang menyertai pelajaran ini, pilih file Minors.txt, dan klik Buka
- Pada kotak dialog, klik OK
- Pada halaman pertama Wizard Impor Teks, terima bahwa teks akan Dibatasi dan klik Berikutnya
- Di halaman kedua, terima bahwa pembatas disetel ke Tab dan klik Baris Pertama Berisi Nama Bidang
- Klik Berikutnya
- Di halaman ketiga wizard, klik Berikutnya
- Klik panah kotak kombo dan pilih MinorID
- Klik Berikutnya
- Terima nama tabel sebagai Anak di Bawah Umur dan klik Selesai
- Bila catatan telah diimpor, klik Tutup
- Di Panel Navigasi, klik kanan tabel Karyawan dan klik Tampilan Desain
- Ubah karakteristik bidang berikut:
Nama Bidang Ukuran Bidang MinrID Kecil 100 - Tutup tabel
- Saat ditanya apakah Anda ingin menyimpan, klik Ya
- Anda juga akan menerima kotak pesan bahwa beberapa data mungkin hilang. Baca dan klik Ya
- Di Panel Navigasi, klik kanan Tabel1, posisikan mouse pada Impor, dan klik File Teks
- Dalam kotak dialog Dapatkan Data Eksternal - File Teks, klik tombol Telusuri
- Temukan sumber daya yang menyertai pelajaran ini dan pilih file Students.txt
- Klik Buka
- Pada kotak dialog, klik OK
- Pada halaman pertama Wizard Impor Teks, terima bahwa teks akan Dibatasi dan klik Berikutnya
- Di halaman kedua, setujui bahwa pembatas disetel ke Koma atau Tab dan klik Berikutnya
- Di halaman kedua wizard, klik Baris Pertama Berisi Nama Bidang
- Klik Berikutnya
- Saat StudentNumber dipilih, klik panah kotak kombo Tipe Data dan pilih Teks Pendek
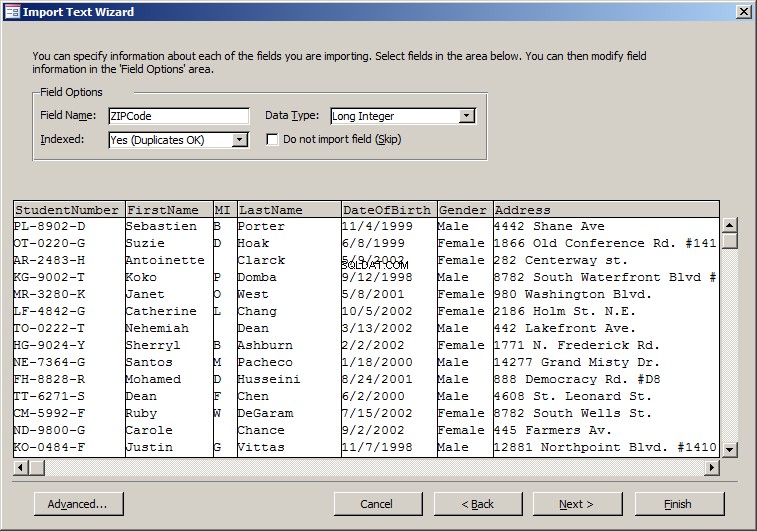
- Klik Berikutnya
- Klik panah kotak kombo dan pilih StudentNumber
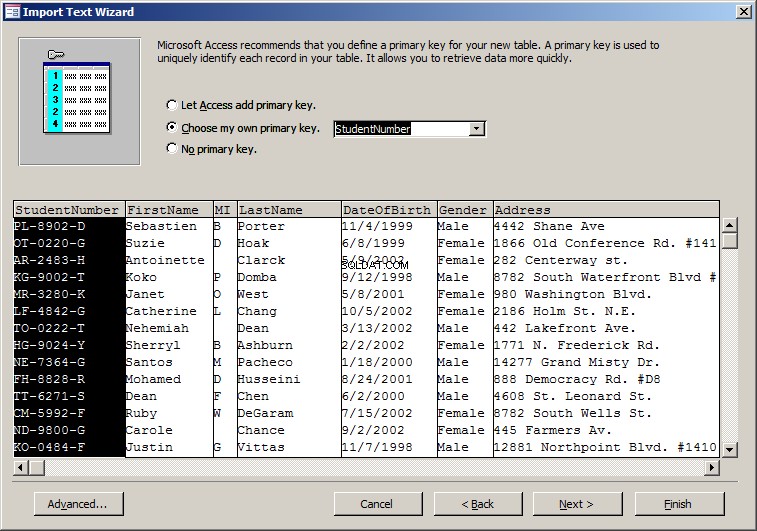
- Klik Berikutnya
- Terima nama tabel sebagai Siswa dan klik Selesai
- Bila catatan telah diimpor, klik Tutup
- Di Panel Navigasi, klik kanan tabel Siswa dan klik Tampilan Desain
- Ubah karakteristik bidang berikut:
Nama Bidang Ukuran Bidang Keterangan StudentNumber 12 Mahasiswa # Nama Depan 25 Nama Depan MiddleName 25 Nama Belakang 25 Nama Belakang Tanggal Lahir Jenis Kelamin 20 Alamat 120 Kota 40 Negara bagian 50 ZIPCode 20 Kode Pos - Tutup tabel
- Saat ditanya apakah Anda ingin menyimpan, klik Ya
- Anda juga akan menerima kotak pesan bahwa beberapa data mungkin hilang. Baca dan klik Ya
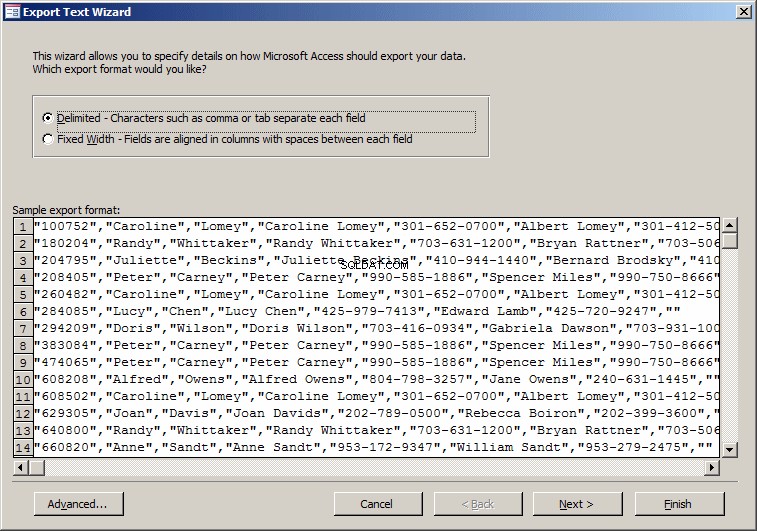
Mengekspor File Teks
Untuk menyimpan tabel sebagai teks:
- Di Panel Navigasi, klik tabel yang ingin Anda ekspor. Di bagian Ekspor Pita, klik tombol File Teks
- Di Panel Navigasi, klik kanan tabel yang menyimpan data, posisikan mouse pada Ekspor, dan klik File Teks Pendek
Ini akan membuka kotak dialog Ekspor - File Teks dengan nama file menggunakan ekstensi .txt. Cukup ikuti wizard:
Microsoft Access and XML
Importing an XML File
An XML file is essentially a document made of at least one table. A typical XML file starts with a root node:
<?xml version="1.0" standalone="yes"?>
Under it, the global parent node starts and closes itself:
<?xml version="1.0" standalone="yes"?>
<FunFurniture>
</FunFurniture>
This global parent node is not the table. Inside that node, you should have a node that would represent a table and it can repeat itself as many times as necessary. Ini contohnya:
<?xml version="1.0" standalone="yes"?>
<FunFurniture>
  <Employees>
  </Employees>
  <Employees>
  </Employees>
</FunFurniture>
Inside each table, you should have the name of each column followed by its value:
<?xml version="1.0" standalone="yes"?>
<FunFurniture>
  <Employees>
    <EmployeeNumber>924795</EmployeeNumber>
    <FirstName>Donald</FirstName>
    <LastName>Tripleton</LastName>
    <Title>Sales Manager</Title>
  </Employees>
  <Employees>
    <EmployeeNumber>274957</EmployeeNumber>
    <FirstName>Jeanne</FirstName>
    <LastName>Wooley</LastName>
    <Title>Sales Associate</Title>
  </Employees>
  <Employees>
    <EmployeeNumber>684078</EmployeeNumber>
    <FirstName>Irene</FirstName>
    <LastName>Polsen</LastName>
    <Title>Sales Associate</Title>
  </Employees>
  <Employees>
    <EmployeeNumber>297149</EmployeeNumber>
    <FirstName>Monica</FirstName>
    <LastName>Jackson</LastName>
    <Title>Sales Associate</Title>
  </Employees>
</FunFurniture>
After creating and saving an XML file, to import it in Microsoft Access, in the External Data tab of the Ribbon and in the Import section, click the XML File button  and follow the wizard.
Practical Learning:Importing an XML Document
- To start a new database, on the Ribbon, click File and click New
- Click Blank Desktop Database
- Set the name to StatesStatistics2
- Click Create
- Close the default table without saving it
- On the Ribbon, click External Data
- In the Import &Link section, click the XML File button
- In the Get External Data - XML File dialog box, click the Browse button
- Locate the resources that accompany these lessons and select the StatesStatistics.xml file
- Click Open
- On the Get External Data - XML File dialog box, click OK
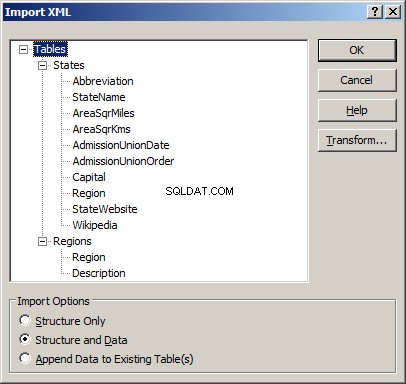
- In the Import XML dialog box, accept the selections and click OK
- In the Get External Data - XML File dialog box, click the Close button
- In the Navigation Pane, right-click the Regions table and click Design View
- In the top side of the window, make sure Region is selected.
In the bottom side, set the Field Size to 25 - Close the table
- When asked whether you want to save, click Yes
- You will also receive a message box that some data may be lost. Read it and click Yes
- In the Navigation Pane, double-click the States table
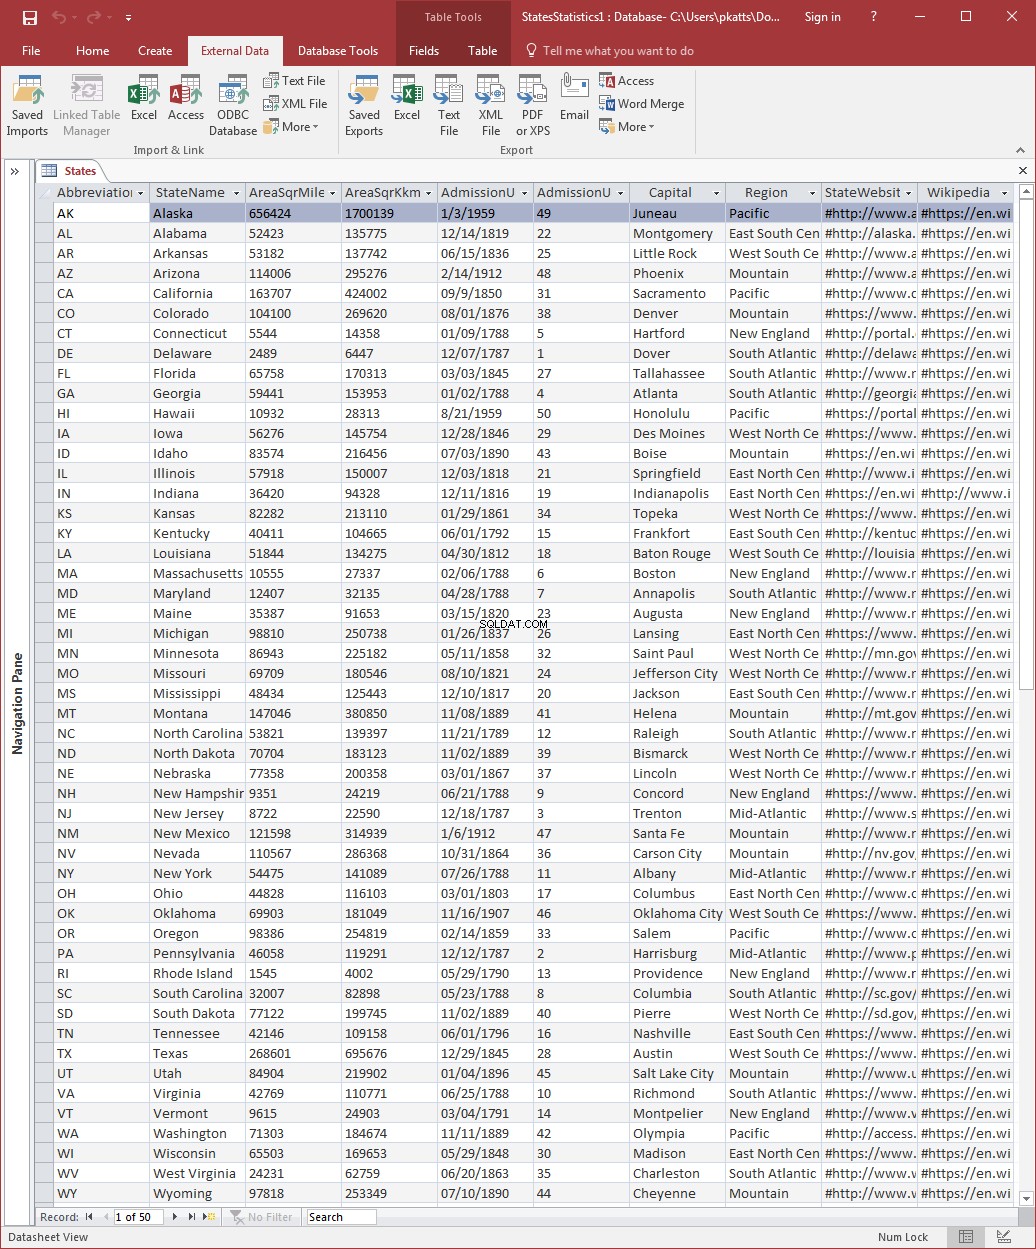
- After viewing the records, right-click the States tab and click Design View
- Change the following characteristics of the fields:
Field Name Data Type Field Size Format Decimal Places Caption Abbreviation 2 State StateName 40 Name AreaSqrMiles Number Standard 0 Sqr Miles AreaSqrKm Number Standard 0 Sqr Kms AdmissionUnionDate Date/Time Date of Admission to Union AdmissionUnionOrder Number Byte Order of Admission to Union Capital 40 Region 25 StateWebsite Hyperlink State's Website Wikipedia Hyperlink - Close the table
- When asked whether you want to save, click Yes
- You will also receive a message box that some data may be lost. Read it and click Yes
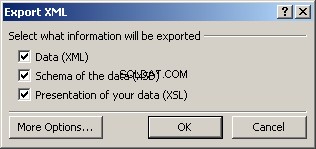
Exporting to XML
To export a table to XML format, in the Navigation Pane:
- Right-click the table that holds the data, position the mouse on Export, and click XML File
- Click the table you want to export. On the Ribbon, click External Data and, in the Export section, click More -> XML File
The Export - XML File dialog box that comes up allows you to verify the name of the file that will be created and the path where it will go. Once you are ready, you can click OK. A dialog box would come up asking which one(s) of the three files you want to have created:
If you want to create a more elaborate XML application with advanced options, you can click the More Options button. This would close the previous dialog box and open another one:
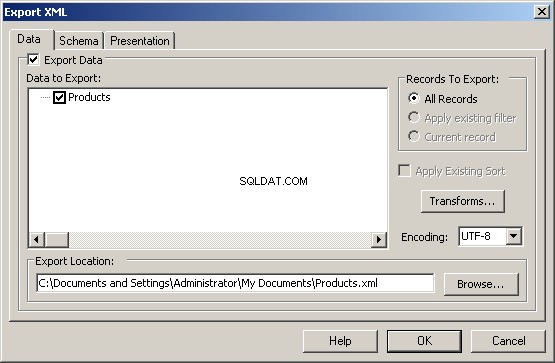
This dialog box allows you to specify more details on how the table should be exported. After making your selections, click OK.
Microsoft Access and the Web
Importing an HTML File
To import an HTML file in Microsoft Access:
- In the Import section of the Ribbon, click the More button and click HTML Document
- If the Navigation Pane contains at least one table, right-click a table, position the mouse on Import, and click HTML Document
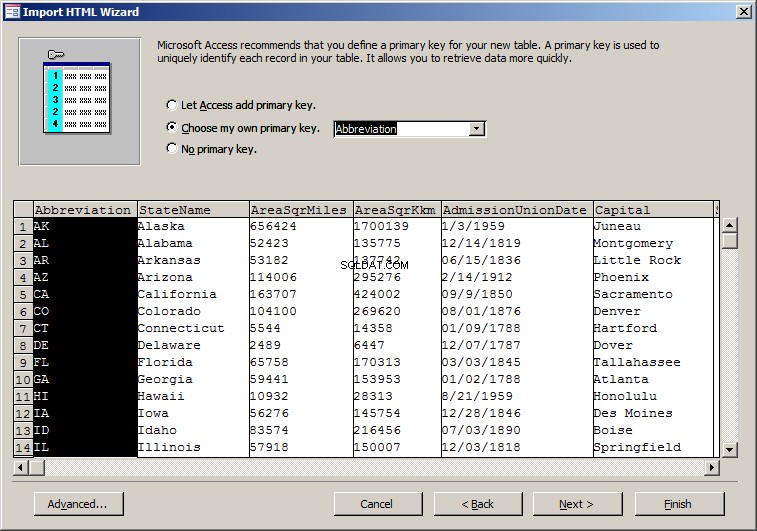
The primary steps to follow are the same for a text document. In the third page of the wizard, to consider and/or apply more options, click the Advanced button:
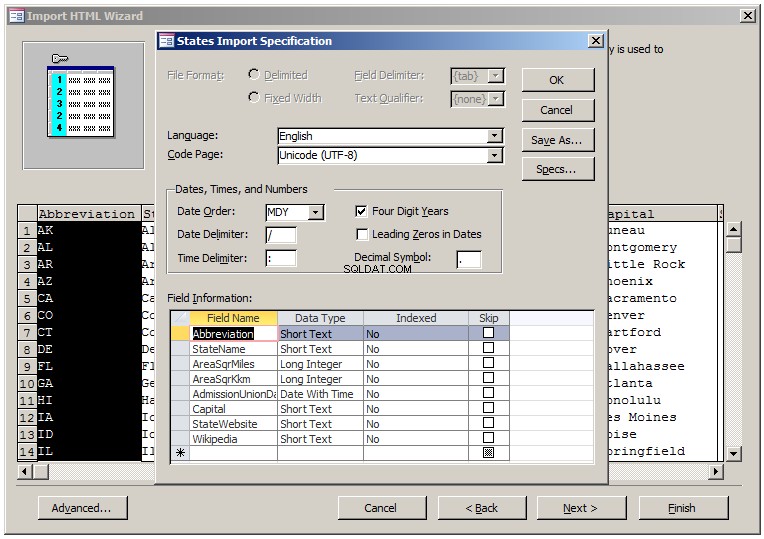
After making the necessary adjustments, click OK.
Practical Learning:Importing a Text Document
- On the Ribbon, click File and click New
- Click Blank Desktop Database
- Set the name to States Statistics
- Click Create
- In the Navigation Pane, right-click Table1, position the mouse on Import, and click HTML Document
- In the Get External Data - HTML Document dialog box, click the Browse button
- Locate the resources that accompany these lessons
- Select the states.htm document and click Open
- Click OK
- In the first page of the Import HTML Wizard, click First Row Contains Column Headings
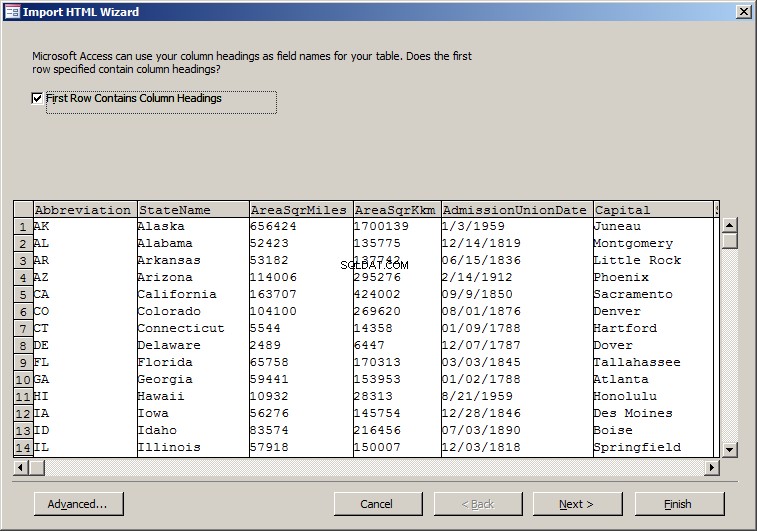
- Click Next
- Accept the defaults of the second page of the wizard and click Next
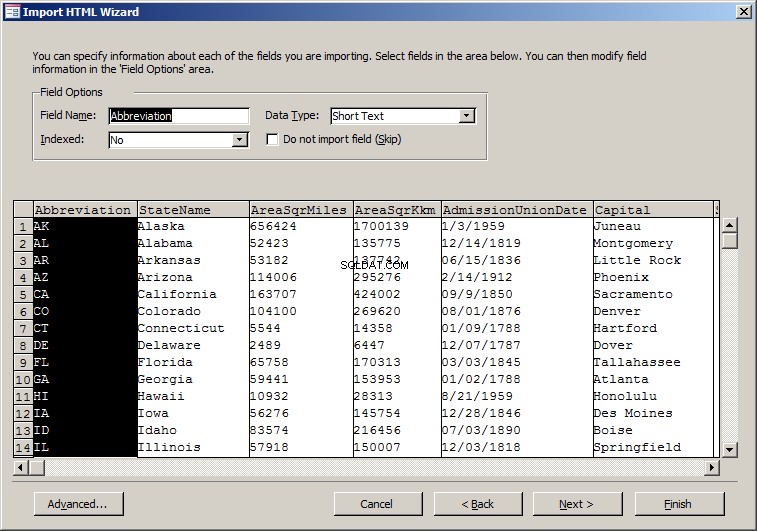
- In the third page of the wizard, click the arrow of the combo box and select Abbreviation
- Click Next
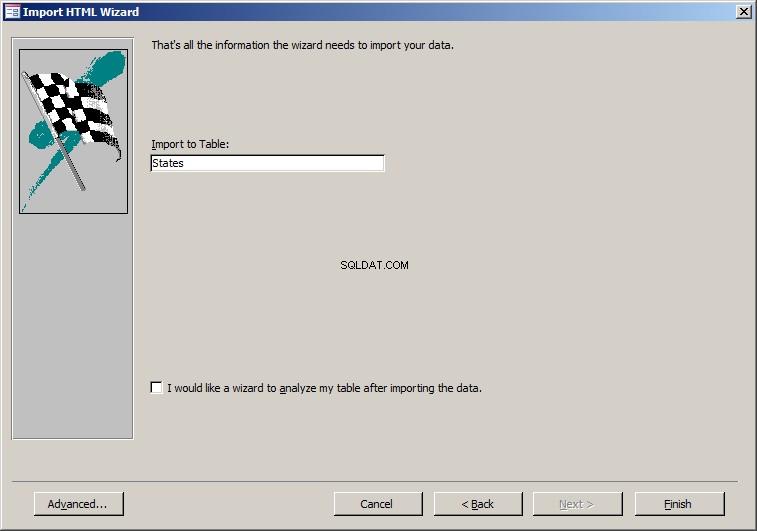
- Set the name of the table as States
- Click Finish
- You receive a confirmation message. Click Close
- In the Navigation Pane, right-click the States table and click Design View
- Change the following characteristics of the fields:
Field Name Data Type Field Size Format Caption Abbreviation 5 Abbrv StateName 40 State Name AreaSqrMiles Number Double Standard Area in Square Miles AreaSqrKkm Number Double Standard Area in Square Kilometers AdmissionUnionDate Date of Admission to Union Capital 40 StateWebsite Hyperlink State's Website Wikipedia Hyperlink - Close the table
- When asked whether you want to save, click Yes
- You will also receive a message box that some data may be lost. Read it and click Yes
- Close Microsoft Access
A Microsoft Access Table on a Web Page
You can copy and paste Data from a webpage into a table. To do this:
- If you want to copy all columns and all records, in the Navigation Pane of Microsoft Access, right-click the table and click Copy
- If you want to copy all columns and all records, open the table in Microsoft Access, press Ctrl + A to select everything. Press Ctrl + C to copy. In the web page of the application, click the section you want on the web page and press Ctrl + V to paste
- If you want to copy only some columns and/or some records, open the table in Microsoft Access. Make the selection. Right-click the selection and click Copy. In the web application, right-click the section you want on the web page and click Paste or click the section and press Ctrl + V
Some other applications do not support copy and paste. An alternative is to export the table to HTML. To save a table as HTML, in the Navigation Pane:
- Right-click the table that holds the data, position the mouse on Export, and click HTML Document
- Click the table you want to export. On the Ribbon, click External Data and, in the Export section, click More -> HTML Document
This would open the Export - HTML Document dialog box.
Microsoft Access and Microsoft Word
Introduction
There are various ways you can use Microsoft Word with a Microsoft Access database. As opposed to copying from a database table and pasting to a table, you may want the reverse. That is, you can copy a table from a Microsoft Word document. To do this, in Microsoft Word, select the table in a document and copy it. Start a table in Microsoft Access and paste the records.
Mail Merge
Mail merging allows you to use data on your database to create letters, labels, envelopes, and other documents that require external data originating from another document. To start a mail merge, in the Navigation Pane:
- Click the table that holds the information you want to use. In the Export section of the Ribbon, click Word Merge
- Right-click the table, position the mouse on Export and click Word Merge
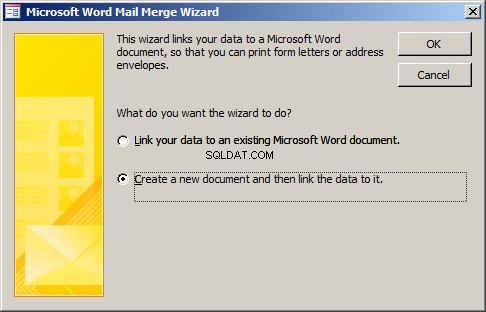
This would open the Microsoft Word Mail Merge Wizard:

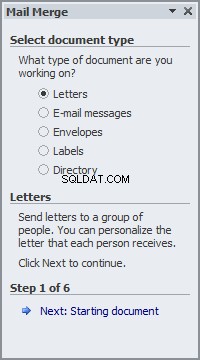
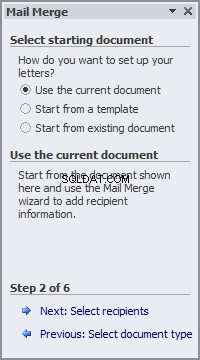
And click OK. This would open the Select Microsoft Word Document dialog box. It allows you to select the letter/document you plan to use. If you don't have that document, click Cancel, open Microsoft Word, create the document and proceed from there. If you have a letter, select it. This would open the letter in Microsoft Word. ail Merge window, if you want to create a letter to be sent out, accept the Letters radio button and click Next. In the second page of the wizard, you will have the choice of creating a new Microsoft Word document or using an existing document. If you want to create a new document, click or accept Use the Current Document. If you click Start From Existing Document, you will be asked to specify the document, in which case you should click Open, select the document, and click Open:
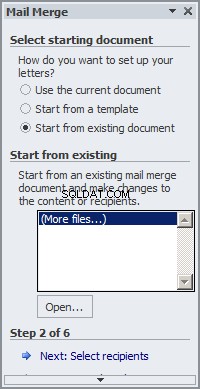
After this, the Mail Merge window would come back to the Use Current Document option. Click Next:Select Recipients.
To insert other types of items, in the Mail Merge window, you can click the Address Block link, the Insert Address Block dialog box would come up. The Insert Address Block dialog box is made of various sections. It allows you to specify a type of greeting and other pieces of information to be inserted in the document. After making the selection(s), you can click OK.
After creating the document and adding the necessary fields to it, you can preview and review it. To do this, in the Mail Merge window, click the Next:Preview Your Letters link. When you do this, the letter appears with the value(s) of the first record. To review the document with the other values, in the Mail Merge window, you can click the previous 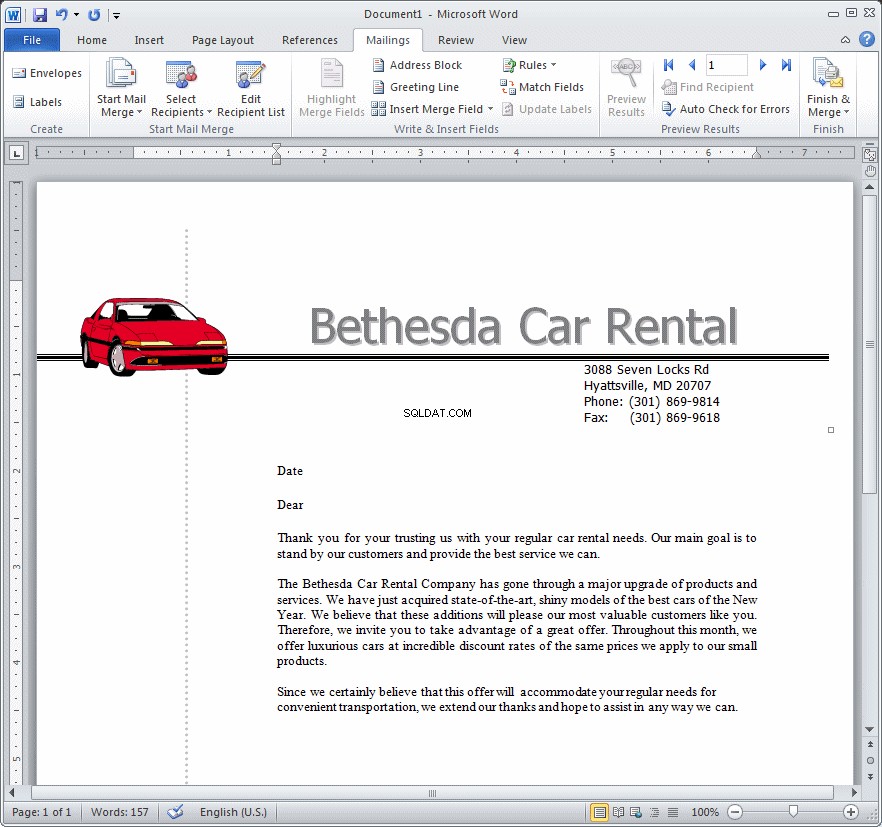 or the next
  buttons.
After reviewing the document, in the Mail Merge window, you can click the Next:Complete The Merge link. You can then save, print, and manage the document. In the same way, you can create labels or envelopes.
Practical Learning:Creating a Mail Merge
- Start Microsoft Word
- From the resources that accompany these lessons, open Promotion.docx
- Press Ctrl + A to select everything
- Press Ctrl + C to copy
- Close Microsoft Word and return to Microsoft Access
- From the resources that accompany these lessons, open the Bethesda Car Rental1 database
- In the Navigation Pane, in the Tables section, click Customers
- To start a mail merge, on the Ribbon, click External Data
- In the Export section, click Word Merge
- Click the second radio button:
- Click OK.
Microsoft Word starts. - In Microsoft Word, press Ctrl + V to paste the Promotion.docx document (this would be the equivalent of creating or designing the document)
- In the Mail Merge window, to create a letter to be sent out, accept the Letters radio button
Click Next:Starting Document - In the Select Starting Document section, make sure Use the Current Document is selected Click Next:Select Recipients
- Click Next:Write Your Letter

- In the Microsoft Word document, double-click Date and press Delete
- On the Ribbon of Microsoft Word, click Insert
- In the Text section, click Date &Time
- In the Available Formats list box of the Date &Time dialog box, click the second option (day, month, and year)
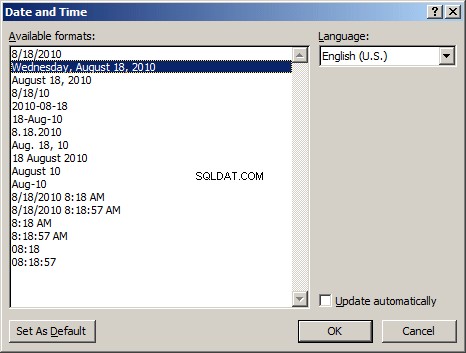
- Click OK
- Press Enter
- Click the right side of Dear
- In the Mail Merge window, click More Items
- In the Fields list, click FirstName

- Click Insert
- Click Close
- Press the Space bar
- In the Mail Merge window, click More Items...
- In the Fields name, double-click LastName
- Click Close
- In the Mail Merge window, click Next:Preview Your Letters

- In the Mail Merge window, click the next recipient button
 and observe the name in the document
 - Click the next recipient button 4 times and observe the names in the document
- Click the previous recipient button 2 times and observe the names in the document
- In the Mail Merge window, click Next:Complete the Merge
- Close Microsoft Word
- When asked whether you want to save, click Save
- Set the file name as Bethesda Car Rental Promotional Campaign1
- Click Save
- Close Microsoft Access
Sharing a Microsoft Access Database
Distributing the Database
Distributing a database consists of making it available to more than one computer. Both Microsoft Windows and Microsoft Access provide various solutions, One solution is to install Microsoft Access on each computer that will use your database. This may be the most expensive solution but it is the easiest. Most companies use that solution because it is easy either to purchase many copies or get many licenses of Microsoft Office Professional that includes Microsoft Access.
After creating a database, in the server or the computer of your choice (normally, the database can be located on any computer that is a member of your network) where you want the database to be located, create a folder. Copy the database file into that folder
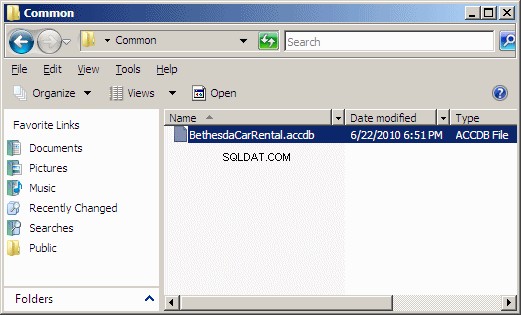
Access the drive that holds that folder. To share it, right-click it and click Share:
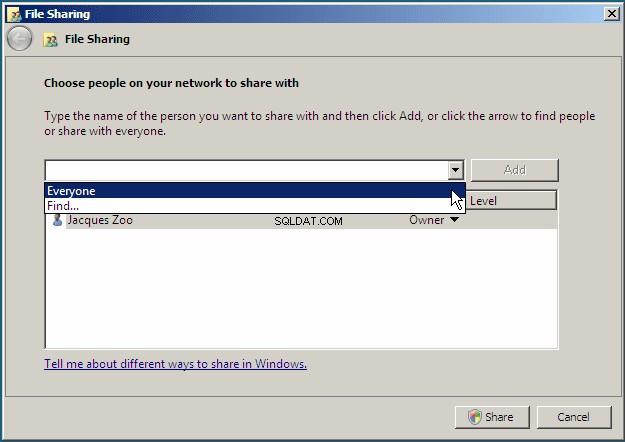
Click the arrow of the combo box in the File Sharing window and select Everyone:
After selecting Everyone, click Add. Click the down-pointing arrow on the right side of Everyone:
- If you are sharing from Microsoft Windows Server 2008, select Contributor
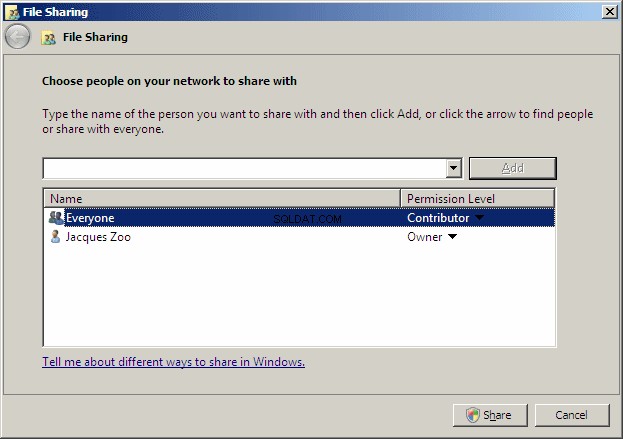
- If you are sharing from Microsoft Windows 7+, select Read/Write
Click Share. If you receive a message box, click Continue.
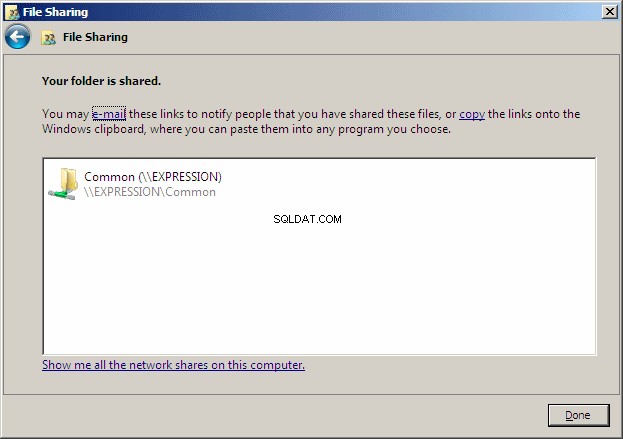
You should receive a message box telling you that the sharing was successful
Click Close.
In another computer where you want to access the database, open a file utility such as Windows Explorer. Click Network. Click the name of the computer to show its shared folders. Open the folder that contains the database. Right-click the name of the database, position the mouse on Send To, and click Desktop (Create Shortcut)
As an alternative, you could right-click the database and click Create Shortcut, then copy that shortcut where you want the database to be accessible. To open the database from that computer, double-click the shortcut.
Importing or Splitting a Database
Introduction
Importing data allows you to get information from an external source and insert it in your database. Microsoft Access can accept data from various applications. To import a file or objects, on the Ribbon, click the External Data tab:
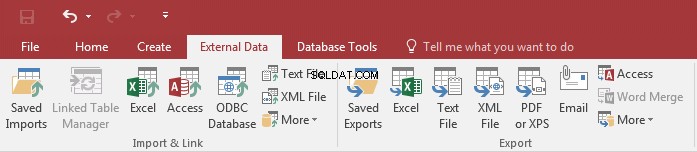
In the Import section of the Ribbon, click the button that corresponds to the type of object you want to get. What happens depends on the type of file you are trying to import.
Importing Microsoft Access Objects
To import objects from another Microsoft Access database, on the Ribbon, click External Data. In the Import section of the Ribbon, click the Access button . This would open the Get External Data - Access Database wizard. You should first locate the folder that contains the database, and then select the database.
Splitting a Database
You can divide your database in two parts. One part would be installed on one computer that can be a server or just another computer. This is referred to as back-end. The other part would be installed in each user's computer. The users computers can then connect to the back-end database that stores the actual database. The users computer have only the graphical interface that allows them to work. To implement this scenario, you split your database.
To split a database, on the Ribbon, click Database Tools:
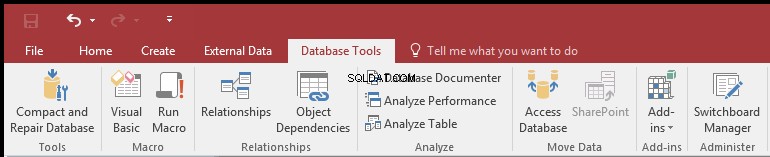
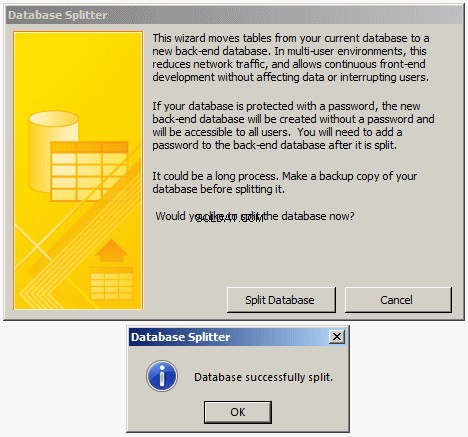
In the Move Data section, click the Access Database button  . This would open the Database Splitter dialog box with four paragraphs and two buttons:

After reading them, click Split Database and follow the wizard.
Practical Learning:Splitting a Database
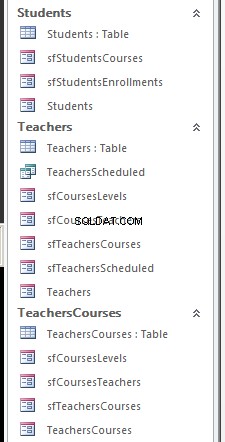
- From the resources that accompany these lessons, open the Computer Training Center database.
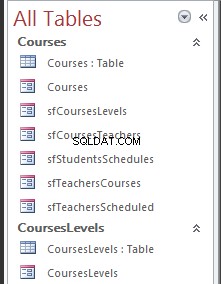
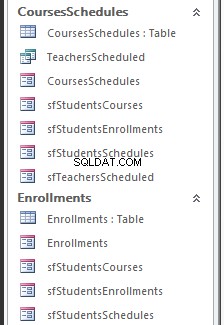
Notice the objects in the Navigation Pane
- On the Ribbon, click Database Tools
- In the Move Data section, click Access Database
- You receive a Database Splitter dialog box. Read the paragraphs and click Split Database
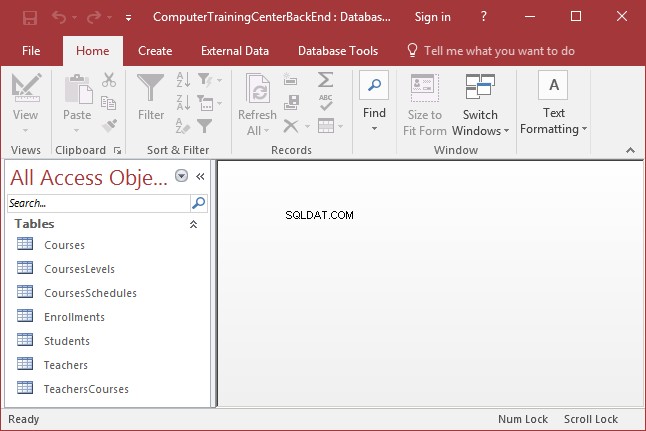
- In the Create Back-End Database dialog box, change the name of the file to ComputerTrainingCenterBackEnd
- Click Split.
When the splitting is over, a dialog box appears
- Read it and click OK
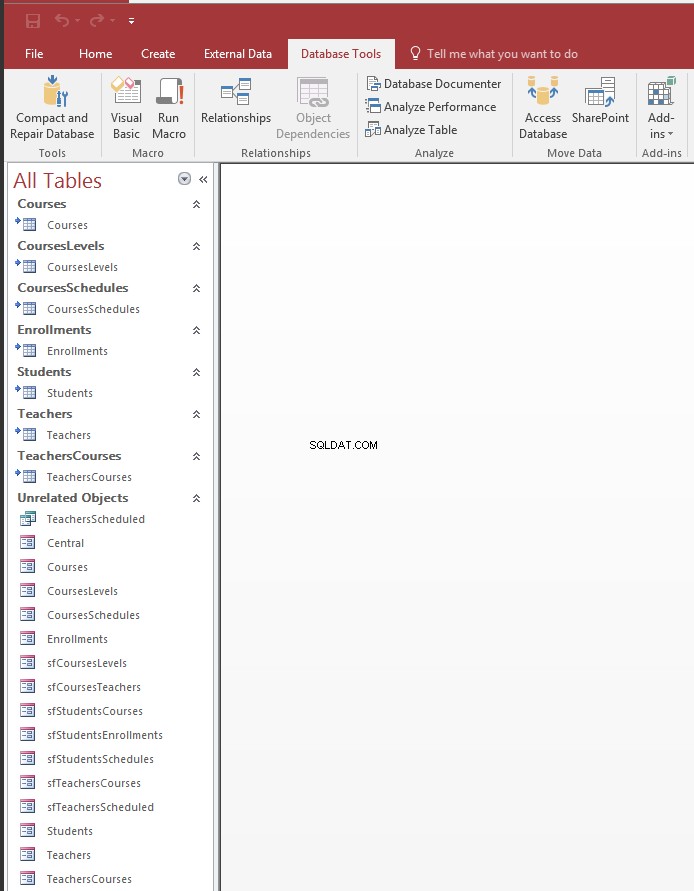
- Open the ComputerTrainingCenterBackEnd database. Notice the icons of the tables in the Navigation Pane
- Re-open the Bethesda Car Rental5 database and notice the new icons of the tables in the Navigation Pane
- Close Microsoft Access