Menyimpan cadangan database Anda adalah salah satu tugas terpenting di lingkungan produksi apa pun. Ini adalah proses menyalin data Anda ke tempat lain agar tetap aman. Ini dapat berguna dalam pemulihan dari situasi darurat seperti kerusakan database atau database mogok yang tidak dapat diperbaiki.
Selain pemulihan, pencadangan juga dapat digunakan untuk meniru basis data produksi untuk menguji aplikasi di lingkungan yang berbeda, atau bahkan untuk men-debug sesuatu yang tidak dapat dilakukan pada basis data produksi.
Ada berbagai metode pencadangan basis data yang dapat Anda terapkan, mulai dari pencadangan logis menggunakan alat yang tertanam dalam basis data (mis. mysqldump, mongodump, pg_dump) hingga pencadangan fisik menggunakan alat pihak ketiga (mis. xtrabackup, bartender, pgbackrest, cadangan konsisten mongodb).
Metode mana yang akan digunakan sering kali ditentukan berdasarkan cara Anda ingin memulihkan. Misalnya, anggap Anda menjatuhkan meja atau koleksi karena kesalahan. Tidak mungkin seperti yang terlihat, itu memang terjadi. Jadi cara tercepat untuk memulihkan adalah dengan memulihkan tabel atau koleksi itu saja, daripada harus memulihkan seluruh database.
Cadangkan dan Pulihkan di Mongodb
Mongodump dan mongorestore adalah alat untuk pencadangan logis yang digunakan di MongoDB, semacam mysqldump di MySQL, atau pg_dump di PostgreSQL. Utilitas mongodump dan mongorestore akan disertakan saat Anda menginstal MongoDB dan membuang data dalam format BSON. Mongodump digunakan untuk membuat cadangan basis data secara logis ke dalam file dump, sedangkan mongorestore digunakan untuk operasi pemulihan.
perintah mongodump dan mongorestore mudah digunakan, meskipun ada banyak opsi.
Seperti yang dapat kita lihat di bawah, Anda dapat membuat cadangan database atau koleksi tertentu. Anda bahkan dapat mengambil snapshot titik waktu dengan menyertakan oplog.
[email protected]:~# mongodump --help

Usage:

  mongodump <options>


Export the content of a running server into .bson files.


Specify a database with -d and a collection with -c to only dump that database or collection.


See http://docs.mongodb.org/manual/reference/program/mongodump/ for more information.


general options:

      --help                                                print usage

      --version                                             print the tool version and exit


verbosity options:

  -v, --verbose=<level>                                     more detailed log output (include multiple times for more verbosity, e.g. -vvvvv, or specify a numeric value, e.g. --verbose=N)

      --quiet                                               hide all log output


connection options:

  -h, --host=<hostname>                                     mongodb host to connect to (setname/host1,host2 for replica sets)

      --port=<port>                                         server port (can also use --host hostname:port)


kerberos options:

      --gssapiServiceName=<service-name>                    service name to use when authenticating using GSSAPI/Kerberos ('mongodb' by default)

      --gssapiHostName=<host-name>                          hostname to use when authenticating using GSSAPI/Kerberos (remote server's address by default)


ssl options:

      --ssl                                                 connect to a mongod or mongos that has ssl enabled

      --sslCAFile=<filename>                                the .pem file containing the root certificate chain from the certificate authority

      --sslPEMKeyFile=<filename>                            the .pem file containing the certificate and key

      --sslPEMKeyPassword=<password>                        the password to decrypt the sslPEMKeyFile, if necessary

      --sslCRLFile=<filename>                               the .pem file containing the certificate revocation list

      --sslAllowInvalidCertificates                         bypass the validation for server certificates

      --sslAllowInvalidHostnames                            bypass the validation for server name

      --sslFIPSMode                                         use FIPS mode of the installed openssl library


authentication options:

  -u, --username=<username>                                 username for authentication

  -p, --password=<password>                                 password for authentication

      --authenticationDatabase=<database-name>              database that holds the user's credentials

      --authenticationMechanism=<mechanism>                 authentication mechanism to use


namespace options:

  -d, --db=<database-name>                                  database to use

  -c, --collection=<collection-name>                        collection to use


uri options:

      --uri=mongodb-uri                                     mongodb uri connection string


query options:

  -q, --query=                                              query filter, as a JSON string, e.g., '{x:{$gt:1}}'

      --queryFile=                                          path to a file containing a query filter (JSON)

      --readPreference=<string>|<json>                      specify either a preference name or a preference json object

      --forceTableScan                                      force a table scan


output options:

  -o, --out=<directory-path>                                output directory, or '-' for stdout (defaults to 'dump')

      --gzip                                                compress archive our collection output with Gzip

      --repair                                              try to recover documents from damaged data files (not supported by all storage engines)

      --oplog                                               use oplog for taking a point-in-time snapshot

      --archive=<file-path>                                 dump as an archive to the specified path. If flag is specified without a value, archive is written to stdout

      --dumpDbUsersAndRoles                                 dump user and role definitions for the specified database

      --excludeCollection=<collection-name>                 collection to exclude from the dump (may be specified multiple times to exclude additional collections)

      --excludeCollectionsWithPrefix=<collection-prefix>    exclude all collections from the dump that have the given prefix (may be specified multiple times to exclude additional prefixes)

  -j, --numParallelCollections=                             number of collections to dump in parallel (4 by default) (default: 4)

      --viewsAsCollections                                  dump views as normal collections with their produced data, omitting standard collections
Ada banyak opsi dalam perintah mongorestore, opsi wajib terkait dengan opsi koneksi seperti host, port, dan otentikasi. Ada parameter lain, seperti -j digunakan untuk memulihkan koleksi secara paralel, -c atau --collection digunakan untuk koleksi tertentu, dan -d atau --db digunakan untuk mendefinisikan database tertentu. Daftar opsi parameter mongorestore dapat ditampilkan menggunakan bantuan :
[email protected]:~# mongorestore --help

Usage:

  mongorestore <options> <directory or file to restore>


Restore backups generated with mongodump to a running server.


Specify a database with -d to restore a single database from the target directory,

or use -d and -c to restore a single collection from a single .bson file.


See http://docs.mongodb.org/manual/reference/program/mongorestore/ for more information.


general options:

      --help                                                print usage

      --version                                             print the tool version and exit


verbosity options:

  -v, --verbose=<level>                                     more detailed log output (include multiple times for more verbosity, e.g. -vvvvv, or specify a numeric value, e.g. --verbose=N)

      --quiet                                               hide all log output


connection options:

  -h, --host=<hostname>                                     mongodb host to connect to (setname/host1,host2 for replica sets)

      --port=<port>                                         server port (can also use --host hostname:port)


kerberos options:

      --gssapiServiceName=<service-name>                    service name to use when authenticating using GSSAPI/Kerberos ('mongodb' by default)

      --gssapiHostName=<host-name>                          hostname to use when authenticating using GSSAPI/Kerberos (remote server's address by default)


ssl options:

      --ssl                                                 connect to a mongod or mongos that has ssl enabled

      --sslCAFile=<filename>                                the .pem file containing the root certificate chain from the certificate authority

      --sslPEMKeyFile=<filename>                            the .pem file containing the certificate and key

      --sslPEMKeyPassword=<password>                        the password to decrypt the sslPEMKeyFile, if necessary

      --sslCRLFile=<filename>                               the .pem file containing the certificate revocation list

      --sslAllowInvalidCertificates                         bypass the validation for server certificates

      --sslAllowInvalidHostnames                            bypass the validation for server name

      --sslFIPSMode                                         use FIPS mode of the installed openssl library


authentication options:

  -u, --username=<username>                                 username for authentication

  -p, --password=<password>                                 password for authentication

      --authenticationDatabase=<database-name>              database that holds the user's credentials

      --authenticationMechanism=<mechanism>                 authentication mechanism to use


uri options:

      --uri=mongodb-uri                                     mongodb uri connection string


namespace options:

  -d, --db=<database-name>                                  database to use when restoring from a BSON file

  -c, --collection=<collection-name>                        collection to use when restoring from a BSON file

      --excludeCollection=<collection-name>                 DEPRECATED; collection to skip over during restore (may be specified multiple times to exclude additional collections)

      --excludeCollectionsWithPrefix=<collection-prefix>    DEPRECATED; collections to skip over during restore that have the given prefix (may be specified multiple times to exclude additional prefixes)

      --nsExclude=<namespace-pattern>                       exclude matching namespaces

      --nsInclude=<namespace-pattern>                       include matching namespaces

      --nsFrom=<namespace-pattern>                          rename matching namespaces, must have matching nsTo

      --nsTo=<namespace-pattern>                            rename matched namespaces, must have matching nsFrom


input options:

      --objcheck                                            validate all objects before inserting

      --oplogReplay                                         replay oplog for point-in-time restore

      --oplogLimit=<seconds>[:ordinal]                      only include oplog entries before the provided Timestamp

      --oplogFile=<filename>                                oplog file to use for replay of oplog

      --archive=<filename>                                  restore dump from the specified archive file. If flag is specified without a value, archive is read from stdin

      --restoreDbUsersAndRoles                              restore user and role definitions for the given database

      --dir=<directory-name>                                input directory, use '-' for stdin

      --gzip                                                decompress gzipped input


restore options:

      --drop                                                drop each collection before import

      --dryRun                                              view summary without importing anything. recommended with verbosity

      --writeConcern=<write-concern>                        write concern options e.g. --writeConcern majority, --writeConcern '{w: 3, wtimeout: 500, fsync: true, j: true}'

      --noIndexRestore                                      don't restore indexes

      --noOptionsRestore                                    don't restore collection options

      --keepIndexVersion                                    don't update index version

      --maintainInsertionOrder                              preserve order of documents during restoration

  -j, --numParallelCollections=                             number of collections to restore in parallel (4 by default) (default: 4)

      --numInsertionWorkersPerCollection=                   number of insert operations to run concurrently per collection (1 by default) (default: 1)

      --stopOnError                                         stop restoring if an error is encountered on insert (off by default)

      --bypassDocumentValidation                            bypass document validation

      --preserveUUID                                        preserve original collection UUIDs (off by default, requires drop)
Memulihkan koleksi tertentu di MongoDB dapat dilakukan menggunakan koleksi parameter di mongorestore. Asumsikan Anda memiliki database pesanan, di dalam database pesanan ada beberapa koleksi seperti yang ditunjukkan di bawah ini:
my_mongodb_0:PRIMARY> show dbs;

admin   0.000GB

config  0.000GB

local   0.000GB

orders  0.000GB

my_mongodb_0:PRIMARY> use orders;

my_mongodb_0:PRIMARY> show collections;

order_details

orders

stock
Kami telah menjadwalkan pencadangan untuk database pesanan, dan kami ingin mengembalikan koleksi stok ke database baru order_new di server yang sama. Jika Anda ingin menggunakan opsi --collection, Anda harus meneruskan nama koleksi sebagai parameter mongorestore atau Anda dapat menggunakan opsi --nsInclude={db}.{collection} jika Anda tidak menentukan jalur ke file koleksi .
[email protected]:~/dump/orders# mongorestore -umongoadmin --authenticationDatabase admin --db order_new --collection stock /root/dump/orders/stock.bson
Enter password:
2020-03-09T04:06:29.100+0000 checking for collection data in /root/dump/orders/stock.bson
2020-03-09T04:06:29.110+0000 reading metadata for order_new.stock from /root/dump/orders/stock.metadata.json
2020-03-09T04:06:29.134+0000 restoring order_new.stock from /root/dump/orders/stock.bson
2020-03-09T04:06:29.202+0000 no indexes to restore
2020-03-09T04:06:29.203+0000 finished restoring order_new.stock (1 document)
2020-03-09T04:06:29.203+0000 doneAnda bisa mengecek koleksi di database order_new seperti gambar di bawah ini :
my_mongodb_0:PRIMARY> use order_new;
switched to db order_new
my_mongodb_0:PRIMARY> show collections;
stockBagaimana Kami Dapat Mengembalikan Menggunakan mongodump di ClusterControl
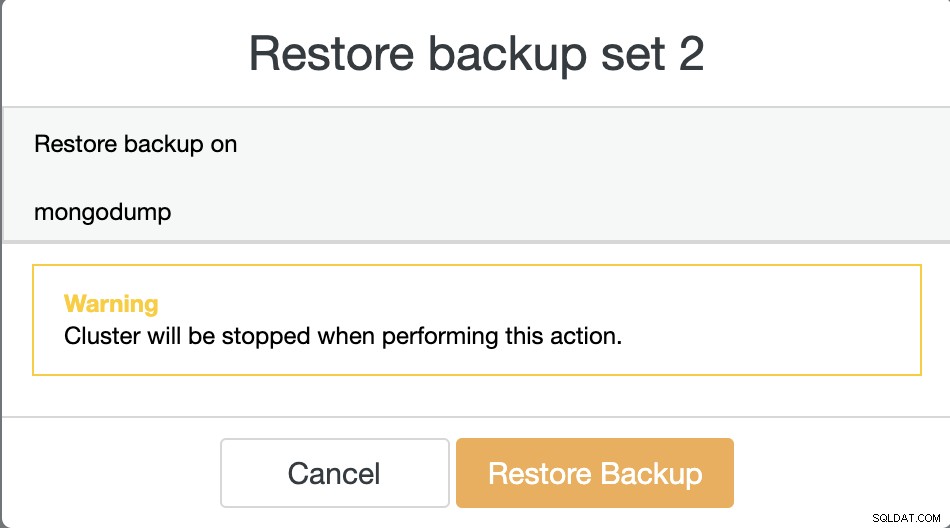
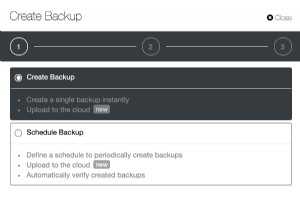
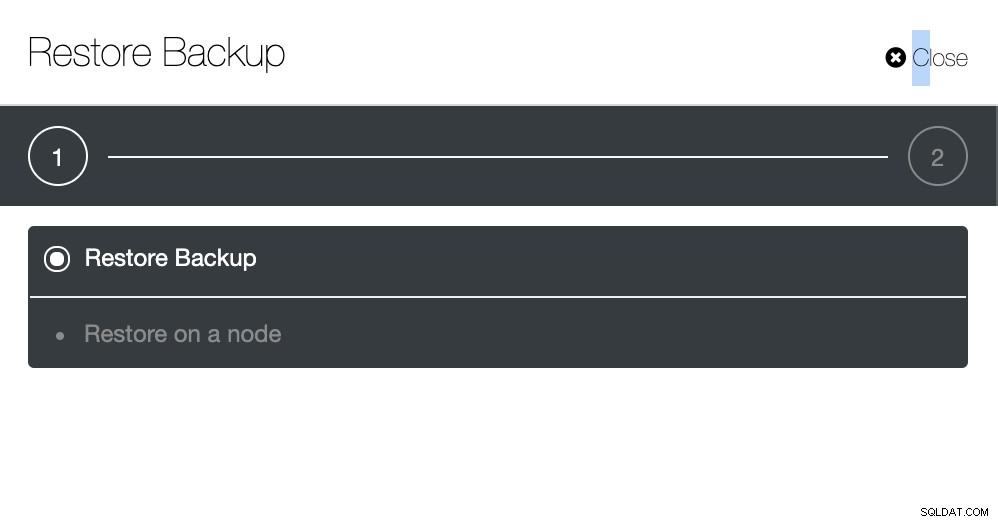
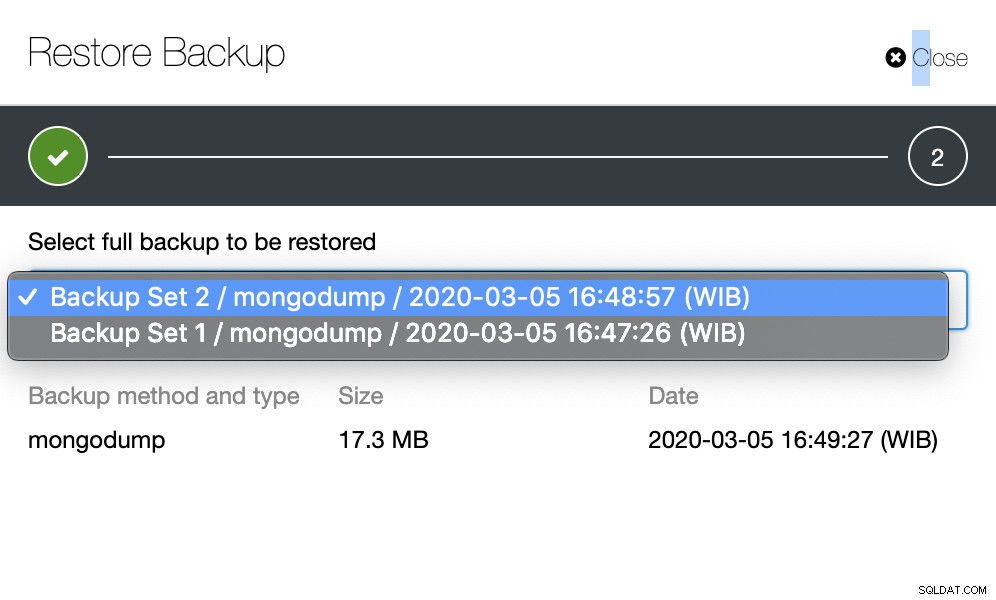
Memulihkan dump cadangan melalui ClusterControl itu mudah, Anda hanya perlu 2 langkah untuk memulihkan cadangan. Akan ada banyak file cadangan dalam daftar jika Anda mengaktifkan jadwal pencadangan, ada beberapa informasi tentang pencadangan yang bisa sangat berguna. Misalnya status pencadangan yang menunjukkan apakah pencadangan selesai/gagal, metode pencadangan yang dilakukan, daftar database, dan ukuran dump. Langkah-langkah restore data MongoDB melalui ClusterControl adalah sebagai berikut :
Langkah Pertama
Ikuti petunjuk untuk memulihkan cadangan ke node seperti yang ditunjukkan di bawah ini...
Langkah Kedua
Anda harus memilih cadangan mana yang perlu dipulihkan.
Langkah Ketiga
Tinjau ringkasannya...
