MySql adalah salah satu database paling populer.
Kami baru saja memublikasikan kursus Database MySQL di saluran YouTube freeCodeCamp.org.
Bharath Ram Manoharan dari Execute on Command membuat kursus ini. Dia adalah insinyur basis data senior dan guru yang hebat.
Kursus ini dimulai dengan dasar-dasar SQL. Kemudian juga masuk ke konsep basis data utama seperti Pemodelan Data, Kunci, Indeks, Penjelasan SQL, dan banyak lagi.
Berikut adalah topik yang dibahas dalam kursus ini:
- Cara membuat Instans AWS EC2
- Cara menginstal database MySQL
- Pemodelan Data
- Dasar-Dasar SQL - Membuat Tabel
- Dasar-Dasar SQL - Memasukkan data
- Dasar-Dasar SQL - Memperbarui dan Menghapus Data
- Dasar-Dasar SQL - Membaca data (Pilihan pernyataan)
- SQL Bergabung
- Tingkat Isolasi Transaksi
- Kunci Level Tabel
- Kunci Tingkat Baris
- Deadlock Basis Data
- Indeks Terkelompok
- Penjelasan SQL
Tonton kursus selengkapnya di bawah atau di saluran YouTube freeCodeCamp.org (tontonan 2 jam).
Transkrip
(dibuat otomatis)
MySQL adalah salah satu database paling populer, pelajari cara menggunakannya dalam kursus ini dari insinyur database senior.
Selamat datang di kursus MySQL dasar ini. Saya ingin memulai dengan menghargai Anda karena mencoba mempelajari keterampilan baru.
Izinkan saya memperkenalkan diri.
Nama saya Barbara dan saya bekerja untuk Salesforce sebagai insinyur basis data senior, saya memiliki lebih dari 12 tahun pengalaman dengan berbagai basis data Oracle menjadi yang utama, saya memiliki pengalaman bekerja dengan perusahaan seperti Chase, PayPal, Wells, Fargo, StubHub, dll.
Biarkan saya menjawab beberapa pertanyaan dasar untuk Anda terlebih dahulu, dan itulah siapa, apa, dan mengapa.
Jadi siapa yang harus mengikuti kursus ini. Kursus ini ditujukan bagi para profesional database yang ingin mengembangkan keahlian mereka.
Jika Anda seorang insinyur perangkat lunak atau pengembang tumpukan penuh dan Anda ingin mendapatkan pemahaman mendalam tentang database MySQL, kursus ini cocok untuk Anda.
Dan jika Anda seorang mahasiswa, atau mahasiswa ilmu komputer atau lulusan baru, kursus ini akan memberi Anda pengetahuan tentang internal database.
Jadi mengapa Anda harus belajar MySQL, MySQL adalah database open source paling populer dan tentu saja, Postgres.
SQL pasti ada di sana.
Saat perusahaan memindahkan data mereka dari lokal ke cloud, mereka biasanya suka bermigrasi ke database cloud native, atau database open source, seperti MySQL atau sekuel Postgres, untuk menghemat biaya.
Jadi, katakanlah Anda adalah pakar Database Oracle.
Jika Anda memperoleh pengetahuan tentang database seperti MySQL, maka Anda dapat membantu perusahaan memigrasikan data mereka dari Oracle ke MySQL, dan itu bisa sangat berharga.
Sekarang mari kita lihat apa yang dibahas dalam kursus ini.
Sekarang, pertama-tama, dengan MySQL, maksud saya, mesin penyimpanan MySQL InnoDB selama kursus ini, yang digunakan di belakang situs web perdagangan, atau bank atau lembaga keuangan, dan seterusnya.
Dan MySQL menawarkan berbagai mesin penyimpanan, saya Sam, di mesin penyimpanan memori, atau beberapa mesin penyimpanan populer, yang tersedia, kita akan belajar tentang MySQL InnoDB, saya tidak membahas jenis mesin penyimpanan lainnya.
Sekarang, inilah topik yang akan saya bahas dalam kursus ini.
Dan harap dicatat bahwa ini adalah kursus administrasi database.
Jadi ini adalah administrasi database 80%.
Dan untuk orang-orang yang benar-benar baru mengenal database, saya telah menyertakan dasar-dasar SQL.
Jadi Anda akan belajar tentang instalasi basis data, MySQL Workbench, indeks basis data, log basis data, Anda juga akan belajar sedikit penyetelan kinerja, yaitu penjelasan SQL.
Jadi ini adalah beberapa topik menarik yang akan saya bahas.
Jadi, apa yang sebenarnya Anda perlukan untuk memulai kursus ini, Anda memerlukan PC atau Mac.
Jadi jika Anda menggunakan PC, maka saya sarankan Anda untuk benar-benar melihat lembar kerja atau materi tambahan yang terlampir dalam deskripsi.
Jika Anda memiliki laptop Mac, maka Anda berada dalam posisi terbaik untuk mempelajari kursus ini.
Karena dengan begitu Anda bisa melihat apa yang saya ketik.
Dan Anda cukup mengetikkan perintah yang sama dan mengikuti dari ujung ke ujung.
Dan yang terpenting, ini adalah syarat utama, saya ingin Anda membuat akun AWS, yang benar dan memukau pada akun Layanan Web.
Jadi jika Anda tidak tahu apa yang saya bicarakan, silakan lihat lembar kerja saya yang dapat ditemukan dalam deskripsi, saya telah melampirkan beberapa sumber, yang akan menunjukkan cara membuat akun AWS, saya akan menggunakan instans dua AWS EC sepanjang kursus.
Dan saya akan menunjukkan cara membuatnya.
Tapi satu hal utama yang saya ingin Anda ingat adalah setelah setiap sesi belajar Anda, Anda dapat mematikan dua instance EC Anda.
Dengan begitu Anda tidak perlu mengeluarkan biaya yang tidak perlu.
Dan harap diingat bahwa Anda tidak harus menjalankan dua instans EC Anda 24 tujuh.
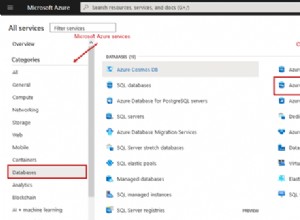
Jadi, setelah Anda membuat akun AWS, dan masuk, Anda akan diarahkan ke dasbor ini, atau halaman ini.
Dan Anda dapat membuka menu layanan di sini.
Dan kemudian di bawah menghitung, Anda dapat memilih mudah untuk jadi di sini di sisi kiri, Anda dapat memilih contoh.
Dan kemudian di sini kita akan membuat sebuah instance yang akan menjadi lingkungan lab kita.
Jadi klik pada instance peluncuran.
Dan kemudian mari kita pilih gambar untuk contoh kita.
Jadi saya akan memilih Red Hat Enterprise Linux versi 864 bit dan jenis instans saya adalah T two micro yang memenuhi syarat tingkat gratis.
Dan Anda harus memilih subnet yang sesuai.
Jika Anda baru saja membuat akun AWS, Anda bisa keluar.
Biarkan subnet default apa pun yang muncul untuk Anda.
Bagi saya, saya akan memilih saya Jadilah yang spesifik.
Kemudian pastikan untuk mengaktifkan opsi penetapan IP publik secara otomatis ini.
Karena itu akan menetapkan IP publik ke instans Anda yang dapat digunakan untuk SSH ke instans Anda, dari laptop Anda, dan membiarkan semua setelan lainnya apa adanya.
Dan mari kita alokasikan seperti 25 gigs, untuk database, atau untuk seluruh instance.
Dan Anda bisa meninggalkan sisa ISIS, pergi ke halaman berikutnya untuk membaca, Anda dapat membuat tag untuk instance Anda.
Jadi saya akan menyebutnya sebagai contoh SQL saya.
Pertama, buka halaman grup keamanan.
Dan kemudian di sini, yang penting adalah Anda harus bisa SSH ke dalam instance.
Dan Anda perlu, Anda perlu membuat aturan firewall yang tepat agar siapa pun, pada dasarnya, siapa pun di dunia dapat masuk ke instance ini, melalui Port 22.
Dan itu sama sekali tidak aman.
Dan saya akan menangani kasus ini.
Karena setelah saya selesai merekam, saya biasanya menghapusnya.
Jadi saya tahu bagaimana menangani ini.
Namun saat membuat aturan, pastikan untuk memasukkan IP laptop Anda di sana, agar lebih aman, maka sekarang Anda dapat meninjau konfigurasi Anda, lalu klik luncurkan.
Tetapi jika mau, Anda dapat membuat pasangan kunci baru, lalu beri nama saja.
Dan kemudian unduh sebelum Anda membuat instance.
Bagi saya, saya hanya akan memilih pasangan kunci yang ada.
Mungkin yang ini, dan saya katakan pengetahuan, mungkin yang lain.
Baiklah, yang ini.
Dan luncurkan instance.
Sekarang instance Anda sedang dibuat, mungkin perlu beberapa menit untuk membuat instance ini.
Oke, begitulah cara membuat instance EC two.
Dan sekarang setelah instance saya aktif dan berjalan, dan saya dapat melihat IP publik.
Nanti, saya akan menginstal MySQL pada contoh ini.
Jadi itulah yang ingin saya tunjukkan dalam pelajaran ini.
Jadi apa yang Anda lihat pada dasarnya adalah dokumentasi sekuel saya yang menunjukkan semua panduan penginstalan yang berbeda ini, seperti Windows dan Mac, dan seterusnya.
Jadi kami tertarik pada instalasi Linux pada dasarnya adalah instalasi MySQL di Linux.
Dan sebenarnya ada beberapa panduan.
Jadi yang ini pada dasarnya menginstal jannettek binary, kita lewati itu dan pergi ke sini.
Dan bahkan dalam menginstal MySQL, di Linux, ada banyak panduan.
Jadi metode instalasi yang disarankan adalah menggunakan paket RPM dari Oracle.
Tapi kita akan menggunakan instalasi berbasis repositori MySQL yum ini.
Dan sebenarnya cukup mudah.
Jadi untuk instalasi ini, kita perlu pergi ke MySQL comm dan download.
Dan kami mengunduh Edisi Komunitas dan pergi ke repositori yum.
Seperti yang Anda ketahui, instance yang kami buat memiliki Archie l Eight, Red Hat, Enterprise Linux Eight yang berjalan di dalamnya.
Jadi kita perlu mendownload rpm ini.
Tetapi kemudian kita perlu mengunduh RPM pada instance itu sendiri, yang telah kita buat.
Jadi mari kita masuk ke instance.
Jadi saya akan menggunakan SSH, dan kami akan menggunakan kunci pribadi saya.
Dan logging mudah untuk pengguna memilih pengguna default dan pada dasarnya mendapatkan IP publik dari login instance saya dan kami beralih ke root oke.
Jadi satu hal yang kita perlukan untuk mengunduh RPM ini ke instance Linux ini adalah paket W get.
Jadi mari kita lanjutkan dan instal itu terlebih dahulu.
Baiklah, setelah gerbang w terpasang, kita perlu mengunduh RPM yang baru saja kita lihat.
Jadi untuk mendapatkan link RPM ini, kita harus masuk ke download ini.
Dan kita harus klik kanan di sini dan salin tautannya.
Dan jika Anda menginstal pada OSS yang berbeda, Anda perlu mengklik tombol yang sesuai.
Oke, jadi kita punya tautannya, dan mari kita lanjutkan dan tempel tautan itu di sini, seperti w get dan tautannya.
Dan perintah itu mengunduh paket ini, sekarang kita akan menggunakan perintah RPM untuk menginstal paket ini.
Jadi paket ini, seperti yang saya sebutkan sebelumnya, akan menambahkan repo yum MySQL ini ke daftar repo sistem lokal Anda.
Dengan instalasi Red Hat Enterprise Linux, Anda mendapatkan modul MySQL secara default.
Jadi mari kita nonaktifkan yang itu.
Jika Anda tidak menonaktifkannya, maka ini akan mengganggu instalasi MySQL kami.
Jadi mari kita lanjutkan dan nonaktifkan menggunakan perintah ini.
Dan jangan khawatir tentang menulis perintah ini, saya akan meletakkan tautan ke repo Git saya dengan semua komentar ini di deskripsi.
Jadi semua ini telah dinonaktifkan.
Sekarang mari kita lanjutkan dan instal MySQL Community Server Edition menggunakan yum install MySQL community server.
Dan mari kita masukkan minus y di sana hanya untuk melanjutkan dan menerima semua petunjuknya.
Dan itu berarti menginstal semua paket ini.
Baiklah, jadi SQL saya telah diinstal.
Mari kita mulai database MySQL menggunakan sistem CTL.
Perintah.
Dan mari kita periksa statusnya.
Jadi sekarang, database SQL saya sudah aktif dan berjalan.
Oke, jadi file log software database MySQL ini ada di bawah var log.
Dan kemudian jika Anda mengambil temp dari file log ini, Anda akan mendapatkan kata sandi sementara untuk pengguna root.
Dan Anda dapat menggunakannya untuk masuk ke database MySQL.
Dan bagaimana Anda masuk, Anda menggunakan perintah ini sekuel saya minus u, itu akan menjadi root dan minus P untuk login berbasis kata sandi.
Dan kemudian kita masuk ke database MySQL.
Jadi mari gunakan kata sandi ini dan lihat apakah itu masuk.
Dan kita masuk.
Dan jika Anda menjalankan perintah apa pun pada saat ini, sekuel saya akan meminta Anda untuk mengatur ulang kata sandi menggunakan pernyataan perubahan pengguna.
Kita bisa melakukannya dengan cara yang berbeda.
Jadi ada executable yang disebut admin MySQL.
Dan ini adalah perintah untuk itu.
Admin MySQL, tanpa nama pengguna dan kata sandi p.
Kami akan mengatur ulang kata sandi pengguna root.
Dan mari kita berikan kata sandi saat ini yang merupakan kata sandi sementara ini terlebih dahulu.
Dan mari berikan kata sandi baru No.
Baiklah, kata sandi telah diterima.
Sekarang izinkan saya mencoba masuk dengan kata sandi baru ini menggunakan perintah sebelumnya SQL saya minus u terbukti dan minus p MySQL.
Biarkan saya memasukkan kata sandi yang saya katakan barusan kita masuk.
Jadi mari kita jalankan perintah show databases sederhana yang menampilkan semua database default yang datang sebagai bagian dari instalasi.
Jadi satu hal lagi yang perlu kita lakukan untuk menyelesaikan instalasi adalah memuat file zona waktu atau tabel zona waktu seperti yang ditunjukkan di sini.
Jadi jika saya memilih bintang, yang pada dasarnya adalah kueri SQL untuk dibaca dari tabel ini, Anda dapat melihat bahwa tabel tersebut kosong sekarang.
Jadi mari kita keluar dan menjalankan perintah lain.
Untuk memuat data terkait zona waktu.
Jadi ini perintahnya.
Dan mari kita lanjutkan dan jalankan.
Dan saya akan melanjutkan dan memasukkan kata sandi saya, dan itu memuat banyak data, Anda dapat mengabaikan semua peringatan ini.
Mari kembali ke database MySQL.
Jadi jika Anda memilih bintang, dari zona waktu titik MySQL, sekali lagi, itu menunjukkan banyak data.
Jadi sekarang, Anda baik-baik saja.
Dan itu menyelesaikan instalasi database MySQL.
Baiklah teman-teman, di bagian ini, kita akan berbicara tentang pemodelan data.
Oke, jadi desain database, pemodelan data, desain skema, ini semua adalah kata yang dapat dipertukarkan, istilah untuk desain database adalah proses yang berkelanjutan.
Jadi, Anda datang dengan desain dasar, ketika Anda ingin membuat aplikasi Anda.
Dan kemudian saat aplikasi, Anda tahu, ditambahkan fitur baru, penyempurnaan, peningkatan, pada dasarnya Anda mengulangi desain ini, benar, Anda terus menambahkan hal baru ke desain Anda, dan seterusnya.
Jadi hal pertama yang Anda lakukan saat melakukan desain database atau pemodelan data adalah memahami data bisnis.
Kemudian setelah Anda memahami data bisnis, Anda harus membuat desain logis dari database Anda.
Apa yang saya maksud dengan itu? Yah, pada dasarnya, Anda harus mendesain tabel Anda, kolom, yang masuk ke tabel tersebut, indeks, batasan, seperti batasan kunci utama, batasan kunci unik, bukan batasan nol, nilai default, kunci asing, ini semua adalah berbagai hal yang Anda perlu dibuat.
Saat Anda membuat desain logis skema Anda, setelah Anda benar-benar memiliki desain tabel atau desain skema dasar ini, Anda dapat mencari redundansi data, yang pada dasarnya Anda melihat di mana data Anda berulang.
Dan kemudian Anda mulai menghilangkannya dengan menormalkan tabel Anda.
Dan itu karena redundansi data menyebabkan anomali data.
Yang saya maksud adalah, ketika Anda memiliki beberapa kemunculan data yang sama, ketika Anda, katakanlah, memperbarui data tertentu, Anda harus memperbarui di banyak tempat.
Dan jika Anda lupa memperbarui satu tempat, sekarang Anda memiliki dua versi data yang sama di database Anda.
Dan itu menciptakan anomali data seperti inkonsistensi data sebenarnya.
Dan semua itu terjadi karena redundansi data.
Jadi apa yang kita lihat pada dasarnya adalah sebuah spreadsheet dan spreadsheet pada dasarnya adalah sebuah meja besar sebuah meja besar, bukan? Dan, apa yang akan kita lakukan pada dasarnya adalah merancang tabel untuk situs web e-niaga, situs web e-niaga pada dasarnya seperti zona yang menakjubkan, atau E Bay, atau apa pun, seperti bisnis online, seperti situs web e-niaga online, seperti Alibaba , atau apa pun, kan? Katakanlah seperti, Anda hanya memiliki satu tabel di database ini, bukan? Dan Anda mulai, saat pesanan masuk, melalui situs web ini, Anda mulai memasukkan data ke dalam tabel ini, bukan? Anda telah, Anda tahu, mari kita lihat beberapa hal yang akan Anda catat di tabel ini, kan, Anda jelas membutuhkan seperti hitungan pesanan Anda.
Jadi, Anda mungkin ingin memberi nomor pesanan Anda, lalu bagaimana hasilnya, Anda tahu, apakah itu desktop atau seluler? Atau produk apa? Seperti, Anda tahu, di sini saya mendapatkan beberapa buku, judul buku, dan kemudian harga produknya.
Dan kemudian siapa detail pelanggan pelanggan, detail pembayaran, detail pengiriman, dan sebagainya.
Jadi ini semua adalah bagian dari kata e commerce, pada dasarnya.
Benar? Dan Anda memiliki satu meja raksasa.
Dan jika Anda melihat data di sini, bukan? Jadi, Anda tahu, di sini, saya punya beberapa pelanggan yang membeli Anda tahu, seperti dua produk produk yang berbeda, kan.
Jadi, dan Anda dapat melihat bahwa data telah berulang.
Yang saya maksud adalah seperti setiap kali saya membeli produk yang sama, saya harus mengulang data ini, seperti pesanan pertama yang masuk melalui situs web desktop yang dibawa sejak lahir dan kemudian Anda dapat melihat semua detail ini pelanggan dan semua detail tentang produk dan pembayaran, juga detail pembayaran.
Kemudian pesanan kedua yang datang dari orang yang berbeda, tetapi kemudian itu, Anda tahu, pesanan untuk produk yang sama dan Anda harus mengulang informasi produk.
Benar.
Yang ketiga dari pelanggan sebelumnya.
Tapi kemudian kali ini dia membeli membeli produk yang berbeda, informasinya, informasi pelanggan telah berulang sebenarnya.
Jadi ada banyak data redundansi data telah berulang.
Jadi, ini pada dasarnya adalah database yang didenormalisasi, di mana Anda hanya memiliki satu tabel atau beberapa tabel, kami mencadangkan semua informasi dari situs web Anda, atau bisnis Anda ke dalam beberapa tabel ini.
Sebenarnya, ini adalah versi denormalisasi dari database Anda, mari kita lihat apa lagi yang bisa Anda lakukan.
Jadi apa yang dapat Anda lakukan pada dasarnya, Anda dapat mulai dengan tabel denormalisasi dasar ini, dan kemudian Anda dapat mulai mengeluarkan semua informasi yang berlebihan dari database atau tindakan tabel Anda, hal pertama yang saya lakukan adalah mengambil seperti informasi pelanggan , mereka meletakkannya di tabel terpisah, kan.
Dan saya hanya memiliki detail pelanggan di sini.
Dan saya mulai suka memasukkan nomor ID untuk setiap ID pelanggan atau nomor pelanggan, apa pun namanya.
Setelah saya mengambil informasi pelanggan, saya memiliki tabel Pesanan, tabel awal, saya memanggil tabel Pesanan terlihat seperti ini sekarang, kan? Dan Anda dapat melihat bahwa saya memiliki kolom ID pelanggan seperti di sini.
Dan apa kolom ID pelanggan ini? tebakan Anda? Benar? Jadi kolom ID pelanggan ini sama dengan yang Anda lihat di sini.
Benar? Jadi dan mengapa saya memilikinya karena saya membutuhkan cara untuk menghubungkan baris-baris ini.
Seperti yang Anda tahu, seperti, Anda tahu, ini adalah kolom, ini adalah baris, baris ini, saya harus bisa berhubungan dengan pelanggan, bukan? Jika saya mengambil informasi pelanggan, lalu bagaimana saya bisa berhubungan? Anda tahu, meja ini dan meja itu? Ini melalui kolom umum, atau sekelompok kolom.
Sebenarnya, dalam hal ini, ini hanya satu kolom.
Jadi ID pelanggan, kan? Saya seperti meletakkan nomor ID di sini.
Dan apa lagi yang sebenarnya bisa kita ambil dari tabel ini.
Jadi ini adalah satu tingkat normalisasi.
Benar? Jadi mari kita tetap normalisasi seperti mengeluarkan detail produk.
Benar? Jadi detail produk juga berulang.
Jadi di sini, Anda tidak merasa terlalu sakit, karena hanya ada tiga catatan di tabel ini.
Bagaimana jika tabel memiliki jutaan catatan, bukan? Inilah mengapa kita perlu menormalkan tabel.
Sekarang Anda benar-benar mengeluarkan informasi produk dan memindahkannya ke tabel lain.
Dan kemudian saya memiliki kolom ID produk hanya untuk nomor, seperti ID produk sebenarnya, dan tabel Pesanan Anda akan terlihat seperti ini, kemudian Anda mengambil informasi pembayaran ke tabel yang berbeda.
Dan tabel Pesanan Anda akan terlihat seperti ini.
Ini pada dasarnya adalah proses beralih dari skema yang didenormalisasi atau database ke database yang dinormalisasi.
Saat Anda memiliki data dalam satu tabel, maka Anda tidak perlu melakukan sambungan apa pun.
Jadi Anda mungkin bertanya sebenarnya, apa sebenarnya joint, ketika Anda menjalankan kueri, seperti menggunakan SQL, SQL adalah bahasa bukan? Sebuah Bahasa Kueri Terstruktur, ketika Anda menjalankan perintah di database Anda, Anda, Anda bisa mendapatkan semua data Anda dari satu tabel ini jika database tabel Anda benar-benar didenormalisasi.
Sedangkan jika Anda memiliki banyak tabel, Anda perlu mengurutkan atau menggabungkan kandang dan kemudian Anda harus mengeluarkan datanya.
Jadi itulah yang disebut bergabung dengan tabel.
Jadi, ketika Anda memiliki database denormalisasi, Anda tidak perlu melakukan banyak sambungan.
Dan itu cukup bagus karena database Anda tidak perlu berpikir banyak untuk mendapatkan datanya.
Anda mengatakan saya ingin data ini dan data ini tersedia di tabel ini.
Jadi sangat mudah.
Sedangkan seperti dalam database yang dinormalisasi, ketika Anda menggabungkan banyak tabel, maka mesin database Anda yang mereka gunakan untuk memanggil pengoptimal, di Oracle atau di sebagian besar rekaman sebagian besar database.
Jadi mesin database ini harus berpikir lebih seperti, oke, tabel mana yang harus saya pindai terlebih dahulu? Dan bagaimana saya harus memfilter data dalam tabel ini.
Dan kemudian Oke, saya mengambil set hasil dari tabel itu dan harus bergabung dengan tabel lain ini.
Jadi ada lebih banyak pemikiran bahwa ada lebih banyak pemrosesan yang harus terjadi di server mana pun database ini berjalan.
Benar.
Dan karena itu, kinerjanya akan menjadi agak fleksibel.
Kanan bawah dan itu akan menghabiskan banyak sumber daya dan Anda memiliki semua yang terjadi pada skala seperti banyak operasi yang terjadi pada saat yang sama, maka pada dasarnya Anda memiliki kinerja yang lambat sebenarnya, atau setidaknya lebih rendah dari apa yang seharusnya terjadi di denormalisasi database, tetapi pada saat yang sama, kami menghapus begitu banyak pengulangan data atau redundansi data sangat rendah, karena itu, penyimpanan yang dibutuhkan dalam database yang dinormalisasi jauh lebih rendah.
Jadi, Anda tidak dapat benar-benar menyukai generalisasi dan mengatakan database yang dinormalisasi akan selalu lambat atau database yang didenormalisasi akan cepat, itu semua seperti itu tergantung sebenarnya Anda harus melihat data dan melihat berapa banyak pengulangan yang terjadi, dll, dll.
Jadi, tapi umumnya begini, saat Anda menjalani proses desain ini, kan, Anda tahu, lihat apa yang sebenarnya telah kami lakukan, kan.
Jadi, kami telah memutuskan, tabel yang kami butuhkan, seperti yang Anda tahu, kami memiliki pesanan, produk meja mendapatkan pelanggan dan pembayaran, dan kami memutuskan nama kolom.
Dan bukan hanya itu untuk setiap tabel, Anda perlu memutuskan apa yang akan menjadi kunci utama.
Yang saya maksud dengan itu sebagai kunci utama adalah kunci unik dan yang sebenarnya tidak boleh nol, yang sangat penting.
Jadi dengan menggunakan kunci utama ini, Anda harus dapat mengidentifikasi catatan apa pun di tabel ini, baris apa pun di tabel ini.
Misalnya, jika saya katakan di sini, kunci utama adalah nomor urut, maka saya bisa, kapan saja jika saya memiliki nomor urut, maka saya dapat mencari tabel ini, katakanlah nomor urut sama dengan dua, saya hanya bisa mengeluarkan catatan ini dari basis data saya.
Dan kemudian Anda juga harus memiliki beberapa kunci unik, kan.
Jadi kunci unik hampir mirip dengan kunci utama.
Dan kunci unik sekarang bisa menjadi kunci utama tidak boleh nol, seperti yang saya sebutkan.
Dan kemudian Anda juga dapat memiliki indeks di meja Anda.
Jadi indeks pada dasarnya adalah cara untuk memilih data harian Anda lebih cepat.
Katakanlah saya sering mencari tabel ini berdasarkan email pelanggan, maka saya membutuhkan indeks pada kolom email pelanggan, kan, Anda harus memutuskan itu.
Dan Anda perlu memutuskan kolom mana yang boleh null.
Benar? Di sini, tidak ada kolom yang boleh null.
Katakanlah Anda memiliki kolom lain yang disebut preferensi a preferensi pelanggan seperti dalam jenis pengiriman apa atau jenis apa atau nomor telepon mana yang disukai, atau semacamnya.
Jadi itu bisa menjadi kolom nol, kan? Jadi, Anda tidak boleh memiliki kolom apa pun.
Jika tidak, Anda menetapkan kolom Anda sebagai bukan nol.
Katakanlah seperti, di tabel Pesanan, Anda memiliki kolom terkirim ini, ketika pesanan pada dasarnya dibuat saat pelanggan membeli produk di situs web Anda.
Tentu tidak langsung terkirim, pada saat pembuatan pesanan, kolom yang terkirim akan selalu memiliki nilai no atau n, n kan? Semua hal ini, semua keputusan yang kita buat yang kita bicarakan ini adalah bagian dari desain skema.
Dan setelah Anda mengetahui semua ini, Anda dapat memasukkan informasi tersebut ke dalam alat desain Anda alat desain Hubungan Entitas.
Dan di bagian berikutnya, saya akan menunjukkan kepada Anda bagaimana saya melakukannya di meja kerja sekuel, meja kerja dunia sekuel saya, pada dasarnya, Anda sebenarnya dapat memiliki representasi bergambar dari desain logis basis data Anda, kan.
Dan pada dasarnya itulah yang Anda sebut diagram ER.
Dan tentu saja, Anda dapat berbicara tentang hubungan antara dua tabel, katakanlah Anda dapat mengatakan oh, tabel di tabel ini, mereka memiliki hubungan satu ke banyak, misalnya, setiap pelanggan dapat memesan banyak.
Jadi itu sebenarnya hubungan satu ke banyak, kan.
Tapi satu, lho, satu pesanan hanya bisa dilakukan oleh satu pelanggan.
Benar? Jadi, jadi semacam itu.
Jadi, Anda memiliki hubungan satu ke satu, hubungan satu ke banyak, atau hubungan banyak ke banyak antar tabel.
Sebenarnya, ini semua adalah bagian dari pemodelan data.
Tetapi Anda tidak perlu terlalu khawatir tentang itu, selama Anda memiliki gagasan yang jelas tentang data apa yang masuk ke database Anda.
Dan di sepanjang jalan, Anda perlu menentukan seperti tipe data kolom Anda.
Sebenarnya, itu sangat penting.
Nama Anda akan menjadi karakter liar.
Anda tahu, nomor telepon bisa berupa angka, lalu email kembali seperti grafik jam tangan.
Dan kolom ID atau kolom nomor Anda akan menjadi int atau angka.
Ini semua adalah beberapa keputusan yang akan Anda buat Anda Dalam tugas pemodelan data, sebenarnya, cukup banyak yang ingin saya katakan tentang pemodelan data, lalu masih banyak lagi yang bisa kita bicarakan.
Dan seperti atom, seperti Anda, Anda memiliki semua alamat, semacam atribut yang dikemas ke dalam satu kolom, kami, kami perlu membaginya juga.
Jadi itu disebut atomisitas.
Anda dapat memiliki alamat secara terpisah, kota secara terpisah menyatakan secara terpisah, dan, Anda tahu, kode pos secara terpisah, kan.
Jadi hal-hal semacam itu, ada nuansa yang membuat database Anda semakin efisien.
Dan, tentu saja, kita tidak akan membahas banyak detail di sana.
Tapi ini adalah pemodelan data dasar yang perlu Anda pahami.
Dan seperti yang saya katakan sebelumnya, di bagian selanjutnya, saya akan menunjukkan cara mengambil ini dan memasukkannya ke meja kerja sekuel saya.
rekap cepat dari apa yang saya lakukan di bagian terakhir, pada dasarnya saya membuat desain logis dari situs web e-niaga.
Jadi yang Anda lihat adalah tabel yang saya mulai.
Ini adalah tabel denormalisasi, dan pada dasarnya kami mengambil tabel denormalisasi ini, dan kami menormalkannya.
Seperti yang Anda lihat, ada empat versi tabel ini, saya menyebutnya tabel Pesanan tabel.
Jadi ada empat versi yang berbeda.
Dan saya dengan setiap iterasi, saya mengeluarkan data berulang.
Jadi akhirnya, kami mendarat dengan empat meja, selain dari tabel Pesanan yang asli.
Jadi sekarang kami juga memiliki produk dan pembayaran pelanggan.
Dalam video ini, saya akan mengambil ini sekarang semua kandang dan kemudian saya akan mengambil struktur, dan saya akan membuat desain logis.
Oke, jadi mari kita pergi ke MySQL Workbench dan saya sudah terhubung ke database, apa yang akan saya lakukan adalah pergi ke File dan pergi ke model baru.
jadi di sini kita dapat menambahkan diagram ER baru, diagram hubungan entitas.
Dan sebut saja database ini eecom.
Toko, sesuatu seperti itu.
Jadi mari kita lanjutkan dan mulai membuat tabel kita.
Sekarang, saya tidak akan membuat keempat tabel yang mungkin akan memakan waktu lebih lama atau lebih lama, dan saya akan membuat beberapa tabel.
Dan itu sudah cukup bagi Anda untuk memahami bagaimana kami melakukan ini.
Jadi mari kita mulai dengan tabel Pelanggan.
Jadi tabel pelanggan memiliki lima kolom, ini adalah ikon untuk membuat tabel baru, Anda dapat menarik dan melepas, atau Anda dapat mencoba menggambar sekarang klik dua kali lalu buat tabel yang disebut pelanggan dan di sini kita dapat mulai meletakkan tabel di kolom beri nama ID pelanggan, dan kemudian ini akan diisi oleh urutan Anda.
Jadi sequence adalah objek database.
Dan itu akan menjadi bilangan bulat.
Jadi kita bisa membiarkannya apa adanya.
Dan kita bisa memilikinya sebagai kunci utama, itu bagus dan kunci utama harus diisi, tidak bisa sekarang.
Jadi itu dipilih secara otomatis.
Yang berikutnya adalah nama pelanggan, kita dapat membaginya menjadi nama depan, dan kemudian kita dapat memilih jam tangan kita dan mungkin memberikan sedikit lebih banyak ruang seperti pada panjang nama dan kemudian nama belakang, saya dapat menonton 100 dan kemudian semua ini tidak bisa sekarang jadi kita bisa memilih batasan bukan nol.
Jadi ini adalah batasan berbeda yang tersedia.
Mari kita lanjutkan dengan alamat satu lagi alamat berikutnya.
Dan jika Anda ingat saya berbicara tentang atom.
Jadi Anda ingin kolom Anda menjadi seperti yang Anda ketahui, atomik, dalam arti bahwa di sini, pada dasarnya seluruh alamat dikemas ke dalam satu kolom.
praktik yang baik untuk benar-benar membaginya menjadi kolom atom sebagai alamat secara terpisah, kota menyatakan secara terpisah dan kemudian kode pos secara terpisah.
Jadi kita memiliki semua ini, tentu saja, tidak ada yang bisa sekarang dan apa lagi yang ada? Jadi nomor telepon pelanggan, nomor telepon akan menjadi semua nomor.
Tapi kemudian saya ingin mendapatkan 10 nomor, tentu saja bukan null dan email pelanggan.
Jadi saya hanya bisa bilang email id 100 Oke, bukan null.
Jadi karena I Id adalah kunci utama di sini atau ID pelanggan, saya ingin memastikan bahwa kami memiliki batasan untuk menghindari pengulangan informasi pelanggan.
Misal, jika Anda memiliki satu data pelanggan untuk ID satu, saya tidak ingin pelanggan yang sama, data pelanggan berulang untuk ID yang berbeda, misalnya ID dua.
Jadi saya akan membuat id email unik untuk setiap record di sini.
Dan kemudian mungkin atau mungkin juga nomor telepon.
Jadi ini semua adalah batasan kunci unik, atau batasan unik.
Itu dia.
Jadi kita sudah membuat tabel Pelanggan.
Jadi mari kita kembali dan melihat apa lagi yang kita miliki.
Jadi sekarang mari kita buat, saya sebut produk.
Dan pada dasarnya Anda melakukan hal yang sama, pilih untuk membuat tabel baru.
Dan sekarang di sini, Anda cukup menggambar yang ini, saya akan menyebutnya produk.
Dan kami ingin melalui proses yang sama dan kemudian memasukkan nama kolom produk di sana.
Jika Anda bertanya-tanya, ini adalah kolom ID pelanggan yang sama yang kami tambahkan di sini.
Dan kita akan menjadikannya kunci asing dalam satu menit.
Jadi mari kita lanjutkan dan bagi menjadi beberapa kolom.
Karena, sekali lagi, semuanya dikemas dalam satu kolom, yang bukan praktik yang baik.
Jadi katakanlah sebut saja nomor kartu kredit.
Jika pelanggan menggunakan PayPal, maka kami memerlukan email tersebut.
Jadi bisa menggunakan id email di sini.
Jadi ini bisa null atau tidak null berdasarkan jenis pembayaran yang digunakan.
Jadi tidak apa-apa, jadi tanggal kedaluwarsa akan menjadi kolom tanggal.
Jadi, mari kita ubah itu.
Jadi, jika Anda tidak yakin, Anda dapat menekan drop-down itu dan kemudian memilih tipe data yang tepat untuk masing-masing.
Hal lain yang saya sebutkan, yang pada dasarnya adalah tentang kunci asing, ID pelanggan ini sama dengan yang kami tambahkan di sini.
Jadi, mari kita jadikan ID pelanggan itu sebagai kunci asing.
Jadi kita bisa menyebutnya sebagai kunci asing ID pelanggan.
Kemudian tabel yang akan direferensikan adalah pelanggan.
Dan kolomnya akan menjadi ID pelanggan.
Dan hanya itu.
Jadi Anda dapat melihat bahwa sekarang kita memiliki koneksi atau relasi antara dua tabel ini, saya akan menambahkan tabel Pesanan juga.
Saya telah membuat tabel Pesanan juga, yang merupakan tabel utama dan sekarang saya akan membuat beberapa kunci asing untuk pesanan.
Semuanya sudah selesai.
Jika Anda ingin membuat indeks apa pun saat ini, Anda dapat melakukannya.
Jadi saya rasa kita sudah selesai.
Jadi pada dasarnya kami menambahkan empat tabel ke desain logis kami keempat tabel ini dan kemudian kami telah membuat kolom dan kemudian menentukan tipe datanya.
Dan juga kami membuat kunci asing dan tentu saja kunci utama dan kunci unik untuk setiap tabel.
And you can see the foreign key relationship you know clearly showing here and that You know, that's what you would do to create a data model.
Alright, so now actually, let's just go ahead and create a SQL script for this data model.
So you go to database, and then do forward engineer.
And then basically, you provide the database details where you want to create this, these tables are the schema.
So this is, these are my details continue, go to the next one, provide the password.
Right now we are connected, I had to try the password two, three times.
And this has basically created SQL script for us to create the schema and the tables with all the primary key unique key and foreign key constraints.
So what we can do is we can just continue and then now the database or the schema is created as it goes through and then executes that script.
And close.
And now you can see the stables are actually created.
So you can even go to your SQL editor, and then you can start reading your can start querying your tables.
There you go.
So you ready came back, of course, there is no data in it.
And you can now start using your database.
So we actually successfully created the basic schema, or designed the data model for this e commerce website.
Table creation or a CREATE TABLE command starts with CREATE TABLE keyword followed by the name of the table and followed by parenthesis.
So within the parenthesis, this pair of parentheses, you have all these column names, followed by the column data types, and followed by the constraints.
And you can also use this auto increment keyword, if you want your column value to be incremented.
Automatically, as you load values to the as you load records to this table, and after the column definition, you have the option of specifying the keys like primary keys, unique keys, foreign keys, and so on, you can also specify the storage engine type as part of your table creation.
And this is a very simple table.
You can also have partition tables or partition tables that have compressed tables, encrypted tables, and all these things require special keywords to be used in your table definition.
And please check my sequel documentation.
If you want more details about the syntax.
As mentioned, I'm using just integer watch char data types, the MySQL documentation shows like all these different data types like numeric, date, and time data types, string data types, like the ones I'm using, and JSON spatial.
So these are all available in MySQL for you to use.
So let's go ahead and create this table.
And before creating the table, I want to run this drop command just to make sure the table doesn't exist.
And I'm going to be creating that table and see if the table has been created.
Yes, the table has been created successfully, I'm going to be running a select star from the table name to see if I can successfully query from this table as well.
And then it returns.
Basically, it doesn't return anything that means no data exists in the stable.
And that's how you create a table using CREATE TABLE syntax.
Finally, there is actually a default keyword which helps you specify default values for a certain or for your columns.
So if you don't specify a value for this quantity column in your insert statements, or when you're loading through procedures, loading data through procedures, it will automatically take this default value.
That's pretty much it.
And I'll see you guys in my next MySQL SQL session.
So I just did a describe on the table that I created and it has product ID product name, product type, price and quantity.
And you can see that product ID is also an auto incrementing column right now there is no data in it a typical insert Statement looks like this, let's go to insert into keyword and the table name a bunch of columns within parenthesis, the ones that you want to populate, followed by the values keyword.
And followed by the actual column values.
If you can realize I haven't actually specified the product ID value because it's an auto incrementing column.
So let's go ahead and execute this and insert statement goes through.
So let me also run the select statement.
As you can see, the product ID table has taken the value one, and that's happened automatically ident supply the value one, so I'll go ahead and commit the change.
And then let's actually move on to the second variation.
So this time, I'm going to specify a value for product ID, nothing else is different.
So just want to show you that it is possible.
So it goes through and then a commit.
And then let's do a select to make sure the value has been inserted.
So let's go to this third variation of this insert statement.
So it's going to be pretty much the same, except Actually, I'm going to just jump some values and then insert the value 10.
For this product ID column, I'll go ahead and do that.
It goes through a comment and select again, then you can see that that is also fine.
So yeah, so that worked.
So you can actually jump a few values.
let's actually look at the next variation.
Again, I'm going to insert a record into the stable, with no product ID specified exclusively.
Or explicitly, the product ID column is missing over here, and I'm going to run the insert statement and commit.
And then I'm going to run the select statement.
So just wanted to show you that wherever the latest value is for this auto incrementing column, I inserted the value 10 for product ID last time, and then the next time I do an insert is auto increment kicks in and then you know increases, increases this value from 10 to 11, right picks up from the value that was inserted last time.
And I'm gonna just take another insert statement, and this time, it's actually insert into the table name.
And instead of the values keyword, specifying the column names, values, etc, we actually select from a different table.
Basically, if the products three table is exactly matching the structure of products, one table, then we can do even a select star from if the columns don't match exactly as in like products, one has a different set of columns, and product three has a different set of columns, then we need to make sure that we actually select the columns.
And then, for example, this product ID from products, three maps to this product ID and products one, and product name from products, three maps to product one in I'm sorry, Product Name and product one, and so on.
Let's go ahead and run this and see what happens.
And then that goes through.
And then if I now select the products, one table, you can see like take all these rows are inserted properly.
And basically the products one table is populated.
And then we got all the data from products three table.
So this time I want to show you the insert statement.
Again, this is kind of like a bulk insert or multiple insert just combined into one statement, you can see the insert into clause is specified only once but in the values spark in this clause, actually, we have two rows specified at the same time.
So we can even use such as syntax and a commit, and then do a select all good.
So these are a few variations of insert statement.
I hope you understood how this works.
I will see you guys in the next session.
Hey, my sequel learners.
So in this session, actually, I'm going to be talking about update and delete statements.
So as usual, I'm going to be using my eecom store schema.
And I will be using my products table to do this demo.
So just quickly, if we select products table, there's two rows right now.
So the first update is just to show you the syntax of update.
So you have the update keyword followed by the table name followed by set keyword.
And then you can have as many columns as your table contains, but in this case, I've got only one column and I can just run this update.
So let's actually add one more clause to it, which is the where clause and this is to just update the rows that Do you really want to update so we will be updating only the rows with product ID equals one.
So let's go ahead and do that.
And then I'll just come in and do a SELECT FROM products quantity has gone up by 50, it went from 299 to 349.
Now one more thing to realize is actually like you can, you know, you can specify literal values, when you are updating, you know, that happens all the time.
Or you can also like specify a formula, or you can have SQL functions like replace substring, length, and so on, you know, you can look at my SQL documentation to see what kind of functions are available in this update, like, I just wanted to show you the syntax, basically, to let you know that like you can have multiple, you can update multiple rows at once.
In this case, I put like, values one, two, and three, you know, you don't have to do one row at a time or anything.
So when you use the end keyword, and you can say product ID or whatever, call them in and then a bunch of values to select the rows that you want.
And there are other ways to do it.
But the point being, you can update multiple records at once.
And another interesting usage is using the case statement, you know, you can let's say you have a bunch of update statements, one for product ID equals one another for product ID equals two and another for the other product ID values.
And you can combine all that into one UPDATE statement using a case when then and clause or keyword basically, in this case, actually, for product ID equals one, I want to increment the quantity by 50.
And product ID equals two, I want to increment the quantity by 100, and so on.
So then I've got this similar WHERE clause are similar to the one that I showed you before, I'm going to run this you can see the columns are getting incremental, I'm not going to go back and check I'm pretty sure that it's done the right thing.
So the next one is basically when you want to delete records from a table or purge data from a table, then you can just use a simple delete statement.
And if you are wanting to delete a particular row, again, similar to the update, you can use a where clause to actually like narrow down the data that you want to delete this particular statement, which is delete from a table name, and then where column name equals or the column value.
And you can have multiple filters in here.
So here I don't have the row number three, I think I deleted it already.
Alright, so let's keep going products three table, I just wanted to show you it contains a lot more data than my other table.
You can see it contains data about 5849 rows, I wanted to also show you this particular parameter MySQL configuration parameter to basically enable and disable safe updates.
So let's say like if your delete statement or UPDATE statement is not using a primary key column in the where clause, you know, then basically if you enable this particular parameter, let's say by setting this one, and then if you run your delete, you will get like an error code 1175 it mean, and then it says you're using safe update mode, etc, etc.
It's not leading you to the run this kind of add delete statements, because it could be a good cause bad performance.
So if I disable the same thing, and then if I run the Delete statement, and then just run a select again, then it should go through because now the parameter is disabled.
And two more things.
One is actually like if you have a huge table and you want to delete only a few rows at a time, then you can use the limit keyword to limit the number of records that are deleted by the statement, you know, in this case, because I wanted to delete only 10 rows, let's go ahead and do that.
And it should work just fine.
And then if I do a select, you'll see the difference in the row count actually, now it's like 5839, before it was fired four nights.
So that's how the LIMIT clause helps you also in the limit floors, you can also specify the ORDER BY clause.
It basically sorts the data by these columns, first by quantity, then by product ID, then it deletes the top and or 100 or whatever value you put here, actually.
So let's go ahead and do it and then select again.
Yeah, Kearney, seven D is gone.
So the top 10 rows are gone.
And yeah, that's pretty much it.
Actually, those are all a few variations of update and delete statements.
And of course, there's lots of tangents we can get into but I will leave that task to you.
And I hope it was useful.
And if you have any questions, let me know in the comments.
I'll see you guys in the next session.
MySQL learners.
So in this session, we'll look at SELECT statements, not just the syntax But also like some ways you can actually like improve the performance of your queries, I'm going to be using the schema called income store to explain about this SELECT statement in its most simple form will look like this.
So you have the Select and from keywords and then after the Select, you specify the Select list, which is the columns that you want to select.
If you specify a star, or asterik, that actually selects all the column columns from this table, and then after the from keyword, you specify the table names where you want to select the data from.
So if I do a select star from products underscore three, it's going to return all the data from products underscore three table.
But do remember that anytime you are using a star after the Select, or in the Select list, you're basically querying all the columns in this table, you don't need to query all the columns in the table in most of the cases, so you only like specify the columns that you need to query.
So in this next query, let's go line by line and see what changes that have done to this query to make it better.
So let's say I want to select only these columns.
That's why I specified only these columns in the Select list.
In the from clause, I have specified products underscore three table very often you will be selecting from multiple tables, you need to join the tables and then retrieve useful data out of it.
And in the where clause, you specify all the filters, or the conditions based on which your data will be filtered out.
So here I am, including only the data which have quantity less than 25.
So this way, I'm able to actually filter most of the data out of this table, this is very useful in minimizing the amount of data that you retrieve from the database.
And your queries are going to be fast as ordered by is basically going to sort the data that is retrieved based on the columns that we specify here.
So here, I'm just like ordering by product name.
And of course, like when you're sorting data, especially when you're sorting a lot of data, the operation can be expensive, unless your source buffer size, that is actually the memory area where the slots happen.
Unless it is sized properly, the operation can be really slow.
So you need to pay attention to that configuration as well.
And I have this other query, which just goes to show you that like this is a very simple SELECT statement.
Again, in this select, actually, I have only the Select keyword and a function, I'm using the now function.
But there are several other SQL functions that you can use in the script, for example, I can use the database function to return the database that I am actually connected to.
And as you can see, I am actually able to invoke multiple functions in the same query.
So that's pretty much it.
I'll see you guys in the next session.
In this session, I will be teaching about SQL joints, let's dive straight into the demo, I will be using a schema called eecom store.
And I'm creating a table first called T one with one column, the column name is C one, and I'm inserting these two values in this table.
One and two, I'm creating another table called T two with a column called C one and inserting these two values again, into table D two, one and three.
So it's one and two here and one and three, here, we're going to go ahead and run a commit to make my changes permanent.
So I'm going to be just creating these two tables just to show you the records, D one has one and two, D two as one and three.
Of course, a join is an operation that joins two tables.
And we have all these different types of joints, we'll go one by one and understand what they are.
So this is the syntax, so select an a column list that you're selecting.
So we're joining T one and T two.
And then we're specifying the kind of join that we are making.
And then we also have this on keyword.
And then comes the condition on which the table is joined.
So I'm going to go ahead and run this query and see what happens.
As you can see, this query, this inner join has returned the value one, so that means actually, so it returns the values that exist in both the tables that match.
So that's what INNER JOIN does.
So let's just change it to a left to join, go ahead and run it.
Now the left join is gonna return all the values from your left to table which is T one.
So T one has values one and two are the rows one and two, and then T two, it's going to return only the matching values.
And then for this value, which only exists in table T one, it's going to return and now and then I'm going to change it to right join and as you might have guessed it's going to return all the way Use from table t to in the places where there is no matching value, it's going to return a null.
So let's see if that happens.
That's what we expected.
So we got all the rows from T two, and then for three, there is no matching value and T one, you know, that position has no value.
Now we'll jump quickly to a union.
And then we'll come back to a full join, a union is basically going to look like this.
So two queries, and then in between, we have the union keyword, let's see what it returns, you can see that it's written one, two, and three.
So that's actually the rows from both the tables, but it's kind of like combined the data and then smashes them together.
And then you have one, two, and three, and then let's run the same query with a slight difference.
We'll put union all and then we'll see what happens.
That's written one, two, and one, three.
So that's returned all the data from both the tables, but except this time, we have duplicate values, Union gets rid of all the duplicate values, it's almost like a set where you have a unique set of data, a union all returns all the values, including duplicate data.
Jumping back to full join, we don't have a full join keyword.
So rather, we do full join this way in my sequel.
So basically, you have the similar query where you're joining T one and T two, a left join first on this, there's one column that we have, and then you have another query, again, joining T one and T two on this, just one column, but then we are doing a union of these two, and that's going to return the data from both the tables, we have one, two, these two are matching, then for two, there is no matching value.
So it returns and now for three, there is no matching value in T one, it returns a null over here.
So this is a full joint, that's basically all the joints, all different types of joints that you can do in MySQL, I hope this example was clear.
And I'll see you guys in my next session.
All right, my SQL learners.
In this section, we're going to learn about locks.
More specifically, I want to talk about the isolation level section.
So the first thing is just see what I have here, I have two terminal sessions.
One is in black.
The other one is in slight maroon color.
So I'm actually going to log into the database as the root user.
And I'm going to do the same thing over here.
There you go.
I am logged into my SQL database.
So I have a little script here to create a dummy table called T one.
Okay, so let me show you the SQL script.
At this point, actually, you might not understand the SQL syntax and so on.
But then let me explain.
Briefly, first thing I'm doing is setting auto commit to zero or commit is basically a command that you use to save your work.
Basically, the data changes that you're doing is permanently stored in the database.
When you issue a commit command, in my sequel, you have this variable called auto commit, which is turned on by default, meaning all your commands will be automatically committed.
If you don't turn this off, I want to have more control over what I'm doing here.
So basically, I am doing an auto commit, disable first, so and then I'm starting a transaction.
And just to be safe, I'm dropping this table if I had already created it.
So this table doesn't exist.
So it says unknown table.
And the next thing is I'm creating a table called T one in eecom store schema.
And then the column name is C one.
And the data type is int and its primary key.
So and then I'm actually inserting value, just one row into this table called p one, right, the one that we just created.
And I issue a commit command, alter or the alternative to commit is rollback command.
So which basically rolls back rewards the changes that you just done in that session.
So if I just do a select star from the stable, then I'm going to see this value, so which is fine so far.
So this is pretty straightforward.
So far, we haven't talked about the isolation levels.
So what I mean by isolation level is when multiple sessions are trying to modify or access the same data data, then you need locking mechanism to make sure the data is not corrupted, or the database is behaving in a way that you expect to see how you actually set isolation levels.
And this is the command.
So this is the other session I had opened show session variables like isolation.
So that shows like the transaction isolation level is set to read committed.
Right.
So this is one of the possible options action.
So this is read committed, and you have read uncommitted, and you have repetative read, or repeatable read.
And then you have a serializable value, actually, so let's go one by one, right.
In this session, I already started a transaction.
So I'm going to actually try to update this value using an update command.
So basically, I am updating the same table, and I'm updating this column to to where the column value is currently one, right.
So I'm going to do that the auto commit is turned off.
So it's not committed yet for the start a transaction over here.
And let me run a query against the same table and just copy and paste the table name, want to type it, okay, so we see the value one, which is the previous value.
And if I ran the same query over here, in this session, I see the value two, because this is the session where we are modifying the data, right? So and I can see the changes before committing in the same session here.
Actually, since the value of this transaction isolation, or the isolation level is set to read committed, it is possible only to read the committed data.
In other words, when multiple sessions are accessing the same data, in this case, this column right here from this table, apart from the session that is actually modifying the data, the other sessions can only see committed data, any data that is committed just before this select is executed.
So I'm going to go here and run a commit, and come back over here and run a select.
So now you see the latest data because that commit happened before I ran this query.
Now let's talk about read uncommitted isolation, setting actually freshly log in again, because these things can get tricky.
So every time I want to just recreate the tables to remove any confusion.
So let's actually log in again, okay, in here, and I'm actually going to execute the same script that I showed you before.
So just disabling auto command, starting a transaction, dropping the stable and recreating it, inserting this value, and then running the command.
So now here, what we could do is go ahead and update this value to two.
But remember, I haven't committed this data yet.
Let's go to this session.
And here, go ahead and change the setting to the isolation setting to read uncommitted, because by default, it is always set to read committed action.
Right.
So you can see that here.
So and this is a session level setting.
And you can also change it at global level.
But for the purpose of this demo, we just need to change it at the session level.
So session level isolation initially read committed, then I ran the set session transaction, isolation level, read uncommitted, and then checking the value again.
Now it's changed to read uncommitted, if I ran a select star from this table, then I get the value two, and if you remember that I I only updated the value from one to two.
And you can already see this beta even though it is not committed over here.
So that is how read uncommitted works.
So there is not much locking going on here.
Because database is now letting the sessions do dirty reads because one session is able to read and other sessions changes even before the commits happen actually, right.
So those are dirty reads.
Yes, actually.
So let's go on to the next one.
So we have seen read, committed and read Committed so far.
So now let's move on to repeatable reads action.
Benar? So exit.
So here I am going to just commit.
And I'm gonna re rerun my initial script just to clear the table.
So drop table and then recreated insert, value one again, and then commit.
So now, the table is back to how it looked before.
So here, let me log in again.
So this is repeatable read setting, right? So remember that the default value for this isolation setting is always read committed.
So if I change it to repeatable read, write, and then check the value again, then you can see this.
So and again, remember, or show variables is the command to check the current value.
And then set is the command to set the configuration right, so I will put all these commands in like a git GitHub repo file, then you can actually grab the commands from there, and then you can try them yourself.
Basically, I'm changing the I'm changing the setting from read committed to repeatable read, right, so I'm going to just start a new transaction over here in here, I'm going to update this value to two.
And over here, I'm going to run the Select query that we saw before just selecting everything from this table.
And you see that the value is currently one.
And that makes sense.
So let me go ahead and run commit.
And if I ran the same query, again, I see the value one.
And this is the same as the value that was read before, even though the data was changed by this other session.
And then committed within this transaction, the data that we are seeing is the same in in other terms, basically, we are, we are reading the same data, or the reads are being repeated.
Right.
So that is the third setting.
And the last one is the most strict locking configuration.
So which is called serializable.
So I'm going to, as usual, I'm going to drop the table and then just recreate them recreated, inserted value one again, they might come in.
So here, we're going to log in again.
And as usual, the default setting is read committed, right? So let's check that first, just to show you, and then I'm going to change it to serial serializable.
So what this means is, basically, I'm going to start a transaction.
So on the first session, I'm going to run an update, basically changing the value from one to two.
And here, I'm going to start a transaction, and I'm going to run a query on that table.
Right.
And now this query, even though it's just a select, select is just a read, it's not updating, it's not deleting or doing anything, it's just a read, it is waiting, because the update is basically updating this data.
And then it's not database, MySQL databases, not even letting this read or the Select query from the other session to see the data.
So this is the most strict setting action.
So if I do a commit over here, then on this other session, you will see that the Gradius return and it's seeing the latest value, right.
So if I go ahead and run another select, of course, it's returning the same thing.
But if I try to update this value from two to three, another update, that is basically going to wait on the Select, basically this transaction that is running right now because the Select again, select is just a read, it is just reading the data.
But still it is locking that row in the database, and it's not letting any updates or modifications to that data.
And then you can see that the update even failed because it waited for some time and then the timeout value exceeded so we don't have to go into those details.
But I'm going to try updating now.
And here.
I'm just going to exit out of this session, which will release all the locks.
And that will help the update to go through.
And then I can commit and exit as well, and how you hope it was clear to you guys.
And if you have any questions, please put it in the comments and reach out to me somehow I know you can figure it out, as you guys are next section.
Hey, MySQL learners.
So welcome back to this new section of my MySQL tutorial.
So in this video, or in this section, we're going to talk about locks.
So what are these locks? Benar? So let's actually approach this kind of like logically.
So if you have a database, and if you're the only person working in this database, then you basically need not worry about anything, right? You know what you're doing.
So you will insert data, delete, or update data the way you want.
And there is no one else trying to intervene or interrupt your work.
But unfortunately, that's not the case.
In today's world.
If you think of a busy ecommerce database like Amazon, then then there's like, a lot going on on the on those websites.
There's like multiple people browsing is like, a lot of people buying stuff.
There's the people who are selling stuff on on these websites, they're updating data relevant to their products.
So that is basically concurrency, right? So you have many users trying to do something on this website at the same time, so how do you manage this concurrency, that's why we need locks.
So if I let everyone work on the same data at the same time, then there's going to be a lot of confusion.
And we might end up losing some data.
So let me actually show you a simple example of how that happens.
So I have a table, a product table.
So if you've been following my tutorial, thus far, we talked about this table called products.
So where we store all the product information, right.
So now, there's a couple of records over here.
And let's say that we have a seller and a buyer who are working on these records, especially like this particular record, the first one, which is a book, and the books, prizes, this and the quantity, the thing we didn't have quantity when we talked about it in my previous sections.
But then I added quantity here.
So there's this quantity column.
And there's a there's a seller and buying buyer interested in this record, let's look at this, right, so we have sort of like a time sequence here.
So what the seller of this particular product is trying to do is he's trying to update the quantity of this product at nine one, he is adding 60 more quantity to that product, which is you know, 40 plus 60, which 100.
And that's what we have over here.
So then a buyer comes and he looks at the quantity.
And then he basically wants to order two or these books, that's 100 minus 90 100 minus two, it's 98 and then you have the quantity 98 over here.
So this happened in a sequence.
So but we are worried about concurrency, right? concurrency is like when things happen at the same time.
But what if Okay, first the seller comes and then he reads the quantity of this item.
Initially it was 40 and then buyer comes and he also sees that the quantity is 40.
Benar? And at 901.
So the first two operations happen at the same time at nine or one seller comes in he says I want to update I want to add 60 more quantity, like meaning I have 60 more books of this title, but then buyer comes and he says okay, I'm buying two items or two of these books.
So but while you that he saw before was 40.
So 40 minus two is 38.
So he updates the quantity 38.
So the seller updates at 200.
But then, because of this previous look up, the quantity is updated to 38.
due to which this whole thing, this whole operation is lost.
And we end up with sort of like corrupted data for this quantity column.
So this is a simple example of how concurrency when not managed well might cause issue data issues like this.
MySQL learners.
So in this video, we are going to look at basically how table locks works.
In the context of e commerce database, we created a simple database or schema called the column store.
And we created a bunch of tables or used another dummy table to explain our transaction isolation levels.
So if you haven't seen my previous material, go back and check it out.
And come back here.
But then yeah, you have four tables for main tables.
And the main table that we are interested in is products table here.
And in the products table, I inserted a couple of records.
These are dummy records.
So I don't have a front end or application running over here.
So we're just looking at database, right.
So what what's going to happen in this tutorial is, so we, we're going to basically simulate a situation where a seller is trying to update the quantity of the book that he is selling on this website, which is this first book actually, the common path to uncommon success.
And then the right now the quantity of this the quantity available.
You know, for this book is 40, right? So he wants to update this quantity 200.
And also, we'll have a couple of more users, or buyers, basically one buyer is trying to buy the same book, we'll have another buyer Hill, who tried to buy a different book, which is this book, tiny habits, and then the same buyer will also try to browse the website, like of course, like, we are going to have to imagine a little bit because I don't have a front end to show you everything.
So let's actually see how this goes.
So first of all, you know basics first, actually, let's actually turn off the auto commit.
Just so just so actually, we have more control over what's happening.
And let me do that in all the three sessions I have open and the first session is the seller session.
The second session is the buyer one session.
And the third session is the buyer to session, basically.
So I'm going to turn off the auto commit, which is basically a mechanism that commits automatically if it's enabled.
And I don't want that.
So I'm disabling it.
So next is I want to show you the transaction isolation level.
And we talked about it in my previous session.
So right now it's a repeatable read.
And it's the same for all.
So we are going to change that to read committed, because read committed is isolation is the right isolation level for OLTP databases.
So now let's actually start with the first seller session.
So three sessions.
So the first seller session is going to update the quantity of this book that he's interested in or his selling action.
But we are going to take this aggressive approach and log the whole table.
Right.
So let's say the application is returned in a way that it logs the whole product stable for right.
And then the other session, let's say by one second session, buyer one comes and he is going to try to buy two books and and how actually we're going To do that is by running an update.
So we are basically updating the products table and we are subtracting the quantity by two, which means actually the we are buying two books.
And which book is there in the book? Where are the record where product ID equals one, right? So if you remember the data, product ID one is this book, let's go ahead and run this update in the second session.
And it's going to obviously, wait, because the table itself has been locked for right by the seller session, the buyer, one session is waiting.
And let's go to the buyer to session the buyer to Australia trying to buy a different book, which book is it this other book, which is tiny habits book where product ID equals two.
And we're gonna do that.
Of course, even that is hanging or waiting.
And that is actually a little bit crazy, isn't it.
So just sellers trying to update the quantity of this one record with just one book.
And everything is tanking.
And the buyer, too, was trying to buy a different book, he kind of gives up.
So he moves to a different session.
And instead of buying or trying to buy a book, he just tries to browse the website, which is a select query or read query, read a select query, which is also hanging.
So the buyer too is getting frustrated right now.
So you can see how restricted this kind of sequences.
So if someone's using table logs, that's going to basically reduce the concurrency of the operations that can happen in this database.
So that's the main point here in this demo.
Hey, my sequel learners.
So in this session, we are going to take a brief look at row level locks.
In my sequel, I have three sessions, I'm already connected to my ecommerce database, MySQL database, and this is how the data looks now.
So we have a products table which holds you know, this data, only two books now, just dummy data that I created this, this is the price and you have the quantity column showing you how many, how much quantity is left for each of these books.
So the first session is seller session.
The second session is buyer session, we can call this buyer one session.
And the third session is a buyer to session.
So this is the data.
And just for clarity, actually, I wanted to show you the transaction isolation setting, which is read committed.
And the auto commit is turned to turned off basically, it's disabled.
So unless I commit explicitly, my transactions will not be permanent.
So let's actually start with a seller.
He's going on the website or a portal that he has available to update the inventory of, let's say the book one, it or the product one, which is this book.
And so he is going to click some buttons, which is going to translate to an update statement being executed in this database, right? So let's say he wants to increase the number of books available in the inventory.
So that will mean quantity is going to be increased incremented by 50.
So that's the UPDATE statement.
And he's going to run that update.
And we can look at the buyer one session, let's say buyer one is trying to buy the same book.
And and then, so he's going to go on the website and then click on buy now or whatever and then is going to translate into this UPDATE statement in the database, choose quantity equals quantity minus one.
So reducing the quantity by one, meaning he's buying a, buying a book.
And of course, there's going to be, you know, other statements updating other tables.
But then to keep it simple, I'm just showing you the product table changes section.
So as you can see, this is going to wait because seller is updating this particular row action.
And that can be seen using acquittee.
On data locks, so if you're under this greddy, of course, you can modify this query as per your needs.
But then if you query this, you will see that there's bunch of sessions and is, is the lock mode column.
And then the table on which the database on which the locks are happening the table, so it gives you a lot of details.
So, so if you want to understand what's going on here.
So we have products table, and then we have ix lock, which is intention, exclusive lock on the table itself, meaning like a transaction is about to get an exclusive lock.
And this is at the table level, but don't get tricked by that.
There is also another row indicating there is a record level or a row level lock.
And, and that is logging only this data equals one.
So if you remember that UPDATE statement, we are using product ID.
So and data for which is one, actually, so product ID equals one.
So that's what we are seeing over here.
And if you see here, this buyer session has actually timed out already, so he's going to attempt to buy again.
So that's how like, you can actually look at the locking details in this table.
Let's try, let's say like buyer two comes in at this point.
And then he just tries to browse the inventory on this ecommerce website.
So that would mean a select query or read query.
And he's, he's able to do this happy reaction.
Right.
So there is no problem.
So while the rollouts are happening, other sessions can read this table, they can even look at the data for the same product.
But they they just cannot buy this book, because that is being blocked by the seller.
So again, it timed out.
So at this point, buyer two wants to buy a different book, you know, I'm not able to buy this book, let me try buying a different book, that's going to translate to, you know, product ID ID equals two, which is not being locked by the seller.
And then that update goes through.
And at this point, let's say the seller has completed updating the inventory.
And, of course, if you look at the data, now, it's going to look different, because this has been updated to 150.
And of course, this hasn't gone down because buyer, buyer, one is still in the process of buying the book, because the commit has not happened yet in the application.
And then if we look at the data, again, the data has gone down, or the quantity has gone down, then via two, let's say wants to buy the first book that buyer one wanted to buy.
At this point, there are no no locks in this table.
Because everyone's committed, and let's say buyer, who is trying to buy this, this book, and then he goes through with that date, and then commits and look at data.
And then the data is changing actually.
So this is how row level log basically allows for high concurrency.
So only the rows which are logged by your transactions are not available for these other sessions to modify.
Right So the other records which are not touched by your transactions are available for updating, deleting, etc.
and all, of course, you can add new books, that means inserting new records in this table.
So I just wanted to show you the difference between table level logs and row level locks.
So this session and my previous session will, will be useful in understanding that difference.
Thank you, I'll see you in my next session.
In this session, we're going to be talking about deadlocks.
And I just want to show you how deadlocks happen, they do happen in in a busy ecommerce or B.
database often, so it's good to know what they are.
So it's going to be a very short and sweet session.
So here, we have a couple of sessions again, so connecting a connected to the same database has two sessions, two different sessions.
So let's say that we are working with products table, right.
So we have seen the stable before in my previous sessions.
Basically, this table has information about the products that are being sold on, you know, an e commerce website.
So we have a couple of records over here, you know, we're going to first let's say, you know, I seller comes to actually update the quantity of this product, basically, let's say if he wants to increase the quantity by 25.
For this first book, this is the command that he's, you know, that's going to be executed, you know, whatever buttons he is clicking, will be translated to an update command like this.
Right.
And let's say like a different person from the same company wants to update the price of this book, not this book, let's say we have it the other book, I'm just actually using the product ID to update the right product, right.
So we have one session where seller, one is updating the quantity of this item, we have another session where we are updating the price of this item.
And then if you see the prices incremented by two, let's say $2.
And this is fine, right? So now we have row level locks.
So this guy is holding a row level lock on this row.
And this guy is holding a row level lock on this row.
So this is fine, right? So we are operating on two different records, two different locks are independent of each other.
All good.
So now let's say the same seller, the second person who is updating with price, wants to update the price of this other book to actually like he is actually increasing the price.
Again, by $2 of this book, the product ID equals one, which book, this one right here, let's go ahead and try to increment the price.
By running this command, you know, he's waiting on waiting for the lock ECI exclusive lock.
And that's not available, because this seller has not committed actually is not committed.
So let's actually go back here and, and this seller at the same time price to update the price of or quantity of this book.
So two sessions are fighting for pretty much the same resource, you know, we ended up in a deadlock situation.
So my sequel was smart, smart enough to just kill the session.
Otherwise, we would have two sessions waiting for each other endlessly.
Benar? So here you can see the error code that is thrown, it says deadlock found when trying to get locks and try restarting that transaction.
So let's go ahead and query the products table and see how it looks.
You can see this, this whole transaction was rolled back.
Correct.
Both the transactions were rolled back.
There's even this one was rolled back.
So I think that Locke was also killed.
So that's why this this one went through.
If you can see the prices have increased by $2.
right because initially For 1699 and 2039, and here 8099 and 20 to 39.
Okay, so that's how it works.
This is a typical deadlock situation, I hope this explanation was clear.
And I will see you guys in my next session.
All right, my sequel learners.
So in this session, we're going to talk about clustered indexes.
So, so clustered index is not a different index type as in, like, you can, you know, directly create a create a clustered index yourself.
So it is a type of index that, that MySQL kind of maintains in the, you know, behind the scenes actually.
So, in also your table data, the data that you insert into your tables or load into your tables are maintained in these indexes.
indexes only what I mean by that is, so let's say this is a B tree index, right, so this is a B tree index.
So you have my sequel, creating this B tree index, as you load the data into these tables.
And then, you know, in the leaf nodes, what you have is actually the data, the data that you're loading into these tables, right? In the clustering, the sorting is based on the primary key that you define, or, you know, in this table, actually, so if you don't define a primary key, MySQL will automatically pick up a non nullable index key, what that means is, so let's say that, in fact, actually, let's jump straight into the example that I have prepared for you guys.
So so this is my MySQL Workbench.
And, you know, I'll show you this table definition.
So this is called products underscore one.
And it's basically a products table that is typically used in a ecommerce store.
And if you've been following my lessons, this is what I've been using, I just changed the name of the table for, you know, demonstrating this concept, this clustering, clustered index concept.
So you have all these like columns, and I'm defining a primary key.
Okay, so let's just start by, you know, I'm just going to switch to a database called eecom, store our schema called the econ store, I'm going to drop, you know, these tables if they exist already, by any chance.
So the table doesn't exist, which is okay, so I'm going to create this table, which I just talked about, called products.
And then this table has primary key in a primary key is product ID.
So product ID is sort of like an integer column.
So this is an auto increment, right? So you don't even have to provide value for this column, actually, when you load the data, so you can just put all this information and load it and then we are good, MySQL will automatically increment the value of this column action.
So and then, of course, like I said, like there is isbm column, which is over here, sort of leg book iasb.
And information if you are, you know, if you remember your school days like this, this is be a number attached with any book, so something like that.
So some kind of ISDN alphanumeric number.
So I'm going to call that like a unique key or a unique constraint.
And let's go ahead and create the stable and this constraint.
So that was successfully created.
And I'm going to create a procedure, which I can use to kind of like populate the stable, right, so don't worry about the details of this procedure.
This is something that I wrote to populate this table.
And then that is successfully created and change the delimiter back to a semi colon.
And then I'm going to call this procedure and which is going to throw some warnings, which is okay with me.
As long as as long as the data gets populated, I'm fine.
So it's going to probably generate some, you know, load some 6000 plus rows into this table.
So we'll see how much we get this awesome.
So it's actually loading a lot of data.
It seems to be done.
So let's go ahead and commit the data and Now Actually, I'm going to select the data in this table, right? Just select all the data, and you will see that the data by default, or the data is actually sorted based on the primary key, which is product ID.
And you can see, we know, I haven't like specified any ordering.
So this is, you know, this is the default ordering of data, right.
And so basically, your table data is sorted based on your clustered index, which is primary key over here, because you have the primary key in the table section.
Right.
So now the next thing is actually, I'm going to create a similar table, which is, you know, so I'm going to call it products too.
But in this case, I'm going to basically not define a primary key, I'm still going to have a unique key called, again, the same thing, you know, it's isbm, it's a unique key.
And let's just give it a different name, just so we have kind of like, we have different names for different constraints.
So let's actually go ahead and create this table.
And so this table is created, I'm going to copy the data from the first table that you know, where I loaded a lot of data.
So I'm going to copy the data from that table into this table, right.
So just very simple.
And then I'm going to commit, right, so that's a board 6455 6455 number of rows inserted into this table.
And I'm going to select all the rows from this table.
And you can see that now, the data is not sorted by product Id rather it is sorted by this iasb.
And it is sorting based on first character first, and then Initially, the first and second characters are the same, then 010 true.
And that keeps going 05 and then 090, a BCD of GE hedge and then having after the zeros, you know, see one, so it is basically sorting data based on iasb.
And and why is being because because of the absence of primary key, it's going to choose this iasb and column, as are the it's going to choose this non nullable unique index key, which is based on iasb and column, right.
So it's starting based on this, but this is actually a terrible, terrible idea.
Because if you're generating random, alphanumeric strings for iasb.
And, you know, then you're not going to be generating the string in sort of like an ascending order or in any type of order, actually.
So in that case, actually, you know, when you're, as you're inserting data into the stable, this B tree is going to be created behind the scenes.
And then my sequel, like whatever program is creating or maintaining this data structure behind the scenes has to work really, really hard to manage this Bre B tree index, actually, right.
That's why this is a terrible idea to have like a you UID or some kind of alphanumeric string as a primary key actually, or in the absence of primary key.
Well, my sequel is going to use this this key for clustering.
And again, it is very bad.
So keep that in mind when you're creating tables actually.
Right.
So finally, what I'm going to do is create another table called product three.
And before that, I'm going to show you the output of this query, which is basically going to come up empty or no, no, no road rows returned.
All I'm doing is actually checking whether this index the index with named Jen flushed index is there in this database, actually.
And then I'm checking the InnoDB tables and information schema I'm joining in odb tables and in odb indexes.
And I'm checking whether this index indeed exists, right? Saying it doesn't exist, which is where the this, this credit, return no rows, and I'm going to create this table and this time, I'm not even going to create the create a unique key.
And I'm going to make all these columns as nullable columns, you know.
So I just want to show you what happens when you have a scenario where you're creating a table with all nullable columns and no primary key index no unique, not nullable index and you know Then I'm going to insert data into this table.
Again, six, the 400 plus rows inserted, commit.
And then I'm going to select from this product three table right now.
And when the data comes up, you can see that there is still some ordering that's happening.
And, you know, we don't have any of these options primary key or a not nullable, unique key available, then how is MySQL able to sort data? What is it using, so it actually uses a hidden, hidden key actually, right, a hidden primary key.
So if you run the same query, again, is ready, you can see that this index has been created on products three table, which is maintained internally by my SQL, for just the purpose of clustering this table, actually.
Okay, so that's a lot of information.
I hope you found this useful.
And I will see you guys in my next video.
Hello, my SQL learners.
So in this session, I want to teach you the basics of using explain or explained plan in MySQL.
Alright, so now let's just let me just show you the table that I'm going to be working with, I'm going to be working with that table called products underscore one.
And it's got some net in a product name, product type price.
And if the product is a book, it will have an ISP a number attached with it.
And then there is a quantity column.
So these are some basic columns that you would see in an e commerce online store.
So let's get started by just looking at the indexes of this table.
So this basically has two indexes.
One is a primary key index, which is on the product ID.
And the other one is an index on the iasb and column.
And this is a unique index, actually.
So let's get started by picking a simple query that we are going to kind of like optimize using explain.
So the query that I'm going to be using is this.
So I'm going to be selecting iasb.
And from this products underscore one table where product name has cat in it.
So the product name is cat.
Okay, so And before I run this query, I'm going to look at the explained plan of it.
And I'm going to put a slash g at the end.
So I get that we'll put in there in a readable format.
So first of all, it gives this output, right, and selectors, just one straights, simple select.
That's what this is showing.
But the main thing is we are working with our this particular row is referring to this table.
And apart from that, actually, you have all these columns, and then they are all null right now, like they don't make much sense apart from this.
So this is a tight column and all means that it is doing a full table scan.
Basically, MySQL is doing a full table scan, it's scanning the whole table.
And how many rows is that it's these many rows.
And we are using a filter over here, it gets all those rows and then it filters the output.
And basically a you know, there's about 600 rows with product name equals cat, right, so the filtered person ages like 10%, basically, and then there is some extra information.
Let's go ahead and create an index on this table.
Create index called, you know, we can give an arbitrary name.
And, and I'm going to create add on products, one table and the column is product name, of course.
This is the column on which I'm creating the index.
Actually, let's just go ahead and run the explain again.
So this is the explained plan.
And that's how it looks.
So basically, you can see that the Again, it's pretty much the same kind of output, but this time, it is also showing some data for all these columns.
So first of all possible keys column shows like all the indexes that this query can use.
And, and out of which, like this is the key or index that it is, you know, it is going to use this particular execution is going to use, and this is the key length in bytes actually write the number of rows that is being scanned in this key, which is 589.
And, you know, since this is index based, we're not really filtering data, rather, we're just going to the index and getting the data.
So there is no filtering over there.
Let's actually create another index, which also includes iasb.
And, and see, like, what happens, actually, we're gonna create the other index and give it a different name.
So let's go ahead and run the explain plan again.
So now, again, the possible keys are these two indexes, but it still chooses to go with this particular index, and the index, key length is the same, and then grows, and etc, etc.
So there's no filtering that happened, right? Because we're choosing an index.
So you might be wondering, like, you know, why it's not using the covering index, right.
So this is supposed to be the covering index and covering indexes are supposed to be better than normal, non clustered index or a secondary index.
So you can actually like, use a format like JSON format to get more information.
So how you can do that is by just specifying like format equals JSON, and use the use that.
And so that's going to give you the output in JSON format.
And you can see that the you know, it gives you a little bit more information as then like the query cost, you know, this is how much it's going to cost for my sequel to execute this query.
And this is a representation of the amount of work MySQL has to do to run this query actually.
So the cost for this one is 7690, right.
And then again, it says these are the possible keys.
And used key is used key parts is product name, which was not given over here.
And then there is a cost and for which is a split of where the cost is going.
So you can read my SQL documentation on all these fields.
You know, you might be wondering why the covering index is not being used.
And we can actually force that index by using this use index.
Syntax or use index keyword.
And then I'm going to put the index name that I want to force which is this one.
And when I ran it, this ran the explained plan this time, it shows the cost of this one is going to be 109 point two seven, you know in comparison to the previous explain plan, where the cost is only 76.
And this is why my sequel is going with this particular plan instead of this guy.
Okay, I hope this session was useful.