Basis Data
Ini adalah bagian kedua dari seri Cara Membuat Blog dengan PHP dan MySQL. Anda bisa mendapatkan bagian pertama di sini
Kami akan melanjutkan di mana kami tinggalkan di tutorial terakhir. Di bagian ini kita akan mengerjakan desain database dan otentikasi pengguna (registrasi dan login). Buat database bernama complete-blog-php. Dalam database ini, buat 2 tabel: postingan dan pengguna dengan kolom berikut.
postingan:
+----+-----------+--------------+------------+
|     field      |     type     | specs      |
+----+-----------+--------------+------------+
|  id            | INT(11)      |            |
|  user_id       | INT(11)      |            |
|  title         | VARCHAR(255) |            |
|  slug          | VARCHAR(255) | UNIQUE     |
|  views         | INT(11)      |            |
|  image         | VARCHAR(255) |            |
|  body          | TEXT         |            |
|  published     | boolean      |            |
|  created_at    | TIMESTAMP    |            |
|  updated_at    | TIMESTAMP    |            |
+----------------+--------------+------------+
pengguna:
+----+-----------+------------------------+------------+
|     field      |     type               | specs      |
+----+-----------+------------------------+------------+
|  id            | INT(11)                |            |
|  username      | VARCHAR(255)           | UNIQUE     |
|  email         | VARCHAR(255)           | UNIQUE     |
|  role          | ENUM("Admin","Author") |            |
|  password      | VARCHAR(255)           |            |
|  created_at    | TIMESTAMP              |            |
|  updated_at    | TIMESTAMP              |            |
+----------------+--------------+---------+------------+
Anda dapat membuat tabel ini menggunakan perintah ini.
pengguna:
CREATE TABLE `users` (
  `id` int(11) AUTO_INCREMENT PRIMARY KEY NOT NULL,
  `username` varchar(255) NOT NULL,
  `email` varchar(255) NOT NULL,
  `role` enum('Author','Admin') DEFAULT NULL,
  `password` varchar(255) NOT NULL,
  `created_at` timestamp NULL DEFAULT CURRENT_TIMESTAMP,
  `updated_at` timestamp NULL DEFAULT NULL
) ENGINE=InnoDB DEFAULT CHARSET=latin1;
postingan:
CREATE TABLE `posts` (
 `id` int(11) NOT NULL AUTO_INCREMENT PRIMARY KEY,
 `user_id` int(11) DEFAULT NULL,
 `title` varchar(255) NOT NULL,
 `slug` varchar(255) NOT NULL UNIQUE,
 `views` int(11) NOT NULL DEFAULT '0',
 `image` varchar(255) NOT NULL,
 `body` text NOT NULL,
 `published` tinyint(1) NOT NULL,
 `created_at` timestamp NOT NULL DEFAULT CURRENT_TIMESTAMP ON UPDATE CURRENT_TIMESTAMP,
 `updated_at` timestamp NOT NULL DEFAULT '0000-00-00 00:00:00',
  FOREIGN KEY (`user_id`) REFERENCES `users` (`id`) ON DELETE NO ACTION ON UPDATE NO ACTION
) ENGINE=InnoDB DEFAULT CHARSET=latin1
Anda dapat menjalankan skrip ini dengan menggunakan prompt perintah SQL atau PHPMyAdmin. Di PHPMyAdmin, klik/pilih database yang Anda inginkan untuk membuat tabel ini (dalam hal ini complete-blog-php), lalu klik pada tab SQL di navbar di suatu tempat di bagian atas halaman. Jika Anda melihat skrip SQL di ruang di bawah, hapus dan tempel skrip di atas ke tempat yang disediakan dan klik 'Buka' untuk membuat tabel.
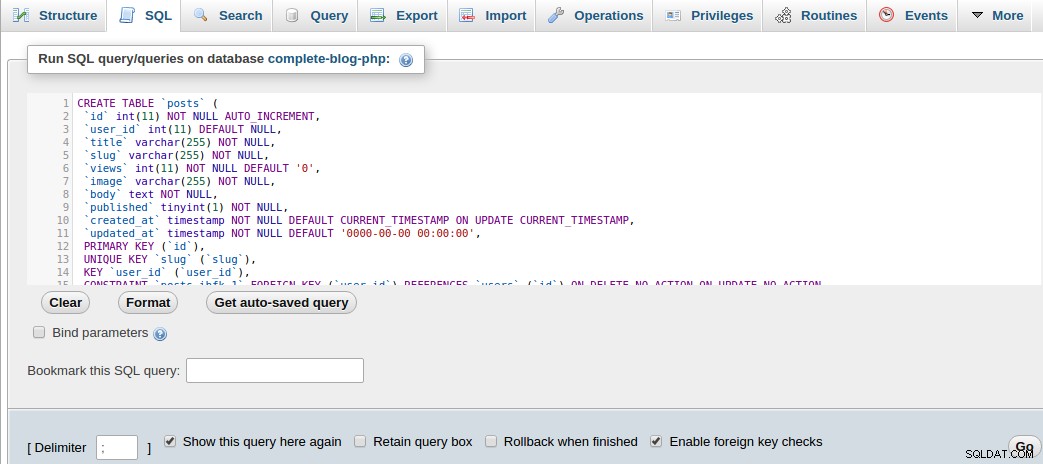
Jika Anda memilih untuk membuat tabel ini secara manual, jangan lupa untuk membuat bidang slug pada tabel pos UNIK, dan ingat untuk mengatur bidang user_id dari tabel kiriman sebagai kunci asing yang mereferensikan id pada tabel pengguna. Tetapkan NO ACTION sebagai nilai untuk opsi ON DELETE dan ON UPDATE sehingga ketika pengguna dihapus atau diperbarui, posting mereka tetap berada di tabel posting dan tidak dihapus.
Sekarang masukkan beberapa pengguna ke tabel pengguna dan beberapa posting ke tabel posting. Anda dapat melakukannya dengan menjalankan kueri SQL ini untuk menyisipkan:
pengguna:
INSERT INTO `users` (`id`, `username`, `email`, `role`, `password`, `created_at`, `updated_at`) VALUES
(1, 'Awa', '[email protected]', 'Admin', 'mypassword', '2018-01-08 12:52:58', '2018-01-08 12:52:58')
postingan:
INSERT INTO `posts` (`id`, `user_id`, `title`, `slug`, `views`, `image`, `body`, `published`, `created_at`, `updated_at`) VALUES
(1, 1, '5 Habits that can improve your life', '5-habits-that-can-improve-your-life', 0, 'banner.jpg', 'Read every day', 1, '2018-02-03 07:58:02', '2018-02-01 19:14:31'),
(2, 1, 'Second post on LifeBlog', 'second-post-on-lifeblog', 0, 'banner.jpg', 'This is the body of the second post on this site', 0, '2018-02-02 11:40:14', '2018-02-01 13:04:36')
Mari sambungkan ke database, buat kueri postingan ini, dan tampilkan di halaman web.
Di config.php, mari tambahkan kode untuk menghubungkan aplikasi kita ke database. Setelah menambahkan kode, file config.php kita akan terlihat seperti ini:
<?php
	session_start();
	// connect to database
	$conn = mysqli_connect("localhost", "root", "", "complete-blog-php");

	if (!$conn) {
		die("Error connecting to database: " . mysqli_connect_error());
	}
    // define global constants
	define ('ROOT_PATH', realpath(dirname(__FILE__)));
	define('BASE_URL', 'http://localhost/complete-blog-php/');
?>
Ini mengembalikan objek konektivitas database $conn yang dapat kita gunakan di seluruh aplikasi untuk membuat kueri database.
Aplikasi ini telah disusun sedemikian rupa sehingga kode PHP terpisah dari HTML mungkin. Operasi seperti membuat kueri database dan menjalankan beberapa logika pada data dilakukan dalam fungsi PHP dan hasilnya dikirim ke HTML untuk ditampilkan. Oleh karena itu untuk mendapatkan semua posting dari database, kita akan melakukannya dalam suatu fungsi dan mengembalikan hasilnya sebagai array asosiatif untuk dilingkari dan ditampilkan di halaman.
Oleh karena itu, buat file bernama public_functions.php di folder include. File ini akan menampung semua fungsi PHP kami untuk area publik. Semua halaman yang menggunakan salah satu fungsi dalam file ini harus menyertakan file ini di bagian atas halaman.
Mari kita buat fungsi pertama kita di public_functions.php yang baru kita buat. Kami akan memberi nama fungsi getPublishedPosts() dan itu akan mengambil semua posting dari tabel posting di database dan mengembalikannya sebagai array asosiatif:
public_functions.php:
<?php
/* * * * * * * * * * * * * * *
* Returns all published posts
* * * * * * * * * * * * * * */
function getPublishedPosts() {
	// use global $conn object in function
	global $conn;
	$sql = "SELECT * FROM posts WHERE published=true";
	$result = mysqli_query($conn, $sql);

	// fetch all posts as an associative array called $posts
	$posts = mysqli_fetch_all($result, MYSQLI_ASSOC);

	return $posts;
}

// more functions to come here ...
?>
Di bagian atas file index.php, tepat di bawah baris yang menyertakan config. php , tambahkan kode ini untuk menanyakan database:
<!-- config.php should be here as the first include  -->

<?php require_once( ROOT_PATH . '/includes/public_functions.php') ?>

<!-- Retrieve all posts from database  -->
<?php $posts = getPublishedPosts(); ?>
Kami menambahkan dua baris kode. Yang pertama menyertakan file public_functions.php (yang menyimpan fungsi) ke file index.php kami. Baris kode kedua memanggil fungsi getPublishedPosts() yang menanyakan database dan mengembalikan posting yang diambil dari database dalam variabel yang disebut $posts. Sekarang mari kita mengulang dan menampilkan postingan ini di halaman index.php.
Buka kembali file index.php terkenal kami. Di bagian konten di suatu tempat di tengah, Anda akan menemukan tag
dan komentar yang menunjukkan di mana lebih banyak konten akan datang. Di spasi, tepat di bawah tag
, tambahkan kode ini:
<hr>
<!-- more content still to come here ... -->

<!-- Add this ... -->
<?php foreach ($posts as $post): ?>
	<div class="post" style="margin-left: 0px;">
		<img src="<?php echo BASE_URL . '/static/images/' . $post['image']; ?>" class="post_image" alt="">
		<a href="single_post.php?post-slug=<?php echo $post['slug']; ?>">
			<div class="post_info">
				<h3><?php echo $post['title'] ?></h3>
				<div class="info">
					<span><?php echo date("F j, Y ", strtotime($post["created_at"])); ?></span>
					<span class="read_more">Read more...</span>
				</div>
			</div>
		</a>
	</div>
<?php endforeach ?>
Oke plieease jangan reload halaman dulu. Mari tambahkan gaya ke daftar posting ini. Buka public_styling.css dan tambahkan kode ini ke dalamnya:
/* CONTENT */
.content {
	margin: 5px auto;
	border-radius: 5px;
	min-height: 400px;
}
.content:after {
	content: "";
	display: block;
	clear: both;
}
.content .content-title {
	margin: 10px 0px;
	color: #374447;
	font-family: 'Averia Serif Libre', cursive;
}
.content .post {
	width: 335px;
	margin: 9px;
	min-height: 320px;
	float: left;
	border-radius: 2px;
	border: 1px solid #b3b3b3;
	position: relative;
}
.content .post .category {
	margin-top: 0px;
	padding: 3px 8px;
	color: #374447;
	background: white;
	display: inline-block;
	border-radius: 2px;
	border: 1px solid #374447;
	box-shadow: 3px 2px 2px;
	position: absolute;
	left: 5px; top: 5px;
	z-index: 3;
}
.content .post .category:hover {
	box-shadow: 3px 2px 2px;
	color: white;
	background: #374447;
	transition: .4s;
	opacity: 1;
}
.content .post .post_image {
	height: 260px;
	width: 100%;
	background-size: 100%;
}
.content .post .post_image {
	width: 100%;
	height: 260px;
}
.content .post .post_info {
	height: 100%;
	padding: 0px 5px;
	font-weight: 200;
    font-family: 'Noto Serif', serif;
}
.content .post .post_info {
	color: #222;
}
.content .post .post_info span {
	color: #A6A6A6;
	font-style: italic;
}
.content .post .post_info span.read_more {
	position: absolute;
	right: 5px; bottom: 5px;
}
Sekarang Anda dapat memuat ulang halaman.
Jika semuanya berjalan dengan baik, Anda akan melihat satu postingan bergaya sebagai thumbnail di bawah judul "Artikel terbaru". Ingat kami telah memasukkan dua catatan dalam database tetapi hanya satu yang ditampilkan. Hal ini terjadi karena salah satu catatan memiliki bidang yang diterbitkannya disetel ke false (yaitu, 0), dan karena hanya artikel yang diterbitkan yang dapat ditampilkan, kami hanya melihat satu, yang diterbitkan.
Tapi posting kami sampai sekarang tidak diklasifikasikan di bawah topik apa pun. Mari buat tabel topik dan bentuk hubungan Banyak ke Banyak antara postingan dan tabel topik. Untuk melakukannya, kita akan membuat dua tabel baru:topik untuk menyimpan topik, dan tabel post_topic untuk menangani hubungan antara postingan dan topik.
topik:
+----+-----------+------------------------+------------+
|     field      |     type               | specs      |
+----+-----------+------------------------+------------+
|  id            | INT(11)                |            |
|  name          | VARCHAR(255)           |            |
|  slug          | VARCHAR(255)           | UNIQUE     |
+----------------+--------------+---------+------------+
post_topic:
+----+-----------+------------------------+------------+
|     field      |     type               | specs      |
+----+-----------+------------------------+------------+
|  id            | INT(11)                |            |
|  post_id       | INT(11)                |  UNIQUE    |
|  topic_id      | INT(11)                |            |
+----------------+--------------+---------+------------+
Yang sangat kami minati adalah tabel post_topic. Ini adalah tabel yang menangani hubungan antara posting dan topik. Ketika sebuah postingan dibuat di bawah topik tertentu, id postingan tersebut (post_id), serta id topik (topic_id) di mana postingan tersebut dibuat, dimasukkan ke dalam tabel post_topic.
Mari kita buat hubungan ini sehingga ketika sebuah postingan dihapus, entri mereka di tabel post_topic juga akan otomatis terhapus; Anda tidak ingin menyimpan info tentang hubungan posting ketika posting tidak ada kan?
Klik/pilih tabel post_topic, lalu klik pada tab struktur navbar PHPMyAdmin. Selanjutnya, klik Relation View tepat di bawah tab struktur (dapat ditemukan di tempat lain bergantung pada versi PHPMyAdmin Anda). Kemudian isi form di bawah ini sebagai berikut:

Tip:Tautan +Tambahkan batasan digunakan untuk menambahkan batasan baru.
ON DELETE dan ON UPDATE masing-masing disetel ke CASCADE dan NO ACTION sehingga ketika sebuah postingan atau topik dihapus, info hubungan di tabel post_topic juga otomatis terhapus. (Pada gambar saya membuat kesalahan dengan menyetel ON UPDATE ke CASCADE alih-alih NO ACTION, maaf untuk itu).
Klik simpan dan hanya itu. Tabel sekarang terkait. Tetapi untuk membangun hubungan antara posting dan topik, kita perlu mengisi tabel topik dengan topik dan akhirnya tabel post_topic yang merupakan info hubungan yang sebenarnya.
Sekarang mari kita masukkan beberapa entri ke dalam dua tabel:
topik:
INSERT INTO `topics` (`id`, `name`, `slug`) VALUES
(1, 'Inspiration', 'inspiration'),
(2, 'Motivation', 'motivation'),
(3, 'Diary', 'diary')
post_topic:
INSERT INTO `post_topic` (`id`, `post_id`, `topic_id`) VALUES
(1, 1, 1),
(2, 2, 2)
Hubungan yang ditentukan pada tabel post_topic menyatakan bahwa topik dengan id 1 pada tabel topik adalah milik postingan dengan id 1 pada tabel postingan. Hal yang sama berlaku untuk topik dengan id 2 dan posting dengan id 2.
Pada setiap daftar posting di halaman index.php, kita akan menampilkan topik di mana posting dibuat.
Untuk melakukan ini, kita harus memodifikasi getPublishedPosts() yang kita buat di dalam public_functions.php untuk menanyakan topik setiap posting dari database dan mengembalikan posting di samping topiknya.
Ubah file public_functions.php menjadi seperti ini:
<?php
/* * * * * * * * * * * * * * *
* Returns all published posts
* * * * * * * * * * * * * * */
function getPublishedPosts() {
	// use global $conn object in function
	global $conn;
	$sql = "SELECT * FROM posts WHERE published=true";
	$result = mysqli_query($conn, $sql);
	// fetch all posts as an associative array called $posts
	$posts = mysqli_fetch_all($result, MYSQLI_ASSOC);

	$final_posts = array();
	foreach ($posts as $post) {
		$post['topic'] = getPostTopic($post['id']);
		array_push($final_posts, $post);
	}
	return $final_posts;
}
/* * * * * * * * * * * * * * *
* Receives a post id and
* Returns topic of the post
* * * * * * * * * * * * * * */
function getPostTopic($post_id){
	global $conn;
	$sql = "SELECT * FROM topics WHERE id=
			(SELECT topic_id FROM post_topic WHERE post_id=$post_id) LIMIT 1";
	$result = mysqli_query($conn, $sql);
	$topic = mysqli_fetch_assoc($result);
	return $topic;
}
?>
Sekarang pergi ke file index.php. Di dalam loop foreach, tepat di bawah tag gambar , tambahkan pernyataan if untuk menampilkan topik. Loop foreach Anda akan terlihat seperti ini setelah memodifikasi:
<?php foreach ($posts as $post): ?>
	<div class="post" style="margin-left: 0px;">
		<img src="<?php echo BASE_URL . '/static/images/' . $post['image']; ?>" class="post_image" alt="">
        <!-- Added this if statement... -->
		<?php if (isset($post['topic']['name'])): ?>
			<a
				href="<?php echo BASE_URL . 'filtered_posts.php?topic=' . $post['topic']['id'] ?>"
				class="btn category">
				<?php echo $post['topic']['name'] ?>
			</a>
		<?php endif ?>

		<a href="single_post.php?post-slug=<?php echo $post['slug']; ?>">
			<div class="post_info">
				<h3><?php echo $post['title'] ?></h3>
				<div class="info">
					<span><?php echo date("F j, Y ", strtotime($post["created_at"])); ?></span>
					<span class="read_more">Read more...</span>
				</div>
			</div>
		</a>
	</div>
<?php endforeach ?>
Sekarang muat ulang halaman dan Anda akan melihat topik yang ditampilkan di postingan.
Di dalam foreach loop ini, Anda melihat bahwa ada dua tautan yang ketika diklik akan membawa Anda ke dua halaman:filtered_posts.php dan single_post.php.
filtered_posts.php adalah halaman yang mencantumkan semua posting di bawah topik tertentu ketika pengguna mengklik topik itu.
single_post.php adalah halaman yang menampilkan postingan lengkap secara detail beserta komentar saat pengguna mengklik thumbnail postingan.
Kedua file ini membutuhkan beberapa fungsi dari file public_functions.php kita. filtered_posts.php membutuhkan dua fungsi yang disebut getPublishedPostsByTopic() dan getTopicNameById() sementara single_posts.php membutuhkan getPost() dan getAllTopics().
Mari kita mulai dengan file filtered_posts.php. Buka public_functions.php dan tambahkan dua fungsi ini ke daftar fungsi:
/* * * * * * * * * * * * * * * *
* Returns all posts under a topic
* * * * * * * * * * * * * * * * */
function getPublishedPostsByTopic($topic_id) {
	global $conn;
	$sql = "SELECT * FROM posts ps
			WHERE ps.id IN
			(SELECT pt.post_id FROM post_topic pt
				WHERE pt.topic_id=$topic_id GROUP BY pt.post_id
				HAVING COUNT(1) = 1)";
	$result = mysqli_query($conn, $sql);
	// fetch all posts as an associative array called $posts
	$posts = mysqli_fetch_all($result, MYSQLI_ASSOC);

	$final_posts = array();
	foreach ($posts as $post) {
		$post['topic'] = getPostTopic($post['id']);
		array_push($final_posts, $post);
	}
	return $final_posts;
}
/* * * * * * * * * * * * * * * *
* Returns topic name by topic id
* * * * * * * * * * * * * * * * */
function getTopicNameById($id)
{
	global $conn;
	$sql = "SELECT name FROM topics WHERE id=$id";
	$result = mysqli_query($conn, $sql);
	$topic = mysqli_fetch_assoc($result);
	return $topic['name'];
}
Pertama-tama, buat file filtered_posts.php di folder root aplikasi kita (yaitu, complete-blog-php/filtered_posts.php). Saya akan melanjutkan dan menempelkan seluruh kode halaman ini di dalam file:
filtered_posts.php:
<?php include('config.php'); ?>
<?php include('includes/public_functions.php'); ?>
<?php include('includes/head_section.php'); ?>
<?php
	// Get posts under a particular topic
	if (isset($_GET['topic'])) {
		$topic_id = $_GET['topic'];
		$posts = getPublishedPostsByTopic($topic_id);
	}
?>
	<title>LifeBlog | Home </title>
</head>
<body>
<div class="container">
<!-- Navbar -->
	<?php include( ROOT_PATH . '/includes/navbar.php'); ?>
<!-- // Navbar -->
<!-- content -->
<div class="content">
	<h2 class="content-title">
		Articles on <u><?php echo getTopicNameById($topic_id); ?></u>
	</h2>
	<hr>
	<?php foreach ($posts as $post): ?>
		<div class="post" style="margin-left: 0px;">
			<img src="<?php echo BASE_URL . '/static/images/' . $post['image']; ?>" class="post_image" alt="">
			<a href="single_post.php?post-slug=<?php echo $post['slug']; ?>">
				<div class="post_info">
					<h3><?php echo $post['title'] ?></h3>
					<div class="info">
						<span><?php echo date("F j, Y ", strtotime($post["created_at"])); ?></span>
						<span class="read_more">Read more...</span>
					</div>
				</div>
			</a>
		</div>
	<?php endforeach ?>
</div>
<!-- // content -->
</div>
<!-- // container -->

<!-- Footer -->
	<?php include( ROOT_PATH . '/includes/footer.php'); ?>
<!-- // Footer -->
Sekarang segarkan halaman, klik topik dan jika itu membawa Anda ke halaman yang menampilkan posting di bawah topik itu, maka Anda melakukan hal yang benar.
Mari kita lakukan hal yang sama dengan single_post.php. Buka public_functions.php dan tambahkan 2 fungsi berikut ke dalamnya:
/* * * * * * * * * * * * * * *
* Returns a single post
* * * * * * * * * * * * * * */
function getPost($slug){
	global $conn;
	// Get single post slug
	$post_slug = $_GET['post-slug'];
	$sql = "SELECT * FROM posts WHERE slug='$post_slug' AND published=true";
	$result = mysqli_query($conn, $sql);

	// fetch query results as associative array.
	$post = mysqli_fetch_assoc($result);
	if ($post) {
		// get the topic to which this post belongs
		$post['topic'] = getPostTopic($post['id']);
	}
	return $post;
}
/* * * * * * * * * * * *
*  Returns all topics
* * * * * * * * * * * * */
function getAllTopics()
{
	global $conn;
	$sql = "SELECT * FROM topics";
	$result = mysqli_query($conn, $sql);
	$topics = mysqli_fetch_all($result, MYSQLI_ASSOC);
	return $topics;
}
Sekarang buat file complete-blog-php/single_post.php dan rekatkan kode ini ke dalamnya:
<?php  include('config.php'); ?>
<?php  include('includes/public_functions.php'); ?>
<?php
	if (isset($_GET['post-slug'])) {
		$post = getPost($_GET['post-slug']);
	}
	$topics = getAllTopics();
?>
<?php include('includes/head_section.php'); ?>
<title> <?php echo $post['title'] ?> | LifeBlog</title>
</head>
<body>
<div class="container">
	<!-- Navbar -->
		<?php include( ROOT_PATH . '/includes/navbar.php'); ?>
	<!-- // Navbar -->

	<div class="content" >
		<!-- Page wrapper -->
		<div class="post-wrapper">
			<!-- full post div -->
			<div class="full-post-div">
			<?php if ($post['published'] == false): ?>
				<h2 class="post-title">Sorry... This post has not been published</h2>
			<?php else: ?>
				<h2 class="post-title"><?php echo $post['title']; ?></h2>
				<div class="post-body-div">
					<?php echo html_entity_decode($post['body']); ?>
				</div>
			<?php endif ?>
			</div>
			<!-- // full post div -->

			<!-- comments section -->
			<!--  coming soon ...  -->
		</div>
		<!-- // Page wrapper -->

		<!-- post sidebar -->
		<div class="post-sidebar">
			<div class="card">
				<div class="card-header">
					<h2>Topics</h2>
				</div>
				<div class="card-content">
					<?php foreach ($topics as $topic): ?>
						<a
							href="<?php echo BASE_URL . 'filtered_posts.php?topic=' . $topic['id'] ?>">
							<?php echo $topic['name']; ?>
						</a>
					<?php endforeach ?>
				</div>
			</div>
		</div>
		<!-- // post sidebar -->
	</div>
</div>
<!-- // content -->

<?php include( ROOT_PATH . '/includes/footer.php'); ?>
Sekarang mari kita terapkan gaya untuk ini. Buka public_styling.css dan tambahkan kode gaya ini ke dalamnya:
/* * * * * * * * *
* SINGLE PAGE
* * * * * * * * */
.content .post-wrapper {
	width: 70%;
	float: left;
	min-height: 250px;
}
.full-post-div {
	min-height: 300px;
	padding: 20px;
	border: 1px solid #e4e1e1;
	border-radius: 2px;
}
.full-post-div h2.post-title {
	margin: 10px auto 20px;
	text-align: center;
}
.post-body-div {
	font-family: 'Noto Serif', serif;
	font-size: 1.2em;
}
.post-body-div p {
	margin:20px 0px;
}
.post-sidebar {
	width: 24%;
	float: left;
	margin-left: 5px;
	min-height: 400px;
}
.content .post-comments {
	margin-top: 25px;
	border-radius: 2px;
	border-top: 1px solid #e4e1e1;
	padding: 10px;
}
.post-sidebar .card {
	width: 95%;
	margin: 10px auto;
	border: 1px solid #e4e1e1;
	border-radius: 10px 10px 0px 0px;
}
.post-sidebar .card .card-header {
	padding: 10px;
	text-align: center;
	border-radius: 3px 3px 0px 0px;
	background: #3E606F;
}
.post-sidebar .card .card-header h2 {
	color: white;
}
.post-sidebar .card .card-content a {
	display: block;
	box-sizing: border-box;
	padding: 8px 10px;
	border-bottom: 1px solid #e4e1e1;
	color: #444;
}
.post-sidebar .card .card-content a:hover {
	padding-left: 20px;
	background: #F9F9F9;
	transition: 0.1s;
}
Terlihat bagus sekarang kan?
Satu hal terakhir yang harus dilakukan dan kami akan cukup banyak selesai dengan area publik:Kami akan menerapkan pendaftaran pengguna dan login.
Pendaftaran dan login pengguna
Karena saya telah membuat tutorial tentang pendaftaran dan login pengguna, saya akan langsung pada bagian ini dan tidak akan banyak menjelaskan.
Buat dua file di folder root Anda bernama register.php dan login.php. Buka masing-masing dan letakkan kode ini di dalamnya:
register.php:
<?php  include('config.php'); ?>
<!-- Source code for handling registration and login -->
<?php  include('includes/registration_login.php'); ?>

<?php include('includes/head_section.php'); ?>

<title>LifeBlog | Sign up </title>
</head>
<body>
<div class="container">
	<!-- Navbar -->
		<?php include( ROOT_PATH . '/includes/navbar.php'); ?>
	<!-- // Navbar -->

	<div style="width: 40%; margin: 20px auto;">
		<form method="post" action="register.php" >
			<h2>Register on LifeBlog</h2>
			<?php include(ROOT_PATH . '/includes/errors.php') ?>
			<input  type="text" name="username" value="<?php echo $username; ?>"  placeholder="Username">
			<input type="email" name="email" value="<?php echo $email ?>" placeholder="Email">
			<input type="password" name="password_1" placeholder="Password">
			<input type="password" name="password_2" placeholder="Password confirmation">
			<button type="submit" class="btn" name="reg_user">Register</button>
			<p>
				Already a member? <a href="login.php">Sign in</a>
			</p>
		</form>
	</div>
</div>
<!-- // container -->
<!-- Footer -->
	<?php include( ROOT_PATH . '/includes/footer.php'); ?>
<!-- // Footer -->
login.php:
<?php  include('config.php'); ?>
<?php  include('includes/registration_login.php'); ?>
<?php  include('includes/head_section.php'); ?>
	<title>LifeBlog | Sign in </title>
</head>
<body>
<div class="container">
	<!-- Navbar -->
	<?php include( ROOT_PATH . '/includes/navbar.php'); ?>
	<!-- // Navbar -->

	<div style="width: 40%; margin: 20px auto;">
		<form method="post" action="login.php" >
			<h2>Login</h2>
			<?php include(ROOT_PATH . '/includes/errors.php') ?>
			<input type="text" name="username" value="<?php echo $username; ?>" value="" placeholder="Username">
			<input type="password" name="password" placeholder="Password">
			<button type="submit" class="btn" name="login_btn">Login</button>
			<p>
				Not yet a member? <a href="register.php">Sign up</a>
			</p>
		</form>
	</div>
</div>
<!-- // container -->

<!-- Footer -->
	<?php include( ROOT_PATH . '/includes/footer.php'); ?>
<!-- // Footer -->
Di bagian atas kedua file, kami menyertakan file bernama registration_login.php untuk menangani logika pendaftaran dan login. Ini adalah file tempat info login dan formulir pendaftaran akan dikirimkan dan komunikasi dengan database akan dilakukan. Mari kita buat di folder include kami dan masukkan kode ini di dalamnya:
complete-blog-php/includes/registration_login.php:
<?php
	// variable declaration
	$username = "";
	$email    = "";
	$errors = array();

	// REGISTER USER
	if (isset($_POST['reg_user'])) {
		// receive all input values from the form
		$username = esc($_POST['username']);
		$email = esc($_POST['email']);
		$password_1 = esc($_POST['password_1']);
		$password_2 = esc($_POST['password_2']);

		// form validation: ensure that the form is correctly filled
		if (empty($username)) {  array_push($errors, "Uhmm...We gonna need your username"); }
		if (empty($email)) { array_push($errors, "Oops.. Email is missing"); }
		if (empty($password_1)) { array_push($errors, "uh-oh you forgot the password"); }
		if ($password_1 != $password_2) { array_push($errors, "The two passwords do not match");}

		// Ensure that no user is registered twice.
		// the email and usernames should be unique
		$user_check_query = "SELECT * FROM users WHERE username='$username'
								OR email='$email' LIMIT 1";

		$result = mysqli_query($conn, $user_check_query);
		$user = mysqli_fetch_assoc($result);

		if ($user) { // if user exists
			if ($user['username'] === $username) {
			  array_push($errors, "Username already exists");
			}
			if ($user['email'] === $email) {
			  array_push($errors, "Email already exists");
			}
		}
		// register user if there are no errors in the form
		if (count($errors) == 0) {
			$password = md5($password_1);//encrypt the password before saving in the database
			$query = "INSERT INTO users (username, email, password, created_at, updated_at)
					  VALUES('$username', '$email', '$password', now(), now())";
			mysqli_query($conn, $query);

			// get id of created user
			$reg_user_id = mysqli_insert_id($conn);

			// put logged in user into session array
			$_SESSION['user'] = getUserById($reg_user_id);

			// if user is admin, redirect to admin area
			if ( in_array($_SESSION['user']['role'], ["Admin", "Author"])) {
				$_SESSION['message'] = "You are now logged in";
				// redirect to admin area
				header('location: ' . BASE_URL . 'admin/dashboard.php');
				exit(0);
			} else {
				$_SESSION['message'] = "You are now logged in";
				// redirect to public area
				header('location: index.php');
				exit(0);
			}
		}
	}

	// LOG USER IN
	if (isset($_POST['login_btn'])) {
		$username = esc($_POST['username']);
		$password = esc($_POST['password']);

		if (empty($username)) { array_push($errors, "Username required"); }
		if (empty($password)) { array_push($errors, "Password required"); }
		if (empty($errors)) {
			$password = md5($password); // encrypt password
			$sql = "SELECT * FROM users WHERE username='$username' and password='$password' LIMIT 1";

			$result = mysqli_query($conn, $sql);
			if (mysqli_num_rows($result) > 0) {
				// get id of created user
				$reg_user_id = mysqli_fetch_assoc($result)['id'];

				// put logged in user into session array
				$_SESSION['user'] = getUserById($reg_user_id);

				// if user is admin, redirect to admin area
				if ( in_array($_SESSION['user']['role'], ["Admin", "Author"])) {
					$_SESSION['message'] = "You are now logged in";
					// redirect to admin area
					header('location: ' . BASE_URL . '/admin/dashboard.php');
					exit(0);
				} else {
					$_SESSION['message'] = "You are now logged in";
					// redirect to public area
					header('location: index.php');
					exit(0);
				}
			} else {
				array_push($errors, 'Wrong credentials');
			}
		}
	}
	// escape value from form
	function esc(String $value)
	{
		// bring the global db connect object into function
		global $conn;

		$val = trim($value); // remove empty space sorrounding string
		$val = mysqli_real_escape_string($conn, $value);

		return $val;
	}
	// Get user info from user id
	function getUserById($id)
	{
		global $conn;
		$sql = "SELECT * FROM users WHERE id=$id LIMIT 1";

		$result = mysqli_query($conn, $sql);
		$user = mysqli_fetch_assoc($result);

		// returns user in an array format:
		// ['id'=>1 'username' => 'Awa', 'email'=>'[email protected]', 'password'=> 'mypass']
		return $user;
	}
?>
Buka http://localhost/complete-blog-php/register.php dan Anda akan melihat kesalahan yang mengatakan bahwa file error.php tidak ditemukan.
File error.php adalah file dengan kode untuk menampilkan kesalahan validasi form. Buat error.php di dalam complete-blog-php/includes dan tempel kode ini di dalamnya:
<?php if (count($errors) > 0) : ?>
  <div class="message error validation_errors" >
  	<?php foreach ($errors as $error) : ?>
  	  <p><?php echo $error ?></p>
  	<?php endforeach ?>
  </div>
<?php endif ?>
Sekali lagi buka public_styling.css mari tambahkan potongan terakhir dari kode gaya untuk file error.php ini dan beberapa elemen lainnya:
/* NOTIFICATION MESSAGES */
.message {
	width: 100%;
	margin: 0px auto;
	padding: 10px 0px;
	color: #3c763d;
	background: #dff0d8;
	border: 1px solid #3c763d;
	border-radius: 5px;
	text-align: center;
}
.error {
	color: #a94442;
	background: #f2dede;
	border: 1px solid #a94442;
	margin-bottom: 20px;
}
.validation_errors p {
	text-align: left;
	margin-left: 10px;
}
.logged_in_info {
	text-align: right;
	padding: 10px;
}
Dan sekarang pesan kesalahan itu hilang. Klik tombol daftar tanpa mengisi formulir dan Anda akan melihat pesan kesalahan yang indah ditampilkan.
Mari buat pengguna baru dengan mengisi formulir di halaman register.php dan mengklik tombol daftar. Anda dapat memberikan info valid apa pun untuk nama pengguna, email, dan kata sandi; pastikan Anda mengingatnya karena kami akan menggunakannya untuk login segera di halaman login.
Saat pengguna login, mereka pasti harus dapat logout. Di folder root aplikasi, buat file bernama logout.php.
complete-blog-php/logout.php:
<?php
	session_start();
	session_unset($_SESSION['user']);
	session_destroy();
	header('location: index.php');
?>
Juga ketika pengguna masuk, kami ingin menampilkan nama mereka dan tautan atau tombol untuk mereka klik untuk keluar. Untuk area publik, kami akan melakukannya di file banner.php yang kami sertakan. Buka file banner.php dan ubah kodenya menjadi seperti ini:
complete-blog-php/includes/banner.php:
<?php if (isset($_SESSION['user']['username'])) { ?>
	<div class="logged_in_info">
		<span>welcome <?php echo $_SESSION['user']['username'] ?></span>
		|
		<span><a href="logout.php">logout</a></span>
	</div>
<?php }else{ ?>
	<div class="banner">
		<div class="welcome_msg">
			<h1>Today's Inspiration</h1>
			<p>
			    One day your life <br>
			    will flash before your eyes. <br>
			    Make sure it's worth watching. <br>
				<span>~ Gerard Way</span>
			</p>
			<a href="register.php" class="btn">Join us!</a>
		</div>

		<div class="login_div">
			<form action="<?php echo BASE_URL . 'index.php'; ?>" method="post" >
				<h2>Login</h2>
				<div style="width: 60%; margin: 0px auto;">
					<?php include(ROOT_PATH . '/includes/errors.php') ?>
				</div>
				<input type="text" name="username" value="<?php echo $username; ?>" placeholder="Username">
				<input type="password" name="password"  placeholder="Password">
				<button class="btn" type="submit" name="login_btn">Sign in</button>
			</form>
		</div>
	</div>
<?php } ?>
It checks the session to see if a user is available (logged in). If logged in, the username is displayed with the logout link. When there is a logged in user, the banner does not get displayed since it is some sort of a welcome screen to guest users.
You notice that the banner has a login form and this banner is included inside index.php file. Therefore we need to include the code that handles registration and login inside our index.php file also. Open index.php and add this line directly under the include for public_functions.php:
top section of complete-blog-php/index.php:
<?php require_once( ROOT_PATH . '/includes/registration_login.php') ?>And that's it with user registration and login. In the next section, we begin work on the admin area.
Thank you so much for sticking around up to this point. I hope you found it helpful. If you have any worries, please leave it in the comments below. Your feedback is always very helpful and if you have any bugs in your code, I will try my best to help you out.
I will be very much encouraged to create more of these tutorials with improved quality if you share, subscribe to my site and recommend my site to your friends.

