Hari ini, kita akan membangun sistem newsletter menggunakan PHP dengan latar belakang MySQL. Tutorial ini akan mencakup pembuatan sistem yang memungkinkan beberapa daftar buletin dan pengiriman pesan ke daftar tertentu.
Hai teman-teman, jadi kita akan membangun sistem buletin yang cukup rumit, jadi mari kita mulai! Anda akan membutuhkan dua sumber daya untuk proyek tersebut.
- Set Ikon Sutra akan digunakan untuk menambahkan beberapa 'bakat' visual ke aplikasi.
- Swift PHP Mailer akan digunakan untuk mengirim email kami.
Langkah 1:Buat Kerangka Aplikasi
Saat memulai proyek apa pun, saya suka menata folder sebelum memulai pengkodean, jadi mari lakukan sekarang. Pertama, buat direktori proyek secara keseluruhan. Selanjutnya, buat folder bernama admin di dalam folder proyek Anda. Kemudian di dalam folder admin, tambahkan dua folder bernama media dan swift. Terakhir, buat folder bernama gambar di dalam direktori media. Juga, Anda dapat menempatkan folder Swift lib di dalam folder Swift yang kami buat. Anda juga dapat menyalin enam ikon sutra yang akan kita gunakan:
- bullet_green.png
- bullet_red.png
- hapus.png
- email_go.png
- temukan.png
- halaman_edit.png
Saya akan menyusun tutorial selanjutnya tentang membuat CRUD:buat, baca, perbarui, dan hapus untuk empat dari enam model kami. Satu lagi akan diedit oleh tindakan lain, dan yang keenam kita tidak akan membuat tindakan CRUD.
Sekarang mari kita buat database kita dulu, dan tabel kita dibuat secara bertahap nanti. Sekarang kita akan mulai coding. Juga, sebagai catatan, saya akan berasumsi bahwa kita akan bekerja dengan file di folder admin kita, kecuali jika saya menentukan lain, karena sebagian besar kode ada di folder ini.
Langkah 2:Konfigurasi Aplikasi
Setiap aplikasi akan memiliki beberapa jenis file konfigurasi, dan kita akan membuatnya sekarang. Silakan buat file bernama config.php dan tambahkan berikut ini:
# admin/config.php
	<?php
	// DB Settings
	define('DB_SERVER', 'localhost');
	define('DB_USER', 'root');
	define('DB_PASSWORD', '');
	define('DB_NAME', 'nettuts_ns_demo');

	define('FROM_EMAIL', 'no_reply@ohyeahemail.com');
	define('FROM_NAME', 'oh yeah email!');


	session_start();
	require_once 'classes.php';
	$mini = false;
	$nonav = false;
	error_reporting(0);
Jadi bagian pertama mengatur variabel database kami, jadi pastikan Anda mengeditnya sehingga konfigurasi lokal pertama Anda. Uraian kami berikutnya menyiapkan beberapa atribut email yang akan kami gunakan nanti. Bagian terakhir memulai sesi kami sehingga kami dapat mengaksesnya, membutuhkan file class.php kami (kami akan membuatnya hanya dalam satu detik), menetapkan default untuk beberapa opsi tata letak, dan kemudian menetapkan pelaporan kesalahan ke 0 untuk menghentikan peringatan yang mengganggu . Namun, jika Anda tampaknya mengalami masalah, coba komentari baris ini.
Sekarang lanjutkan dan buat file class.php kami dan tambahkan:
# admin/classes.php
	<?php
	// Authentication
	function validate_user($username, $pw) {
	    if (check_username_and_pw($username, $pw)) {
	        header('Location: index.php');
	    } else {
	        $_SESSION['error'] = "Login error.";
	        header('Location: login.php');
	    }
	}

	function logged_in() {
	    if ($_SESSION['authorized'] == true) {
	        return true;
	    } else {
	        return false;
	    }
	}

	function login_required() {
	    if(logged_in()) {
	        return true;
	    } else {
	        header('Location: login.php');
	    }
	}
	// mysql
	function query($sql) {
	  $link = new mysqli(DB_SERVER, DB_USER, DB_PASSWORD, DB_NAME) or die('There was a problem connecting to the database.');

	  $stmt = $link->prepare($sql) or die('error');
	  $stmt->execute();
	  $meta = $stmt->result_metadata();

	  while ($field = $meta->fetch_field()) {
	    $parameters[] = &$row[$field->name];
	  }

	  $results = array();
	  call_user_func_array(array($stmt, 'bind_result'), $parameters);

	  while ($stmt->fetch()) {
	    foreach($row as $key => $val) {
	      $x[$key] = $val;
	    }
	    $results[] = $x;
	  }

	  return $results;
	  $results->close();
	  $link->close();
	}

	function count_query($query) {
	  $link = new mysqli(DB_SERVER, DB_USER, DB_PASSWORD, DB_NAME) or die('There was a problem connecting to the database.');
	  if($stmt = $link->prepare($query)) {
	    $stmt->execute();
	    $stmt->bind_result($result);
	    $stmt->fetch();
	    return $result;
	    $stmt->close();
	  }
	  $link->close();
	}

	function check_username_and_pw($u, $pw) {
	  $link = new mysqli(DB_SERVER, DB_USER, DB_PASSWORD, DB_NAME) or die('There was a problem connecting to the database.');

	  $query = "SELECT * FROM users WHERE username = ? AND password = ? LIMIT 1";
	  if($stmt = $link->prepare($query)) {
	    $p = md5($pw);
	    $stmt->bind_param('ss', $u, $p);
	    $stmt->execute();
	    $stmt->bind_result($id, $username, $pw);
	    if($stmt->fetch()) {
	      $_SESSION['authorized'] = true;
	      $_SESSION['username'] = $username;
	      return true;
	    } else {
	      return false;
	    }
	    $stmt->close();
	  }
	  $link->close();
	}
Itu adalah potongan besar kode, dan saya akan membahasnya. Fungsi pertama kami menangani ketika pengguna memposting login kami, dan kemudian mengirimkan data ke fungsi check_username_and_pw kami. Fungsi login_in kami hanya mengembalikan apakah pengguna login. Fungsi login_required kami memeriksa untuk melihat apakah kami login, dan jika tidak, mengirim kami ke halaman login.
Fungsi berikutnya bernama query() membentuk sebuah query pada DB kita, dan dibuat oleh Jeffrey Way. Saya menambahkan pembuatan tautan dan fungsi tutup untuk membuatnya lebih mudah. Fungsi berikutnya yang saya buat khusus agar kami dapat dengan mudah menjalankan COUNT kueri SQL, dan fungsi check_username_and_pw kami memeriksa untuk melihat apakah kami dapat menemukan pengguna dengan email yang sama dan kata sandi hash MD5, dan jika demikian, menyetel variabel sesi kami.
Langkah 3:Tata Letak Aplikasi
File kita selanjutnya yang akan kita kerjakan adalah file layout.php kita, jadi lanjutkan dan buatlah. Di bagian kepala kami, kami hanya mendeklarasikan deklarasi XHTML reguler kami. Jika Anda perhatikan, kami secara otomatis menambahkan judul halaman ke string lain untuk judul kami. Kemudian kami memiliki stylesheet (lanjutkan dan buat juga di folder media kami). Setelah itu kami membuka tag tubuh kami, dan memeriksa untuk melihat apakah kami menginginkan tata letak mini, dan jika demikian, tambahkan kelas. Kemudian kami memiliki tajuk kami, dan kemudian memeriksa untuk melihat apakah kami menginginkan navigasi kami, dan jika kami melakukannya, kami menunjukkan tab kami. Saya juga menambahkan cara untuk menambahkan kelas saat ini untuk setiap tab. Kami juga kemudian memiliki tautan keluar, dan kemudian memiliki div wadah kami. Dalam hal ini, kami menambahkan tag h3 dengan judul kami, dan kemudian menggemakan konten kami.
# admin/layout.php
	<!DOCTYPE html PUBLIC "-//W3C//DTD XHTML 1.1//EN" "https://www.w3.org/TR/xhtml11/DTD/xhtml11.dtd">
	<html xmlns="https://www.w3.org/1999/xhtml" >
	    <head>
	        <meta http-equiv="Content-Type" content="text/html; charset=utf-8" />

	        <title><?php echo $title; ?> » my newsletter app</title>
	        <!-- Stylesheets -->
	        <!-- <link rel="stylesheet" href="media/style.css" type="text/css" media="all" /> -->
	    </head>
	    <body<?php if ($mini == true) { ?> class="mini"<?php } ?>>
	        <div id="header">
	            <h1><a href="index.php">my newsletter app</a></h1>
	        </div>
	        <?php if ($nonav == false) { ?>
	        <div id="nav">
	            <a href="messages.php"<?php if($tab == 'mess') {?>class="current"<?php } ?>>messages</a>
	            <a href="subscribers.php"<?php if($tab == 'sub') {?>class="current"<?php } ?>>subscribers</a>
	            <a href="newsletters.php"<?php if($tab == 'nl') {?>class="current"<?php } ?>>newsletters</a>
	            <a href="templates.php"<?php if($tab == 'temp') {?>class="current"<?php } ?>>templates</a>
	            <span class="right">
	                <a href="logout.php">log out</a>
	            </span>
	        </div>
	        <?php } ?>
	        <div id="container">
	            <h3><?php echo $title;?></h3>
	            <?php echo $content; ?>
	        </div>
	    </body>
	</html>
Sekarang, kita akan membuat halaman index.php agar kita bisa bergaya. Buka index.php dan tambahkan:
# admin/index.php
		<?php
		require_once 'config.php';
		$title = "Home!";
		$content = <<<EOF
		<h3>current stats</h3>
		Our home page!
		EOF;
		include 'layout.php'; ?>
Jadi dalam hal ini, kami memerlukan file konfigurasi kami, mengatur judul kami, dan kemudian mengatur variabel konten kami, dan terakhir membutuhkan file tata letak kami. Ketika Anda pertama kali membukanya akan terlihat seperti:


Sekarang buka lembar gaya kita. Saya suka menggunakan gaya reset dan tipografi 960.gs, dikompresi dalam TextMate. Jadi bagian atas file CSS saya terlihat seperti:
# admin/media/style.css
	/* reset */
	html,body,div,span,applet,object,iframe,h1,h2,h3,h4,h5,h6,p,blockquote,pre,a,abbr,acronym,address,big,cite,code,del,dfn,em,font,img,ins,kbd,q,s,samp,strike,strong,sub,sup,tt,var,b,u,i,center,dl,dt,dd,ol,ul,li,fieldset,form,label,legend,table,caption,tbody,tfoot,thead,tr,th,td{margin:0;padding:0;border:0;outline:0;font-size:100%;vertical-align:baseline;background:transparent}body{line-height:1}ol,ul{list-style:none}blockquote,q{quotes:none}blockquote:before,blockquote:after,q:before,q:after{content:'';content:none}:focus{outline:0}ins{text-decoration:none}del{text-decoration:line-through}table{border-collapse:collapse;border-spacing:0}
	/* typography */
	body{font:13px/1.5 Helvetica,Arial,'Liberation Sans',FreeSans,sans-serif}a:focus{outline:1px dotted invert}hr{border:0 #ccc solid;border-top-width:1px;clear:both;height:0}h1{font-size:25px}h2{font-size:23px}h3{font-size:21px}h4{font-size:19px}h5{font-size:17px}h6{font-size:15px}ol{list-style:decimal}ul{list-style:square}li{margin-left:30px}p,dl,hr,h1,h2,h3,h4,h5,h6,ol,ul,pre,table,address,fieldset{margin:10px 0;}
Mari kita beri gaya pertama pada elemen utama kita, jadi tambahkan gaya berikut:
# admin/media/style.css
	#header {width:85%; margin:0 auto;}
	#header h1 a {text-decoration:none; color:#000;}
	#container {width:85%; background: #111; margin:5px auto; color:#fff; padding:10px;}
Sekarang halaman Anda akan terlihat seperti:


Sekarang jika kita menata tab dengan latar belakang navigasi dan kemudian latar belakang melayang di setiap tautan dan Anda akan melihat:
# admin/media/style.css
	/* tabs */
	#nav {margin:0 auto 2px;padding:10px;width:85%; background:#444;}
	#nav a { padding:12px 10px; margin:0; color:#fff; text-decoration:none; text-align:center;}
	#nav a.current, #nav a:hover {background:#111;}
#nav span.right {float:right;} 


Sekarang, saat kita sedang mengerjakan file, lanjutkan dan tambahkan gaya berikut untuk tata letak mini, input formulir, tabel, tautan besar, dan pesan kesalahan &sukses kita.
# admin/media/style.css
	body.mini #header {width:30%; text-align:center;}
	body.mini #container {width:30%;}

	/* form */
	form input.text {width:95%; font-size:16px;}
	form textarea {width:95%; height:100%;}
	/* table */
	table {width:98%; text-align:right; border:rgb(128,128,128); font-size:12px; margin:5px 10px; color:#000;background:#fff;}
	table th {background-color: rgb(229, 229, 229); border:1px solid rgb(187, 187, 187); padding:3px 6px; font-weight:normal; color:#000;}
	table tr td {border: 1px solid rgb(221, 221, 221); padding:3px 6px;}
	table tr:hover {background-color: rgb(240, 240, 240);color:#000;}
	/* a */
	a.large {padding: 5px; color:#000; background:#eee; text-decoration:none; margin:5px;}
	a.large.right {float:right;}
	a.large:hover, a.large.current {background:#444; color:#fff;}
	/* messages */
	#message {margin: 5px 10px; padding: 4px; display:block;text-align:center;}
	#message.error {background:#FFEBE8;border: 1px solid #CC0000;color:#CC0000;}
	#message.success {border:solid 1px #349534; background:#C9FFCA;color:#008000;}
Itu adalah beberapa gaya yang saya suka gunakan di semua proyek saya. Sekarang setelah kita menyelesaikan tata letak, kita akan melanjutkan ke otentikasi.
Langkah 4:Otentikasi
Kami akan bekerja dengan sistem otentikasi yang sangat sederhana. Buat login.php dan tempatkan berikut ini di dalam:
# admin/login.php
	<?php
	require_once 'config.php';
	if(logged_in()) {header('Location: index.php');}
	$title = "login";
	$nonav = true;
	$mini = true;
	if($_POST && (!empty($_POST['username']) ) && (!empty($_POST['password']))) {
	    validate_user($_POST['username'], $_POST['password']);
	}
	$error = $_SESSION['error'];
	$content = <<<EOF
	$error
	<form action="login.php" method="post">
	    <p>
	        <label for="username">username:</label><br />
	        <input type="text" name="username" class="text" />
	    </p>
	    <p>
	        <label for="password">password:</label><br />
	        <input type="password" name="password" class="text" />
	    </p>
	    <p>
	        <input type="submit" value="login" />
	    </p>
	</form>
	EOF;
	include 'layout.php'; ?>
Saya akan menjelaskan setiap bagian dari kode. Pertama kita membutuhkan file konfigurasi kita. Selanjutnya kami memeriksa untuk melihat apakah kami masuk, dan jika sudah, kami mengarahkan ulang ke rumah. Selanjutnya kita atur judul, dan opsi tata letak kita. Kemudian kami memeriksa untuk melihat apakah kami memiliki POST dan apakah POST memiliki nama pengguna dan kata sandi, dan jika demikian, kami memanggil fungsi validasi_pengguna dari file kelas kami. Kami selanjutnya mengatur kesalahan variabel ke kesalahan sesi kami, dan kemudian kami mengatur formulir kami dan menampilkan kesalahan apa pun. Sekarang kita akan membuat halaman logout, jadi buat logout.php dan masukkan yang berikut di dalamnya:
# admin/logout.php
	<?php
	require_once 'config.php';
	$_SESSION = array();
	session_destroy();
	header('Location: login.php');
	?>
Kami kembali membutuhkan file konfigurasi kami, mengatur sesi kami ke array kosong, lalu menghancurkan sesi kami dan mengarahkan ulang ke halaman login kami. Sekarang setelah Anda melakukan semua ini, halaman login Anda akan terlihat seperti:


Kami juga akan membuat catatan pengguna (dan tabel kami) sehingga kami dapat menambahkan logika otentikasi dan Anda dapat melihat halaman dengan kode di depan. Untuk membuat pengguna dengan nama pengguna admin dan kata sandi rahasia. Untuk menambahkan ini, jalankan SQL ini:
CREATE TABLE `users` (
	   `id` int(10) AUTO_INCREMENT,
	   `username` varchar(50),
	   `password` varchar(32),
	   PRIMARY KEY (`id`)
	) ENGINE=MyISAM DEFAULT CHARSET utf8;

	INSERT INTO `users` (`id`, `username`, `password`) VALUES
	('1', 'admin', '5ebe2294ecd0e0f08eab7690d2a6ee69');
Langkah 5:Buletin
Saya merancang aplikasi ini menjadi sangat fleksibel. Saya ingin Anda (pengguna) dapat membuat dan mengelola buletin sebanyak yang Anda inginkan. Jadi, pertama, kita perlu membuat tabel database kita. Berikut adalah kode SQL dari ekspor pada aplikasi demo saya:
	CREATE TABLE `newsletters` (
	   `id` int(10) AUTO_INCREMENT,
	   `name` varchar(50),
	   `description` varchar(255),
	   `visible` varchar(10),
	   PRIMARY KEY (`id`)
	) ENGINE=MyISAM DEFAULT CHARSET utf8;
Jadi sekarang kita memiliki tabel buletin, kita akan membuat halaman untuk setiap tindakan. Buat empat file bernama:newsletters.php, newsletters_delete.php, newsletters_edit.php, dan newsletters_new.php. Pertama buka newsletters.php:
# admin/newsletters.php
	<?php
	require_once 'config.php';
	login_required();
	$title = "newsletters";
	$newsletters = query("SELECT * FROM newsletters ORDER BY id ASC");
	$tab = 'nl';
	$table = "";
	foreach($newsletters as $row) {
	    $dlink = '<a href="newsletters_delete.php?id='.$row['id'].'" onclick="return confirm(\'Are you sure you want to delete this newsletter?\');" title="delete"><img src="media/images/delete.png" alt="delete"/></a>';
	    $elink = '<a href="newsletters_edit.php?id='.$row['id'].'" title="edit" ><img src="media/images/page_edit.png" alt="edit"/></a>';
	    if($row['visible'] == "1") {$visible = '<img src="media/images/bullet_green.png" />';} else {$visible = '<img src="media/images/bullet_red.png" />';}
	    $table .= "<tr><td>".$row['id']."</td><td>".$row['name']."</td><td>".$row['description']."</td><td>$visible</td><td>".$dlink." ".$elink."</td></tr>\n";
	}
	$message = error_messages();
	$content = <<<EOF
	<a href="newsletters_new.php" class="large">new newsletter »</a>
	$message
	<table>
	    <tr>
	        <th></th>
	        <th>name</th>
	        <th>description</th>
	        <th>visible</th>
	        <th></th>
	    </tr>
	    $table
	</table>
	EOF;
	include 'layout.php'; ?>
Jadi file ini memiliki nuansa dasar yang sama dengan halaman login kita. Kami memerlukan konfigurasi kami, pastikan kami masuk, atur judul kami. Selanjutnya kami menggunakan fungsi query() kami untuk melakukan kueri SELECT untuk menemukan semua buletin kami. Kami kemudian mengatur tab saat ini untuk tata letak kami. Setelah kita mengulang array yang dikembalikan oleh kueri kita, dan membuat tata letak tabel. Kemudian kami memanggil fungsi yang belum diketahui, dan membuat halaman kami. Sebelum Anda dapat melihat halaman, Anda perlu menambahkan berikut ini ke file class.php Anda untuk menangani pesan kesalahan kami dengan mudah:
# admin/classes.php
	// Render error messages
	function error_messages() {
	    $message = '';
	    if($_SESSION['success'] != '') {
	        $message = '<span class="success" id="message">'.$_SESSION['success'].'</span>';
	        $_SESSION['success'] = '';
	    }
	    if($_SESSION['error'] != '') {
	        $message = '<span class="error" id="message">'.$_SESSION['error'].'</span>';
	        $_SESSION['error'] = '';
	    }
	    return $message;
	}
Meskipun Anda mungkin tidak akan memiliki data apa pun, ketika Anda memiliki beberapa catatan, data tersebut akan terlihat seperti:(walaupun sedikit lebih longgar)


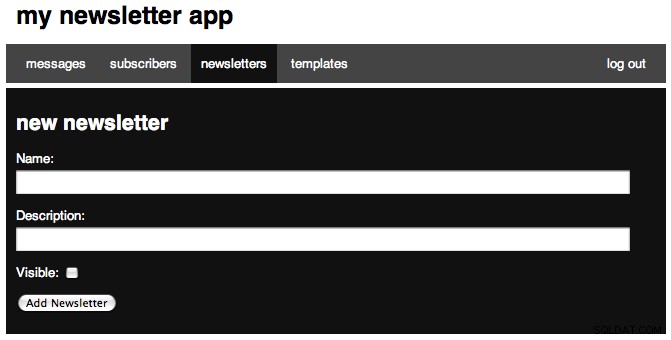
Sekarang kita akan mengerjakan tindakan baru kita, jadi buka newsletters_new.php dan tambahkan berikut ini:
# admin/newsletters_new.php
	<?php
	require_once 'config.php';
	login_required();
	$tab = 'nl';

	if(isset($_POST['submitted'])) {
	    $link = new mysqli(DB_SERVER, DB_USER, DB_PASSWORD, DB_NAME) or die('There was a problem connecting to the database.');
	    $sql = "INSERT INTO NEWSLETTERS (name, description) VALUES ( '".$_POST['name']."' , '".$_POST['description']."' )";
	    $stmt = $link->query($sql) or die($link->error);
	    $stmt->close;
	    $_SESSION['success'] = "Added newsletter.";
	    header('Location: newsletters.php');
	}
	$title = "new newsletter";
	$content = <<<EOF
	<form action="newsletters_new.php" method='POST'>
	    <p>
	        <label for="name">Name:</label><br />
	        <input type='text' name='name' class="text" />
	    </p>
	    <p>
	        <label for="description">Description:</label>
	        <input type="text" name="description" class="text" />
	    </p>
	    <p>
	        <input type='submit' value='Add Newsletter' />
	        <input type='hidden' value='1' name='submitted' />
	    </p>
	</form>
	EOF;
	include 'layout.php'; ?>
Jadi saya harap Anda telah memperhatikan pola di bagian atas setiap file kami. Pertama-tama kita membutuhkan file config.php kita, kemudian pastikan kita login, dan kemudian atur tab kita saat ini, dan kita kemudian menambahkan beberapa logika tambahan untuk menangani POST dan kemudian kita mengatur judul kita, konten kita, dan kemudian merender halaman. Bagian POST cukup sederhana untuk dipahami, jadi saya akan menjelaskannya dengan cepat.
Kami pertama-tama memeriksa untuk melihat apakah item dengan nama yang dikirimkan telah dikirim. Ini adalah bidang tersembunyi yang kita miliki setelah tombol kirim. Selanjutnya, kami membuat tautan ke database kami menggunakan variabel dari file konfigurasi kami. Selanjutnya kita membuat query insert SQL kita, menggunakan variabel POSTed kita. Selanjutnya kita query (bukan fungsi kita) database, dan jika error dimunculkan, kita tampilkan error yang dikembalikan. Selanjutnya, kami menutup kueri, lalu kami menetapkan pesan sukses kami, dan kemudian mengarahkan ulang ke halaman daftar. Halaman Anda akan terlihat seperti:


Selanjutnya kita akan mengerjakan halaman edit kita dan menambahkan yang berikut ini:
# admin/newsletters_edit.php
	<?php
	require_once 'config.php';
	login_required();
	$tab = 'nl';

	if(isset($_POST['submitted'])) {
	    $link = new mysqli(DB_SERVER, DB_USER, DB_PASSWORD, DB_NAME) or die('There was a problem connecting to the database.');
	    if(isset($_POST['visible'])) {$visible = 1;}else{$visible = 0;}
	    $sql = "UPDATE NEWSLETTERS SET name='".$_POST['name']."', description='".$_POST['description']."', visible=".$visible." WHERE id=".$_POST['id']."";
	    $stmt = $link->query($sql) or die($link->error);
	    $stmt->close;
	    $_SESSION['success'] = "Edited newsletter.";
	    header('Location: newsletters.php');
	}
	$title = "edit newsletter";
	$id = (int) $_GET['id'];
	$results = query("SELECT * FROM newsletters WHERE id='".$id."' LIMIT 1");
	$name = $results[0]['name'];
	$description = $results[0]['description'];
	$visible = ($results[0]['visible'] == "1") ? 'checked="checked"' : '';
	$content = <<<EOF
	<form action="newsletters_edit.php" method='POST'>
	    <p>
	        <label for="name">Name:</label><br />
	        <input type='text' name='name' class="text" value="$name" />
	    </p>
	    <p>
	        <label for="description">Description:</label>
	        <input type="text" name="description" class="text" value="$description" />
	    </p>
	    <p>
	        <label for="visible">Visible:</label>
	        <input type="checkbox" name="visible" value="true" $visible/>
	    </p>
	    <p>
	        <input type='submit' value='Edit Newsletter' />
	        <input type='hidden' value='1' name='submitted' />
	        <input type='hidden' value='$id' name='id' />
	    </p>
	</form>
	EOF;
	include 'layout.php'; ?>
Sama seperti semua file kami, kami memulai dengan blok yang sama. Setelah blok POST kami (yang akan saya bicarakan sebentar lagi), kami menetapkan id ke id yang kami minta, memastikan itu adalah bilangan bulat. Kami kemudian menggunakan fungsi kueri kami untuk menemukan buletin yang sedang kami kerjakan, dan menetapkan beberapa variabel ke hasil yang dikembalikan. Anda mungkin bertanya mengapa kami menempatkan [0] sebelum kami meminta setiap nilai, dan alasannya adalah fungsi kueri mengembalikan larik semua catatan, dan setiap catatan adalah larik, jadi kami perlu mengakses larik pertama dalam variabel hasil kami . Baris di mana kita mengatur variabel terlihat ifs sebenarnya adalah pernyataan if/else terkompresi. bagian if adalah ==1, maka jika itu benar, variabel disetel ke dicentang, yang lain tidak ada. Kemudian kami memiliki formulir kami.
Blok POST kami sangat mirip dengan halaman baru kami, dan akan selalu memulai dengan cara yang sama di seluruh halaman kami lainnya. Kami kemudian memeriksa untuk melihat apakah kotak centang dicentang, dan mengatur variabel di sini lagi. Kemudian kami memiliki kueri UPDATE kami, jalankan kueri lagi, atur pesan sukses kami, dan kemudian arahkan kembali ke rumah. Beginilah tampilan form dan pesan yang terlihat setelah diedit:


Halaman terakhir untuk bagian ini adalah yang paling mudah, karena ini adalah halaman hapus. Buka file dan rekatkan ke berikut:
# admin/newsletters_delete.php
	<?php
	require_once 'config.php';
	login_required();
	$id = (int) $_GET['id'];
	$link = new mysqli(DB_SERVER, DB_USER, DB_PASSWORD, DB_NAME) or die('There was a problem connecting to the database.');
	$sql = "DELETE FROM newsletters WHERE id=$id LIMIT 1";
	$stmt = $link->query($sql) or die($link->error);
	if($link->affected_rows) {
	    $_SESSION['success'] = "Newsletter deleted.";
	} else {
	    $_SESSION['error'] = 'Nothing deleted.';
	}
	header('Location: newsletters.php');
Di blok ini kami memerlukan konfigurasi kami, pastikan kami masuk, lalu simpan id yang diminta ke variabel, buat koneksi MySQL, atur kueri SQL kami, lalu jalankan kueri. Kami selanjutnya memeriksa untuk melihat apakah baris terpengaruh, dan menetapkan pesan dengan tepat. Kami kemudian mengarahkan ulang ke halaman buletin. Selamat, Anda telah menyelesaikan bagian pertama dari empat bagian CRUD. Selanjutnya, kita akan mengerjakan CRUD untuk template kita.
Langkah 6:Template
Aplikasi kami juga akan memungkinkan beberapa template, semua disimpan dalam database. Pertama, mari kita buat tabel database kita:
	CREATE TABLE `templates` (
	   `id` int(10) AUTO_INCREMENT,
	   `name` varchar(50),
	   `columns` tinyint(5),
	   `body` text,
	   PRIMARY KEY (`id`)
	) ENGINE=MyISAM DEFAULT CHARSET utf8;
Kami memiliki kolom id yang bertambah secara otomatis, kolom nama, kolom kolom untuk menyimpan jumlah kolom (aplikasi hanya menskalakan 2 kolom, yang seharusnya cukup, tetapi dapat dengan mudah diperluas. Ini juga dapat digunakan untuk bagian yang berbeda .), dan tubuh kita. Sama seperti terakhir kali, kita perlu membuat setiap halaman kita, dan kita akan memiliki halaman templates.php, serta templates_new.php, templates_edit.php, templates_delete.php, dan templates_preview.php. Pertama-tama kita akan mengerjakan file templates.php kita, jadi buka dan tempel:
# admin/templates.php
	<?php
	require_once 'config.php';
	login_required();
	$title = "templates";
	$tab = 'temp';
	$templates = query("SELECT id,name,columns FROM templates ORDER BY id ASC");
	$table = "";
	foreach($templates as $row) {
	    $plink = '<a href="" onClick="window.open(\'templates_preview.php?id='.$row['id'].'\',width=800,height=600)" title="preview"><img src="media/images/find.png" alt="preview"/></a>';
	    $dlink = '<a href="templates_delete.php?id='.$row['id'].'" onclick="return confirm(\'Are you sure you want to delete this template?\');" title="delete"><img src="media/images/delete.png" alt="delete"/></a>';
	    $elink = '<a href="templates_edit.php?id='.$row['id'].'" title="edit"><img src="media/images/page_edit.png" alt="edit"/></a>';
	    $table .= "<tr><td>".$row['id']."</td><td>".$row['name']."</td><td>".$row['columns']."</td><td>".$plink." ".$dlink." ".$elink."</td></tr>\n";
	}
	$message = error_messages();
	$content = <<<EOF
	<a href="templates_new.php" class="large">new template »</a>
	$message
	<table>
	    <tr>
	        <th></th>
	        <th>name</th>
	        <th>columns</th>
	        <th></th>
	    </tr>
	    $table
	</table>
	EOF;
	include 'layout.php'; ?>
Sekali lagi kita mulai dengan dasar-dasarnya. Kami kemudian membentuk kueri untuk menemukan semua template kami. Kami kemudian mengulang setiap array dalam template dan kami membuat tabel. Kami kemudian mendapatkan pesan kesalahan (dan sukses), dan kemudian konten kami. Halaman Anda akan terlihat seperti:


Sekarang, pindah ke halaman baru kami, rekatkan yang berikut ini:
# admin/templates_new.php
	<?php
	require_once 'config.php';
	login_required();
	$tab = 'temp';
	if(isset($_POST['submitted'])) {
	    $link = new mysqli(DB_SERVER, DB_USER, DB_PASSWORD, DB_NAME) or die('There was a problem connecting to the database.');
	    $sql = "INSERT INTO templates (name, columns, body) VALUES ( '".$_POST['name']."' , ".$_POST['columns'].", '".mysql_real_escape_string($_POST['body'])."' )";
	    $stmt = $link->query($sql) or die($link->error);
	    $stmt->close;
	    $_SESSION['success'] = "Added template.";
	    header('Location: templates.php');
	}
	$title = "new template";
	$content = <<<EOF
	<form action="templates_new.php" method='POST'>
	    <p>
	        <label for="name">Name:</label><br />
	        <input type='text' name='name' class="text" />
	    </p>
	    <p>
	        <label for="columns">Columns</label>
	        <select name="columns">
	            <option value="1">Single Column Layout</option>
	            <option value="2">Two Column Layout</option>
	        </select>
	    </p>
	    <p>
	        <label for="description">Body: (raw html)</label><br />
	        Use %content% for a single column layout, %leftcol% and %rightcol% for a two column layout.<br />
	        <textarea name="body" rows="35"></textarea>
	    </p>
	    <p>
	        <input type='submit' value='Add Template' />
	        <input type='hidden' value='1' name='submitted' />
	    </p>
	</form>
	EOF;
	include 'layout.php'; ?>
Jadi, sekali lagi, kami memiliki tajuk yang sama. POST kami kembali membuat koneksi MySQL, lalu kami membuat kueri kami, dan menggunakan mysql_real_escape_string untuk mengizinkan karakter apa pun ke dalam catatan, dan kemudian kami menjalankan kueri kami, mengatur pesan sukses kami, dan mengarahkan ulang ke daftar templat kami. Jika Anda melihat formulir kami, saya juga meminta variabel untuk dimasukkan untuk konten kami, dan saya akan menunjukkan kepada Anda bagaimana ini berperan nanti ketika kami mencocokkan pesan dengan template. Halaman Anda akan terlihat seperti:


Selanjutnya kita akan mengerjakan halaman edit kita. Jika Anda perhatikan, sebagian besar kode ini adalah salin dan tempel di semua tindakan yang sama, jadi permudah diri Anda sendiri.
# admin/templates/edit.php
	<?php
	require_once 'config.php';
	login_required();
	$tab = 'temp';
	if(isset($_POST['submitted'])) {
	    $link = new mysqli(DB_SERVER, DB_USER, DB_PASSWORD, DB_NAME) or die('There was a problem connecting to the database.');
	    $sql = "UPDATE templates SET name='".$_POST['name']."', body='".mysql_real_escape_string($_POST['body'])."', columns=".$_POST['columns']." WHERE id=".$_POST['id']."";
	    $stmt = $link->query($sql) or die($link->error);
	    $stmt->close;
	    $_SESSION['success'] = "Edited template.";
	    header('Location: templates.php');
	}
	$title = "edit template";
	$id = (int) $_GET['id'];
	$results = query("SELECT * FROM templates WHERE id='".$id."' LIMIT 1");
	$name = $results[0]['name'];
	$templatedata = stripslashes(htmlspecialchars($results[0]['body']));
	$content = <<<EOF
	<form action="templates_edit.php" method='POST'>
	    <p>
	        <label for="name">Name:</label><br />
	        <input type='text' name='name' class="text" value="$name"/>
	    </p>
	    <p>
	        <label for="columns">Columns</label>
	        <select name="columns">
	            <option value="1">Single Column Layout</option>
	            <option value="2">Two Column Layout</option>
	        </select>
	    </p>
	    <p>
	        <label for="body">Body: (raw html)</label><br />
	        Use %content% for a single column layout, %leftcol% and %rightcol% for a two column layout.<br />
	        <textarea name="body" rows="35">$templatedata</textarea>
	    </p>
	    <p>
	        <input type='submit' value='Edit Template' />
	        <input type='hidden' value='1' name='submitted' />
	        <input type='hidden' value='$id' name='id' />
	    </p>
	</form>
	EOF;
	include 'layout.php'; ?>
We start with the same intro, then our POST block, our title, then our requested id. After, we try and find the template we are working with, then sets three variables so that we can inset them into our content block. We also convert all of the tags we stored to HTML characters so everything will display. When looking at our POST block, you will notice we create our link, then our query and again use mysql_real_escape_string to save everything, execute our query, and then set our message, and redirect to our templates list. Your edit page (with a sample record) should look like:


Now we will create another delete page, so open up our delete page and paste in:
# admin/templates_delete.php
	<?php
	require_once 'config.php';
	login_required();
	$id = (int) $_GET['id'];
	$link = new mysqli(DB_SERVER, DB_USER, DB_PASSWORD, DB_NAME) or die('There was a problem connecting to the database.');
	$sql = "DELETE FROM templates WHERE id=$id LIMIT 1";
	$stmt = $link->query($sql) or die($link->error);
	if($link->affected_rows) {
	    $_SESSION['success'] = "Template deleted.";
	} else {
	    $_SESSION['error'] = 'Nothing deleted.';
	}
	header('Location: templates.php');
I hope you have picked up the pattern here, this is a very simple page. Now we are going to work on an extra page that is not part of the CRUD spectrum; we are going to create a preview page. The binoculars in the action part on the table is the link for each one (in a new window). So open up our preview page. The page is very simple, we find our template and echo the data, and then append a javascript close button. The code looks like:
# admin/templates_preview.php
	<?php
	require_once 'config.php';
	login_required();
	$id = (int) $_GET['id'];
	$data = query("SELECT body FROM templates WHERE id=$id LIMIT 1");
	$template = $data[0]['body'];
	?>
	<?php echo $template; ?>
	<center><button type="button" onclick="self.close();">close window</button></center>
And an example preview looks like:


Now we have finished with our Templates, we are ready to move onto the next step!
Step 7:Subscribers
So now we are going to work with our subscribers! We are going to create two tables. The first:
CREATE TABLE `subscribers` (
	   `id` tinyint(10) AUTO_INCREMENT,
	   `name` varchar(50),
	   `email` varchar(50),
	   PRIMARY KEY (`id`)
	) ENGINE=MyISAM DEFAULT CHARSET utf8;
Refers to each subscriber, and the second:
CREATE TABLE `subscriptions` (
	   `id` tinyint(10) AUTO_INCREMENT,
	   `subscriber_id` tinyint(10),
	   `newsletter_id` tinyint(10),
	   PRIMARY KEY (`id`)
	) ENGINE=MyISAM DEFAULT CHARSET utf8;
Creates a table for our many-to-many relationship with our newsletters. A subscriber can have multiple subscription to newsletters, so they can subscribe to multiple ones, and each newsletter can have many subscribers. To create the most dynamic solution, we have a linking table.
Let's first create our files. The files we are going are going to have are subscribers.php, subscribers_delete.php, and subscribers_edit.php. Our create action will be created later for the front-end. First open up subscribers.php and paste in:
# admin/subscribers.php
	<?php
	require_once 'config.php';
	login_required();
	$title = "subscribers";
	$tab = 'sub';
	$table = "";
	$messages = query("SELECT * FROM subscribers ORDER BY id ASC");
	foreach($messages as $row) {
		$dlink = '<a href="subscribers_delete.php?id='.$row['id'].'" onclick="return confirm(\'Are you sure you want to delete this subscriber?\');" title="delete"><img src="media/images/delete.png" alt="delete"/></a>';
		$elink = '<a href="subscribers_edit.php?id='.$row['id'].'" title="edit"><img src="media/images/page_edit.png" alt="edit"/></a>';
		$table .= '<tr><td>'.$row['id'].'</td><td>'.$row['name'].'</td><td>'.$row['email'].'</td><td>'.$dlink.' '.$elink.'</td></tr>';
	}
	$message = error_messages();
	$content = <<<EOF
	$message
	<table>
		<tr>
			<th></th>
			<th>name</th>
			<th>email</th>
			<th></th>
		</tr>
		$table
	</table>
	EOF;
	include 'layout.php'; ?>
We have basically the same listing pages as before, except this time we will be finding our subscribers. Your page (with some sample data) should look like:


Now we will move on to our edit page:
# admin/subscribers_edit.php
	<?php
	require_once 'config.php';
	login_required();
	$tab = 'sub';

	if(isset($_POST['submitted'])) {
	    $id = (int) $_POST['id'];
	    $link = new mysqli(DB_SERVER, DB_USER, DB_PASSWORD, DB_NAME) or die('There was a problem connecting to the database.');
	    $sql = "UPDATE subscribers SET name='".$_POST['name']."', email='".$_POST['email']."' WHERE id=$id";
	    $stmt = $link->query($sql) or die($link->error);
	    $stmt->close;

	    foreach($_POST['newsletter'] as $n) {
	        if($n['exists'] != '1' && $n['subscribe'] == "true") { // If we want to subscribe but the record doesnt exist
	            $nlid = $n['nlid'];
	            $sql = "INSERT INTO subscriptions (subscriber_id, newsletter_id) VALUES ('$id', '$nlid')";
	            $stmt = $link->query($sql) or die($link->error);
	            $stmt->close;
	        } elseif ($n['exists'] == '1' && $n['subscribe'] != "true") {// Else if we had an exits but we want to unsubscribe
	            $subid = $n['subid'];
	            $sql = "DELETE FROM subscriptions WHERE id=$subid LIMIT 1";
	            $stmt = $link->query($sql) or die($link->error);
	            $stmt->close;
	        }
	    }
	    $_SESSION['success'] = "Edited subscriber.";
	    header('Location: subscribers.php');
	}
	$title = "edit newsletter";
	$id = (int) $_GET['id'];

	$subscriber = query("SELECT * FROM subscribers WHERE id='$id'");
	$name = $subscriber[0]['name'];
	$email = $subscriber[0]['email'];

	$newsletters = query("SELECT * FROM newsletters");
	$subs = query("SELECT * FROM subscriptions WHERE subscriber_id='".$id."'");
	$subscriptions = '';
	foreach($newsletters as $nl) {
	    $s = false;
	    $subid = '';
	    foreach($subs as $sub) {
	        if($sub['newsletter_id'] == $nl['id']) {$s = true; $subid = $sub['id'];}
	    }
	    $checked = ($s == true) ? 'checked="checked"' : '';
	    $subscriptions .= '
	    <input type="checkbox" name="newsletter['.$nl["id"].'][subscribe]" value="true" '.$checked.'/>
	    <label for="newsletter['.$nl["id"].']">'.$nl['name'].'</label>
	    <input type="hidden" name="newsletter['.$nl["id"].'][exists]" value="'.$s.'" />
	    <input type="hidden" name="newsletter['.$nl["id"].'][nlid]" value="'.$nl['id'].'" />
	    <input type="hidden" name="newsletter['.$nl["id"].'][subid]" value="'.$subid.'" /><br />
	    ';


	}
	$content = <<<EOF
	<form action="subscribers_edit.php" method='POST'>
	    <p>
	        <label for="name">Name:</label><br />
	        <input type='text' name='name' class="text" value="$name" />
	    </p>
	    <p>
	        <label for="email">Email</label><br />
	        <input type="text" name="email" class="text" value="$email" />
	    </p>
	    <p>
	        <strong>Newsletters:</strong><br />
	        $subscriptions
	    </p>
	    <p>
	        <input type='submit' value='Edit Subscriber' />
	        <input type='hidden' value='1' name='submitted' />
	        <input type='hidden' value='$id' name='id' />
	    </p>
	</form>
	EOF;
	include 'layout.php'; ?>
This page is fairly different so I will explain each part. The header is the same we have been using. I'll skip the POST block and come back to it. We then continue the same code. We next find our current subscriber. Next we find all newsletters (this includes ones that are not visible - visible mean visible to the public) and then all of the subscriber's subscriptions. We next loop through every newsletter record returned, we next reset some values. Next, we loop through every subscription the user has, and if the subscription's newsletter_id is equal to the current newsletter we are looping we set $s true, and $subid equal to the subscription id. We then set the variable $checked equal to either checked or nothing depending on whether a subscription was found for this subscriber and the current newsletter in the loop. Next we create the checkbox form area, with a lot of hidden fields. First, we have the actual checkbox with a name that will create an array for each checkbox. We then have our label, and next we output whether or not the subscription exists, the newsletter_id and then the subscription_id for when the subscription exists. After which we have our normal content.
Now, if we move on to our POST block. We first get the id posted from our hidden field at the bottom. We next create our MySQL link. Next we have our first SQL query where we update the subscriber record. Next we loop through every newsletter checkbox. The first conditional statement checks to see if the POSTed data says we do not have an existing subscription, and the user wants to subscribe to the newsletter. To handle this, we are going to perform a SQL INSERT into our subscriptions table where our subscriber_id is the same as the user_id we are editing, and newsletter_id equal to the 'nlid' value POSTed by one of our hidden fields. We then execute that SQL INSERT query. The elseif conditional statement says that if our subscription exists, but the checkbox was unchecked so we unsubscribe, we need to delete the subscription. We handle this with a SQL DELETE query. To form our query we set $subid equal to the posted value for our 'subid'. We then create our query by deleting the record where the subscription id equals our variable of $subid. Next we execute the query, set our session success message, and then redirect back to our subscribers page. Your final edit page should look like:(filled with sample data)


We have one last page to work on for the subscribers part of the backend:the delete page. Just like before, this page is very simple:
# admin/subscribers_delete.php
	<?php
	require_once 'config.php';
	login_required();
	$id = (int) $_GET['id'];
	$link = new mysqli(DB_SERVER, DB_USER, DB_PASSWORD, DB_NAME) or die('There was a problem connecting to the database.');
	$sql = "DELETE FROM subscribers WHERE id=$id LIMIT 1";
	$stmt = $link->query($sql) or die($link->error);
	if($link->affected_rows) {
	    $_SESSION['success'] = "Subscriber deleted.";
	} else {
	    $_SESSION['error'] = 'Nothing deleted.';
	}
	header('Location: subscribers.php');
Step 8:Messages
I will tell you upfront, this section has the most pages. We will be working with seven now, and creating one more in Step 10. First, we are going to create our messages table with this SQL:
CREATE TABLE `messages` (
	   `id` tinyint(10) AUTO_INCREMENT,
	   `subject` varchar(255),
	   `leftcol` text,
	   `rightcol` text,
	   `template_id` tinyint(10),
	   PRIMARY KEY (`id`)
	) ENGINE=MyISAM DEFAULT CHARSET utf8;
Next, we'll create the files for this step. Creates seven files, each named messages.php, messages_delete.php, messages_edit.php, messages_new.php, messages_new_step2.php, messages_new_step3.php, and messages_preview.php. Let's first open up messages.php and make it look like:
# admin/messages.php
	<?php
	require_once 'config.php';
	login_required();
	$title = "messages";
	$tab = 'mess';
	$table = "";
	$messages = query("SELECT * FROM messages ORDER BY id ASC");
	foreach($messages as $row) {
	    $slink = '<a href="messages_send.php?id='.$row['id'].'" title="send message"><img src="media/images/email_go.png" alt="send message"/></a>';
	    $plink = '<a href="messages_preview.php?id='.$row['id'].'" target="_new" title="preview"><img src="media/images/find.png" alt="preview"/></a>';
	    $dlink = '<a href="messages_delete.php?id='.$row['id'].'" onclick="return confirm(\'Are you sure you want to delete this message?\');" title="delete"><img src="media/images/delete.png" alt="delete"/></a>';
	    $elink = '<a href="messages_edit.php?id='.$row['id'].'" title="edit"><img src="media/images/page_edit.png" alt="edit"/></a>';
	    $table .= '<tr><td>'.$row['id'].'</td><td>'.$row['subject'].'</td><td><a href="" onClick="window.open(\'templates_preview.php?id='.$row['template_id'].'\',width=800,height=600)" title="preview"><img src="media/images/find.png" alt="preview"/></a></td><td>'.$slink.' '.$plink.' '.$dlink.' '.$elink.'</td></tr>';
	}
	$message = error_messages();
	$content = <<<EOF
	<a href="messages_new.php" class="large">new message »</a>
	$message
	<table>
	    <tr>
	        <th></th>
	        <th>subject</th>
	        <th>template</th>
	        <th></th>
	    </tr>
	    $table
	</table>
	EOF;
	include 'layout.php'; ?>
This is our routine table, except we now have 4 'extra' links now, one to send the message, one to preview, one to edit, and one to delete. Your page should look like:


Now we are going to start work on our new pages. The first page is where all messages start out, and then you can progress on and enter the actual message on the next page. The reason for this is because we first need to create the initial message in the DB and so we can find information about the template. The step2 page is basically the edit page (there are six line differences according to FileMerge). Open up our new file and paste the following:
# admin/messages_new.php
	<?php
	require_once 'config.php';
	login_required();
	$tab = 'mess';
	if(isset($_POST['subject'])) {
	    $link = new mysqli(DB_SERVER, DB_USER, DB_PASSWORD, DB_NAME) or die('There was a problem connecting to the database.');
	    $sql = "INSERT INTO messages (subject, template_id) VALUES ( '".$_POST['subject']."' , ".$_POST['template'].")";
	    $stmt = $link->query($sql) or die($link->error);
	    $i = query("SELECT id FROM messages WHERE subject='".$_POST['subject']."' AND template_id=".$_POST['template']." ");
	    $id = $i[0]['id'];
	    $stmt->close;
	    $_SESSION['success'] = "Added template.";
	    header('Location: messages_new_step2.php?id=' + $id);
	}
	$title = "new message";
	$templates = query("SELECT id,name,columns FROM templates");
	$tselect = '<select name="template">';
	foreach($templates as $row) {
	    $tselect .= '<option value="'.$row['id'].'">'.$row['name'].'</option>';
	}
	$tselect .= "</select>";
	$content = <<<EOF
	<form action="messages_new.php" method='POST'>
	    <p>
	        <label for="subject">Subject:</label><br />
	        <input type='text' name='subject' class="text" />
	    </p>
	    <p>
	        <label for="template">Template:</label>
	        $tselect
	    </p>
	    <p>
	        <button onclick="">Continue »</button>
	    </p>
	</form>
	EOF;
	include 'layout.php'; ?>
This page is very similar to what our other new pages look like, but this one was one change in the POST block. Right after we perform the SQL INSERT, we find the most recent insert id. Now this is not the perfect solution, but I prefer it to performing another SQL query to find a row using unindexed columns. This step should look like:


We then redirect to step2, so let's open up the file:
# admin/messages_new_step2.php
	<?php
	require_once 'config.php';
	login_required();
	$title = "new message - step 2";
	$tab = 'mess';
	$id = (int) $_GET['id'];

	$mess = query("SELECT * FROM messages WHERE id=$id");
	$message = $mess[0];
	$subject = $message['subject'];

	$templates = query("SELECT id,name,columns FROM templates");
	$tselect = '<select name="template">';
	foreach($templates as $row) {
	    if($message['template_id'] == $row['id']) {
	        $selected = ' selected="selected"';
	        if($row['columns'] == "1") {
	            $textareas = '<p><label for="body">Body: (raw html)</label><br /><textarea name="body" rows="35"></textarea></p>';
	        } else {
	            $textareas = '<p><label for="leftcol">Left column: (raw html)</label><br /><textarea name="leftcol" rows="35"></textarea></p>
	            <p><label for="rightcol">Right column: (raw html)</label><br /><textarea name="rightcol" rows="35"></textarea></p>';
	        }

	    } else {$selected = '';}
	    $tselect .= '<option value="'.$row['id'].'"'.$selected.'>'.$row['name'].'</option>';
	}
	$tselect .= '</select>';

	// Check for a POST
	if(isset($_POST['submitted'])) {
	    $link = new mysqli(DB_SERVER, DB_USER, DB_PASSWORD, DB_NAME) or die('There was a problem connecting to the database.');
		$template = query("SELECT columns FROM templates WHERE id=".$message['template_id']);
	    if($template[0]['columns'] == "1") {
	        $body = mysql_real_escape_string($_POST['body']);
	        $sql = "UPDATE messages SET subject='".$_POST['subject']."', leftcol='$body' WHERE id=$id";
	    } else {
	        $leftcol = mysql_real_escape_string($_POST['leftcol']);
	        $rightcol = htmlentities($_POST['rightcol']);
	        $sql = "UPDATE messages SET subject='".$_POST['subject']."', leftcol='$leftcol', rightcol='$rightcol' WHERE id=$id";
	    }
	    $stmt = $link->query($sql) or die($link->error);
	    $stmt->close;
	    header('Location: messages_new_step3.php?id='.$id);
	}

	$content = <<<EOF
	<form action="messages_new_step2.php?id=$id" method='POST'>
	    <p>
	        <label for="subject">Subject:</label><br />
	        <input type='text' name='subject' class="text" value="$subject"/>
	    </p>
	    <p>
	        <label for="template">Template:</label>
	        $tselect
	    </p>
	    $textareas
	    <p>
	        <input type='submit' value='Continue »' />
	        <input type='hidden' value='1' name='submitted' />
	    </p>
	</form>
	EOF;
	include 'layout.php'; ?>
Hopefully you have gotten the gist of all the pages and understand the page above. We have our normal heading. we then set our id from our GET request. Next we find the message we are working with, then we find all the templates and construct a drop down. We also use this look to define whether we will have one or two textareas. Next we have our POST block, which creates the link, then checks to see if we are working with one or two columns and creates the appropriate SQL query. After that we have our form. Your form should look like:


Now we will continue onto step 3, so open up the file and paste:
# admin/messages_new_step3.php
	<?php
	require_once 'config.php';
	login_required();
	$title = "new message - step 3";
	$id = (int) $_GET['id'];
	$tab = 'mess';

	$mess = query("SELECT * FROM messages WHERE id=$id");
	$message = $mess[0];
	$subject = $message['subject'];

	$content = <<<EOF
	<a href="messages_preview.php?id=$id" class="large" target="_new">preview »</a><br />
	<p>Do you want to <a href="messages.php" class="large">return to messages</a> or <a href="messages_send.php?id=$id" class="large">send the message</a>?</p>
	EOF;
	include 'layout.php';
	?>
The page is very simple and is the end of creating a message. It offers us a few links. The first is a link to preview the message. The next offers to take us back home. The third offers to take us to send the message (Step 10). The page looks like:


Now we are going to continue on to our edit page. I will not explain it as it is the same file as messages_new_step2.php, so you can refer there.
# admin/messages_edit.php
	<?php
	require_once 'config.php';
	login_required();
	$title = "edit message";
	$id = (int) $_GET['id'];
	$tab = 'mess';

	$mess = query("SELECT * FROM messages WHERE id=$id");
	$message = $mess[0];
	$subject = $message['subject'];

	$templates = query("SELECT id,name,columns FROM templates");
	$tselect = '<select name="template">';
	foreach($templates as $row) {
	    if($message['template_id'] == $row['id']) {
	        $selected = ' selected="selected"';
	    } else {$selected = '';}
	    $tselect .= '<option value="'.$row['id'].'"'.$selected.'>'.$row['name'].'</option>';
	}
	$tselect .= '</select>';

	$mid = $message['template_id'];
	$template = query("SELECT id,name,columns FROM templates WHERE id=$mid");
	if($template[0]['columns'] == "1") {
	    $textareas = '<p><label for="body">Body: (raw html)</label><br /><textarea name="body" rows="35">'.$message['leftcol'].'</textarea></p>';
	} else {
	    $textareas = '<p><label for="leftcol">Left column: (raw html)</label><br /><textarea name="leftcol" rows="35">'.$message['leftcol'].'</textarea></p>
	    <p><label for="rightcol">Right column: (raw html)</label><br /><textarea name="rightcol" rows="35">'.$message['rightcol'].'</textarea></p>';
	}

	// Check for a POST
	if(isset($_POST['submitted'])) {
	    $link = new mysqli(DB_SERVER, DB_USER, DB_PASSWORD, DB_NAME) or die('There was a problem connecting to the database.');
	    if($template[0]['columns'] == "1") {
	        $body = mysql_real_escape_string($_POST['body']);
	        $sql = "UPDATE messages SET subject='".$_POST['subject']."', leftcol='$body' WHERE id=$id";
	    } else {
	        $leftcol = mysql_real_escape_string($_POST['leftcol']);
	        $rightcol = htmlentities($_POST['rightcol']);
	        $sql = "UPDATE messages SET subject='".$_POST['subject']."', leftcol='$leftcol', rightcol='$rightcol' WHERE id=$id";
	    }
	    $stmt = $link->query($sql) or die($link->error);
	    $stmt->close;
	    $_SESSION['success'] = "Edited message.";
	    header('Location: messages.php');
	}

	$content = <<<EOF
	<form action="messages_edit.php?id=$id" method='POST'>
	    <p>
	        <label for="subject">Subject:</label><br />
	        <input type='text' name='subject' class="text" value="$subject"/>
	    </p>
	    <p>
	        <label for="template">Template:</label>
	        $tselect
	    </p>
	    $textareas
	    <p>
	        <input type='submit' value='Save »' />
	        <input type='hidden' value='1' name='submitted' />
	    </p>
	</form>
	EOF;
	include 'layout.php'; ?>
The page will look almost identical to our step 2, but the textarea will have content. Now we will create the delete page with:
# admin/messages_delete.php
	<?php
	require_once 'config.php';
	login_required();
	$id = (int) $_GET['id'];
	$link = new mysqli(DB_SERVER, DB_USER, DB_PASSWORD, DB_NAME) or die('There was a problem connecting to the database.');
	$sql = "DELETE FROM messages WHERE id=$id LIMIT 1";
	$stmt = $link->query($sql) or die($link->error);
	if($link->affected_rows) {
	    $_SESSION['success'] = "Message deleted.";
	} else {
	    $_SESSION['error'] = 'Nothing deleted.';
	}
	header('Location: messages.php'); ?>
That page should also look familiar. The final page we are going to work on in this step is our preview page, so open it up and place:
# admin/messages_preview.php
	<?php
	require_once 'config.php';
	login_required();
	$id = (int) $_GET['id'];

	$mess = query("SELECT * FROM messages WHERE id=$id");
	$message = $mess[0];
	$subject = $message['subject'];
	$tid = $message['template_id'];

	$data = query("SELECT body,columns FROM templates WHERE id=$tid LIMIT 1");
	$template = $data[0]['body'];

	if($data[0]['columns'] == "1") {
	    $leftcol = $message['leftcol'];
	    $body = str_replace('%content%', $leftcol, $template);
	} else {
	    $leftcol = $message['leftcol'];
	    $rightcol = $message['rightcol'];
	    $b = str_replace('%leftcol%', $leftcol, $template);
	    $body = str_replace('%rightcol%', $rightcol, $b);
	}
	?>
	<?php echo $body; ?>
	<button type="button" onclick="self.close();">close window</button>
This file is somewhat different than you have seen, so I'll walk you through it. First have have our normal heading. Next we find the current message we are working with, and set a few variables to the results. Next we find the template we are working with and set a variable equal to the body. Next, we have a conditional statement that checks to see the number of columns the template has. If it has we use the PHP function str_replace to replace the %content% tag we have with our actual content. Otherwise, we first perform a str_replace for the left column, and then on the result of that we perform str_replace again for the right column. Now we are ready to continue onto the front-end.
Step 9:The Front-End
We have finally reached the front-end! For this step and this step only, I will assume the files we are working with are in the root of the project (so not the admin folder, the one containing it). We are going to be working with four files here, so go ahead and create index.php, preferences.php, subscribe.php and a style.css file. First open up our index.php file and paste:
# index.php
	<?php
	require_once 'admin/config.php';
	$newsletters = query("SELECT * FROM newsletters WHERE visible=1");
	$subscriptions = '';
	foreach($newsletters as $nl) {
	    $subscriptions .= '
	    <input type="checkbox" name="newsletter['.$nl["id"].'][subscribe]" value="true" '.$checked.'/>
	    <label for="newsletter['.$nl["id"].']">'.$nl['name'].'</label>
	    <input type="hidden" name="newsletter['.$nl["id"].'][nlid]" value="'.$nl['id'].'" /><br />
	    '.$nl["description"].'<br />
	    ';
	}
	?>
	<!DOCTYPE html PUBLIC "-//W3C//DTD XHTML 1.1//EN" "https://www.w3.org/TR/xhtml11/DTD/xhtml11.dtd">
	<html xmlns="https://www.w3.org/1999/xhtml" >
	    <head>
	        <meta http-equiv="Content-Type" content="text/html; charset=utf-8" />

	        <title>my newsletters</title>
	        <!-- Stylesheets -->
	        <link rel="stylesheet" href="style.css" type="text/css" media="all" />
	    </head>
	    <body>
	        <div id="header">
	            <h1>my newsletters</h1>
	        </div>
	        <div id="container">
	            <h3>Subscribe to our newsletters!</h3>
	            <form action="subscribe.php" method="POST">
	                <p>
	                    <label for="name">Name:</label><br />
	                    <input type='text' name='name' class="text" />
	                </p>
	                <p>
	                    <label for="email">Email</label><br />
	                    <input type="text" name="email" class="text" />
	                </p>
	                <p>
	                    <strong>Newsletters:</strong><br />
	                    <?php echo $subscriptions; ?>
	                </p>
	                <p>
	                    <input type='submit' value='Subscribe »' />
	                    <input type='hidden' value='1' name='submitted' />
	                </p>
	            </form>
	        </div>
	    </body>
	</html>
I'll explain the page first and then we will get to the picture so-far and the page styling. In the PHP section at the top we require our config.php file (now in the admin directory), then find all of our publicly visible newsletters and create a check box array. You will notice that we are not handling the POSTed data here, and I chose to do that in our subscribe.php, and we will get to that, but first let's style the page. The page should currently look like:

First I added the 960.gs reset file like I did in our other stylesheet. Then I added the three following styles to make the design look like:
# style.css
	#header, #container {width:65%;margin:0 auto; padding:0.7%;}
	#container {background:#ccc;}
	form input.text {width:95%; font-size:16px;}
#message.success {border:solid 1px #349534; background:#C9FFCA;color:#008000;} 

So now that we have a clean and simple page, we are going to continue on and work on our subscribe.php file. Go ahead and open the file and paste:
# subscribe.php
	<?php
	require_once 'admin/config.php';

	if(isset($_POST['submitted'])) {
	    $link = new mysqli(DB_SERVER, DB_USER, DB_PASSWORD, DB_NAME) or die('There was a problem connecting to the database.');
	    $name = $_POST['name'];
	    $email = $_POST['email'];

	    $sql = "INSERT INTO subscribers (name, email) VALUES ('$name', '$email')";
	    $stmt = $link->query($sql) or die($link->error);
	    $stmt->close;

	    $sql = "SELECT id FROM subscribers WHERE name='$name' AND email='$email' LIMIT 1";
	    $subscriber = query($sql);
	    $id = $subscriber[0]['id'];

	    foreach($_POST['newsletter'] as $n) {
	        if($n['subscribe'] == "true") { // If we want to subscribe but the record doesnt exist
	            $nlid = $n['nlid'];
	            $sql = "INSERT INTO subscriptions (subscriber_id, newsletter_id) VALUES ('$id', '$nlid')";
	            $stmt = $link->query($sql) or die($link->error);
	            $stmt->close;
	        }
	    }
	} else {header('Location: index.php');}
	?>
	<!DOCTYPE html PUBLIC "-//W3C//DTD XHTML 1.1//EN" "https://www.w3.org/TR/xhtml11/DTD/xhtml11.dtd">
	<html xmlns="https://www.w3.org/1999/xhtml" >
	    <head>
	        <meta http-equiv="Content-Type" content="text/html; charset=utf-8" />

	        <title>my newsletters</title>
	        <!-- Stylesheets -->
	        <link rel="stylesheet" href="style.css" type="text/css" media="all" />
	    </head>
	    <body>
	        <div id="header">
	            <h1>my newsletters</h1>
	        </div>
	        <div id="container">
	            <h3>Thank you for subscribing!</h3>
	        </div>
	    </body>
	</html>
This page is very much like our edit subscribers page, but no DELETE SQL queries happen here. We simply check to make sure we have all POSTed data. We then set a few variables to our POSTed data, and then create and perform a SQL INSERT query to add the person to our subscribers table. After which we perform a SQL query to find that just created subscriber (insert_id was not working this time for me). We then loop through all of the POSTed newsletters and check to see if we want to subscribe to them, and perform SQL INSERTs when needed. If all goes to plan, you see a nice screen like the one below:


We have on last page here to work on, and that is the preferences.php file. This is where a user can edit their email subscription. I am going to split the page in two. First we have our PHP block:
# preferences.php
	<?php
	require_once 'admin/config.php';

	if(isset($_POST['submitted'])) {
	    $id = (int) $_POST['id'];
	    $link = new mysqli(DB_SERVER, DB_USER, DB_PASSWORD, DB_NAME) or die('There was a problem connecting to the database.');
	    $sql = "UPDATE subscribers SET name='".$_POST['name']."', email='".$_POST['email']."' WHERE id=$id";
	    $stmt = $link->query($sql) or die($link->error);
	    $stmt->close;

	    foreach($_POST['newsletter'] as $n) {
	        if($n['exists'] != '1' && $n['subscribe'] == "true") { // If we want to subscribe but the record doesnt exist
	            $nlid = $n['nlid'];
	            $sql = "INSERT INTO subscriptions (subscriber_id, newsletter_id) VALUES ('$id', '$nlid')";
	            $stmt = $link->query($sql) or die($link->error);
	            $stmt->close;
	        } elseif ($n['exists'] == '1' && $n['subscribe'] != "true") {// Else if we had an exits but we want to unsubscribe
	            $subid = $n['subid'];
	            $sql = "DELETE FROM subscriptions WHERE id=$subid LIMIT 1";
	            $stmt = $link->query($sql) or die($link->error);
	            $stmt->close;
	        }
	    }
	    $_SESSION['success'] = "Preferences saved.";
	}

	if(isset($_GET['email'])) {$email = $_GET['email']; $display = 'form';} else {$display = 'find';}

	$subscriber = query("SELECT * FROM subscribers WHERE email='$email'");
	if($subscriber || $display == 'find') {
	    $id = $subscriber[0]['id'];
	    $name = $subscriber[0]['name'];
	    $email = $subscriber[0]['email'];
	} else {header('Location: index.php');}

	$newsletters = query("SELECT * FROM newsletters WHERE visible=1");
	$subs = query("SELECT * FROM subscriptions WHERE subscriber_id='".$id."'");
	$subscriptions = '';
	foreach($newsletters as $nl) {
	    $s = false;
	    $subid = '';
	    foreach($subs as $sub) {
	        if($sub['newsletter_id'] == $nl['id']) {$s = true; $subid = $sub['id'];}
	    }
	    $checked = ($s == true) ? 'checked="checked"' : '';
	    $subscriptions .= '
	    <input type="checkbox" name="newsletter['.$nl["id"].'][subscribe]" value="true" '.$checked.'/>
	    <label for="newsletter['.$nl["id"].']">'.$nl['name'].'</label>
	    <input type="hidden" name="newsletter['.$nl["id"].'][exists]" value="'.$s.'" />
	    <input type="hidden" name="newsletter['.$nl["id"].'][nlid]" value="'.$nl['id'].'" />
	    <input type="hidden" name="newsletter['.$nl["id"].'][subid]" value="'.$subid.'" /><br />
	    ';
	}
	$message = error_messages();
	?>
In this block, a lot is going on. First, we include our config file. Next, we check for a POST, and if we have one, we update our database. This portion is copied exactly from our subscribers_edit.php file so you can look there for a bit more explanation. Next depending on if we have a get request, we set our variable (this variable is used in the HTML section of the page). We then look for a subscriber with that email, and if one exists or we are showing the find portion, we continue, otherwise we are redirected home. Next we find all of our newsletters, and all of the subscriber's subscriptions, and then create our checkbox form. The HTML portion looks like:
# preferences.php
	<!DOCTYPE html PUBLIC "-//W3C//DTD XHTML 1.1//EN" "https://www.w3.org/TR/xhtml11/DTD/xhtml11.dtd">
	<html xmlns="https://www.w3.org/1999/xhtml" >
	    <head>
	        <meta http-equiv="Content-Type" content="text/html; charset=utf-8" />

	        <title>my newsletters - my preferences</title>
	        <!-- Stylesheets -->
	        <link rel="stylesheet" href="style.css" type="text/css" media="all" />
	    </head>
	    <body>
	        <div id="header">
	            <h1>my newsletters</h1>
	        </div>
	        <div id="container">
	            <h3>my preferences</h3>
	            <?php if($display == 'form') {?>
	            <form action="preferences.php" method="POST">
	                <p>
	                    <label for="name">Name:</label><br />
	                    <input type='text' name='name' class="text" value="<?php echo $name; ?>"/>
	                </p>
	                <p>
	                    <label for="email">Email</label><br />
	                    <input type="text" name="email" class="text" value="<?php echo $email; ?>"/>
	                </p>
	                <p>
	                    <strong>Newsletters:</strong><br />
	                    <?php echo $subscriptions; ?>
	                </p>
	                <p>
	                    <input type='submit' value='Save my preferences »' />
	                    <input type='hidden' value='1' name='submitted' />
	                    <input type='hidden' value='<?php echo $id; ?>' name='id' />
	                </p>
	            </form>
	            <?php } else { ?>
	            <?php echo $message; ?>
	            <form action='preferences.php' method="get">
	                <p>
	                    <label for="email">Email</label><br />
	                    <input type="text" name="email" class="text" />
	                </p>
	                <p>
	                    <input type='submit' value='Find »' />
	                </p>

	            </form>
	            <?php } ?>
	        </div>
	    </body>
	</html>
In our HTML block we have two forms and some PHP to choose which one to display. The top form is the form the user sees if a record in the database has been found. The second form is for entering your email and having the system find it. The second form looks like:


And the first looks like:

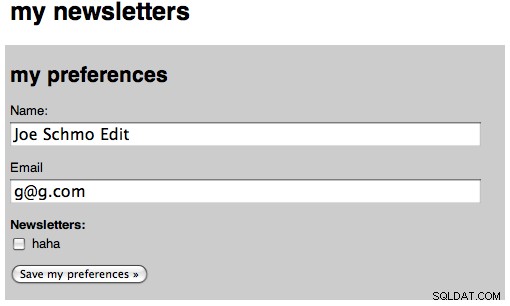
And the second form after we saved our preferences:


Now that we have finished the front-end, we have one last step:sending the emails!
Step 10:Sending Messages
Our last step is to work on the page to send our message. We will be working in the admin directory, and only one file will be created. Go ahead and create our messages_send.php file and place the following in it:
# admin/messages_send.php
	<?php
	require_once 'config.php';
	login_required();
	$title = "send message";
	$id = (int) $_GET['id'];
	$tab = 'mess';

	if(isset($_POST['submitted'])) {
	    $query = "SELECT * FROM subscribers WHERE id=0 ";
	    $emails = array();
	    foreach($_POST['newsletter'] as $n) {
	        if($n['send'] == "true") {
	            $nlid = $n['nlid'];
	            $e = query("SELECT subscriber_id FROM subscriptions WHERE newsletter_id=$nlid");
	            foreach($e as $s) {
	                $sqlids .= " OR id=".$s['subscriber_id'];
	            }
	            $query .= $sqlids;
	        }
	    }
	    $subscribers = query($query);
	    foreach($subscribers as $sub) {
	        $emails[$sub['email']] = $sub['name'];
	    }
	    $from = array(FROM_EMAIL => FROM_NAME);
	    // BODY RENDERING
	    $mess = query("SELECT * FROM messages WHERE id=$id");
	    $message = $mess[0];
	    $subject = $message['subject'];
	    $tid = $message['template_id'];

	    $data = query("SELECT body FROM templates WHERE id=$tid LIMIT 1");
	    $template = $data[0]['body'];

	    if($message['rightcol'] == '') {
	        $leftcol = $message['leftcol'];
	        $body = str_replace('%content%', $leftcol, $template);
	    } else {
	        $leftcol = $message['leftcol'];
	        $rightcol = $message['rightcol'];
	        $b = str_replace('%leftcol%', $leftcol, $template);
	        $body = str_replace('%rightcol%', $rightcol, $b);
	    }

	    send_email_to_mass($from, $emails, $body, $subject) or die('lol');
	    header('Location: index.php');
	}

	$newsletters = query("SELECT * FROM newsletters");
	foreach($newsletters as $nl) {
	    $nls .= '
	    <input type="hidden" name="newsletter['.$nl["id"].'][nlid]" value="'.$nl['id'].'" />
	    <input type="checkbox" name="newsletter['.$nl["id"].'][send]" value="true" '.$checked.'/>
	    <label for="newsletter['.$nl["id"].']">'.$nl['name'].'</label> - '.$nl['description'].'<br />
	    ';
	}
	$mess = query("SELECT * FROM messages WHERE id=$id");
	$message = $mess[0];
	$subject = $message['subject'];

	$content = <<<EOF
	<a href="messages_preview.php?id=$id" class="large" target="_new">preview »</a><br />
	<form action='messages_send.php?id=$id' method="POST">
	    <p>
	        Subject: $subject<br />
	    </p>
	    <p>Send to:<br />
	        $nls
	    </p>
	    <p>
	        <input type='submit' value='Send »' />
	        <input type='hidden' value='1' name='submitted' />
	    </p>
	</form>
	EOF;
	include 'layout.php'; ?>
The first part we again require our config, then make sure the user is logged in, then our title, make sure our id is an integer, and then set our tab. Next we have our complicated post block. First we set up our base query, and running just that would return 0 records, which is good because that means no users will be send the newsletter. Next we loop through every newsletter that we want to send to, and find all of the subscriptions for that newsletter. We then create a string that will be appended to our original SQL query so that we can find every subscriber. Now, we run that query and create an array where the keys are the emails and the name is the value, and this helps us use names when the user looks at the email in their mail application, showing the TO:as their name. We next find the message we are working with, and set the subject, message, and template id to variables. We then find our template and set the body to a variable. Then we use the same code from the message preview to replace the strings inside the template the the parts of the message. Then we call our yet-to-be-created-function send_email_to_mass and then redirect home.
Leaving our POST block, we create the same checkbox list of newsletters so the admin can pick which one(s) he wants to send the message to. Then we have a simple form that looks like:


Now, open up our classes.php file and add the following function:
# admin/classes.php
	// EMAIL
	function send_email_to_mass($from, $recipients, $body, $subject) {
	    require_once 'swift/lib/swift_required.php'; //require lib

	    $transport = Swift_MailTransport::newInstance();
	    $mailer = Swift_Mailer::newInstance($transport) or die('Error creating mailer.');
	    $message = Swift_Message::newInstance($subject)
	        ->setFrom($from)
	        ->setTo($recipients)
	        ->setBody($body, 'text/html') or die('error here.');
	    $result = $mailer->batchSend($message);

	    return true;
	}
So first, we have our function declaration, and it expects four variables to be passed to it, from, recipients, body, and subject. Next we require the sqift_required.php file of our Swift Mailer Library. Next we create a new Mail Transport (this uses the PHP mail function, so it would be sending from your local machine, for the documentation on the three transport types, see the documentation). Next we create a mailer using that transport. Then we create a new message from our subject, then set our from, to, and body. Then we use the batch_send function so that each recipient only sees themselves on the email, and no one else.
There is one possibly downside of doing it the way I have, and that is if you are sending many messages, the page may take forever to load. A solution to tthis would be running a Javascript AJAX request to send each and every message, but I won't cover that here. Now that we have finished working on sending messages, we are going to spice up the home page and then we will be done!
Step 11:The Homepage
When you load the admin index, the page does not really do much. I want to have some 'stats' on our homepage, and we will finally use the count_query function. Open up the admin index file and change it to look like:
# admin/index.php
	<?php
	require_once 'config.php';
	login_required();
	$users = count_query("SELECT COUNT(*) AS num FROM users");
	$emails = count_query("SELECT COUNT(*) AS num FROM subscribers");
	$subs = count_query("SELECT COUNT(*) AS num FROM subscriptions");
	$nls = count_query("SELECT COUNT(*) AS num FROM newsletters");
	$mess = count_query("SELECT COUNT(*) AS num FROM messages");
	$temps = count_query("SELECT COUNT(*) AS num FROM templates");
	$title = "Home!";
	$content = <<<EOF
	<h3>current stats</h3>
	<p>$users user registered</p>
	<p>$emails subscribers</p>
	<p>$subs newsletter subscriptions</p>
	<p>$nls newsletters</p>
	<p>$mess messages</p>
	<p>$temps templates</p>
	EOF;
	include 'layout.php'; ?>
The page is very simple. We require our config, make sure we are logged in, then we perform six count queries, one for each of our tables and then output that. This is what the final page look like: